Are you looking for a way to export WooCommerce orders to Google Sheets in real-time?
Google Sheets is a popular online spreadsheet application that allows businesses to collaborate seamlessly. Its real-time collaboration feature means that any new data entered is instantly available to all users, providing the most current information for everyone to work with.
In this step-by-step tutorial, we'll guide you through the process of exporting your WooCommerce orders to Google Sheets as soon as they are placed on your website.
But before we dive into the step-by-step guide, let's explore some key benefits of exporting WooCommerce orders to Google Sheets in real time.
Google Sheets is one of the most widely used online tools by eCommerce businesses. It allows them to easily organize data, perform calculations, and bring clarity to chaos.
When it comes to exporting WooCommerce orders, Google Sheets offers an efficient solution for data management and operational workflows. It comes with many benefits such as:
With these benefits in mind, let's move on to the detailed steps to set up the integration.
When it comes to exporting WooCommerce orders, WP All Export stands out as the best plugin. It is a comprehensive and user-friendly plugin that allows you to export all order data, including the custom field data.
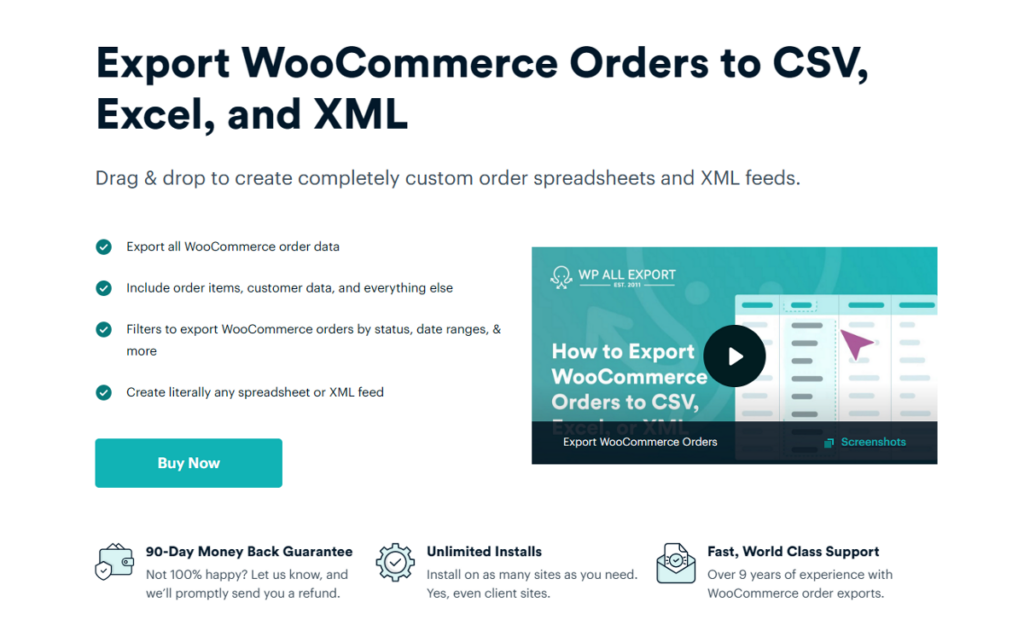
It also includes an integration with Zapier, that allows you to connect to thousands of third-party applications, including Google Sheets. This setup enables real-time sync of orders between your website and Google Sheets.
To get started, you'll need to install the premium version of WP All Export Pro along with its Export WooCommerce add-on plugin.
Let's dive into the detailed steps to set up this seamless integration.
Once you have installed WP All Export and its WooCommerce add-on, navigate to All Export › New Export from your WordPress dashboard. WP All Export supports exporting all WordPress and WooCommerce data, including orders, products, posts, pages, and more.
For this tutorial, select "WooCommerce Orders" as the Post type.
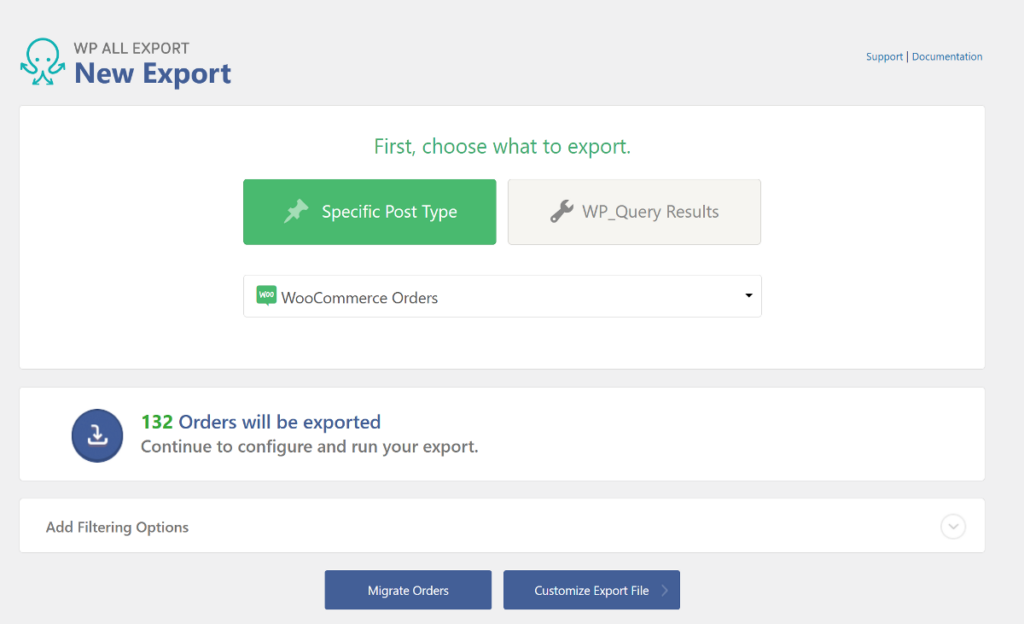
WP All Export will scan your website and display the total number of orders available for export. Don’t worry about the numbers at this stage, as we’ll set up real-time export in the following steps.
WP All Export creates an entry for each order status in your Google Sheets file. To avoid creating duplicate entries, we need to add a filter to export only "Completed" orders.
To do this, simply expand the Add Filtering Options section and add the following filter rule:

Once you've added all three components of the rule, click the Add Rule button to filter your orders.
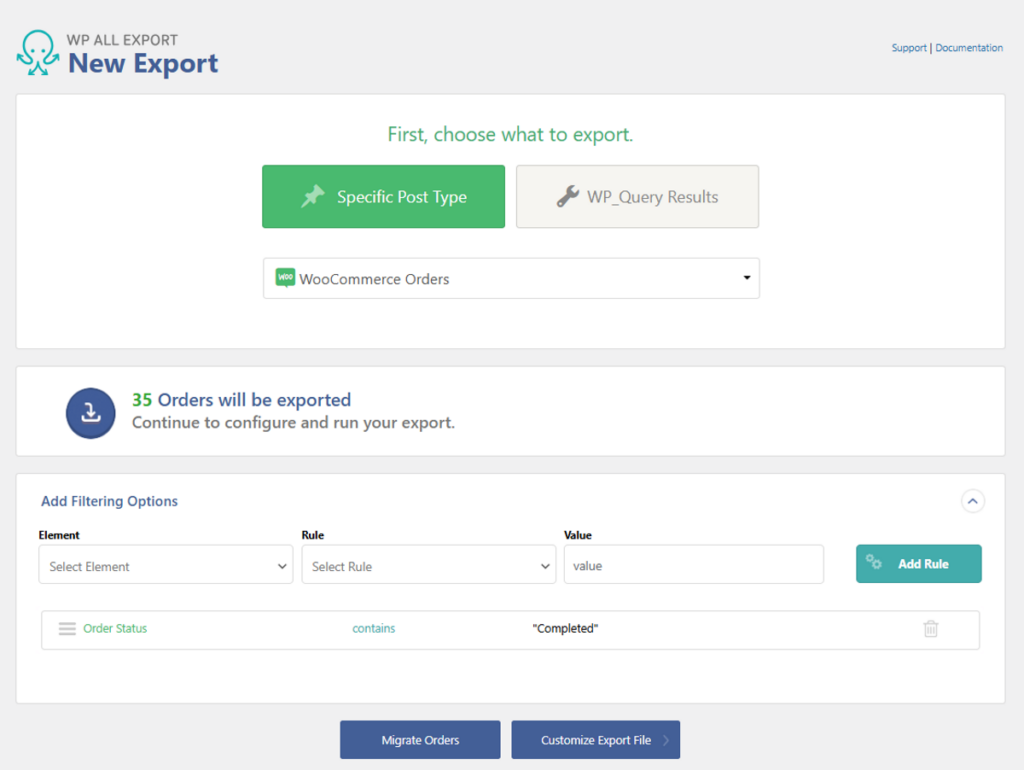
Next, click Customize Export File at the bottom to proceed to the next step.
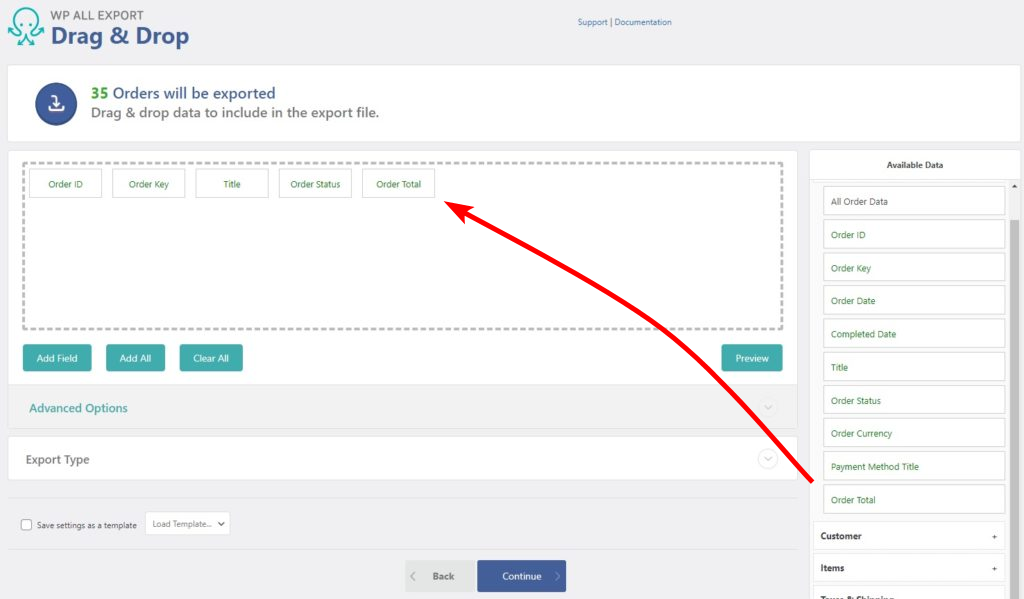
WP All Export comes with a user-friendly interface that allows you to select WooCommerce order details using an intuitive drag-and-drop selector.
On the right side of the page, you'll find the Available Data section, which lists order fields organized into different tabs.
These categories include:
To add an order field to your export file, simply expand one of the field categories and use the drag-and-drop selector to add the field to the selection area. Follow the same procedure to add the remaining fields to your export file.
WP All Export is a powerful tool that allows you to customize spreadsheet columns on the fly. You can combine multiple fields into one column, split multi-value fields into separate columns, or use the custom PHP editor to manipulate the data exactly how you want.
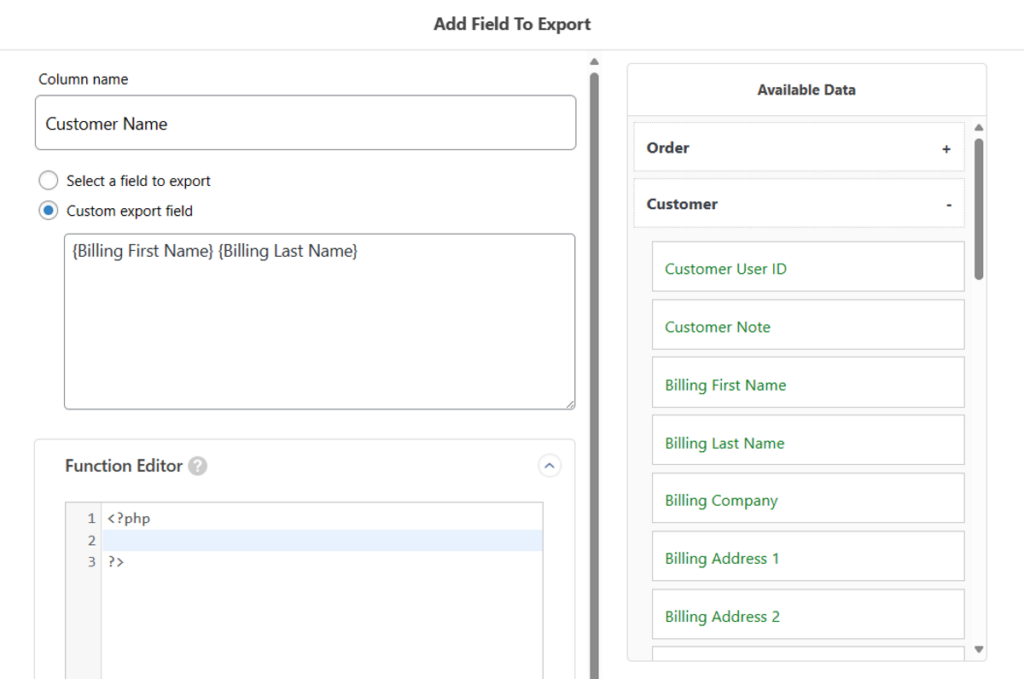
To combine multiple fields into one column, click the Add Field button below the selection area.
In the window that appears, select the Custom Export Field option and expand the Customer tab in the Available Data panel.
Drag the [Billing First Name] and [Billing Last Name] fields into the export field area and add a space between the two fields.
Finally, enter “Customer Name” in the Column Name field and save the field.
Once you have added all the desired fields, click the Preview button to see how the order entries will look in a spreadsheet.
If everything looks okay, click Continue to move to the next step.
WP All Export includes several advanced options, one of which is enabling real-time export of orders.
In the Export Settings screen, expand the Advanced Options panel and select the first option, "Export each WooCommerce Order in real-time as they are completed," to enable real-time exports.
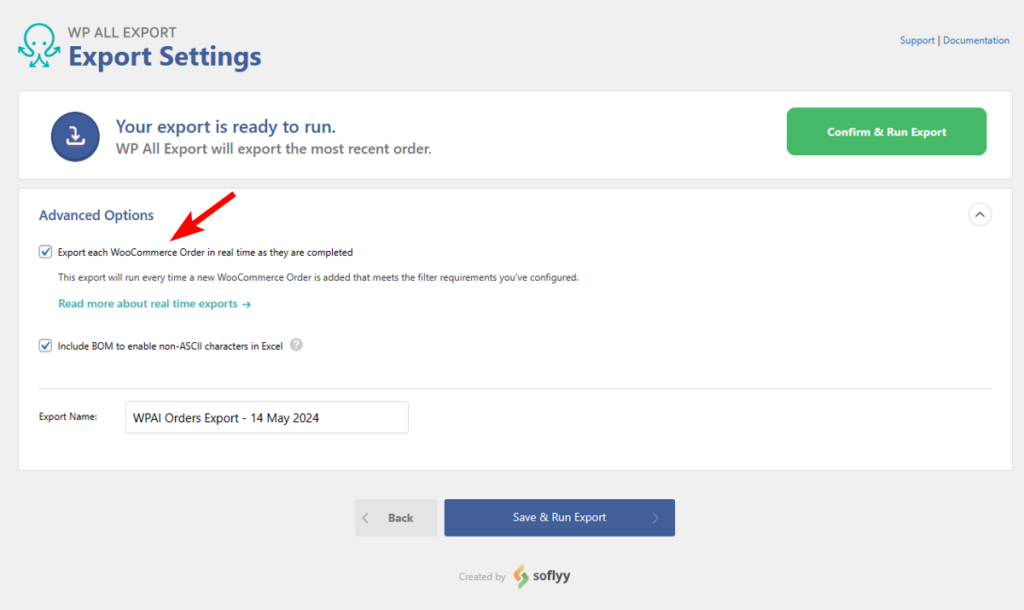
This will automatically hide all other options.
Next, add a custom file name and click the green Confirm & Run button to proceed to the next step.
WP All Export will generate a test export file that you must download. Keep this file handy, as you will need it later to prepare your Google Sheets file.
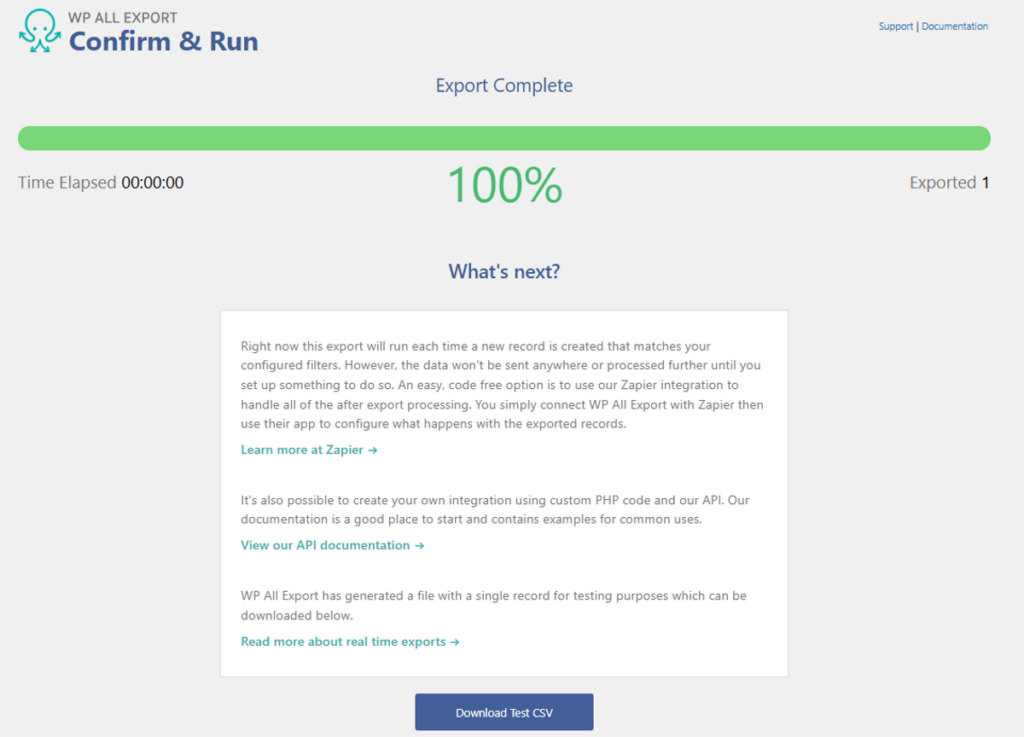
The above step will create a trigger in WP All Export that runs every time a new order is placed. To add data to Google Sheets, we'll need to configure an action using the Zapier integration. Let's look at how to do that next.
Zapier is a no-code automation builder that allows you to connect to over 5,000 apps, including Google Sheets.
To simplify the process of creating the Zap, you can use the new AI Zap builder to create the integration in just a few clicks.
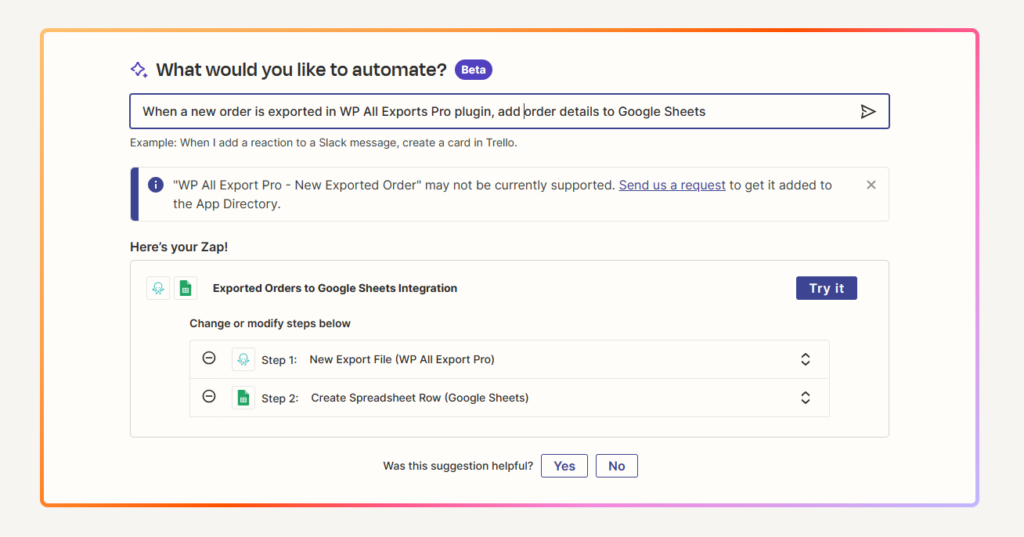
If you prefer to manually create the Zap, follow the steps below.
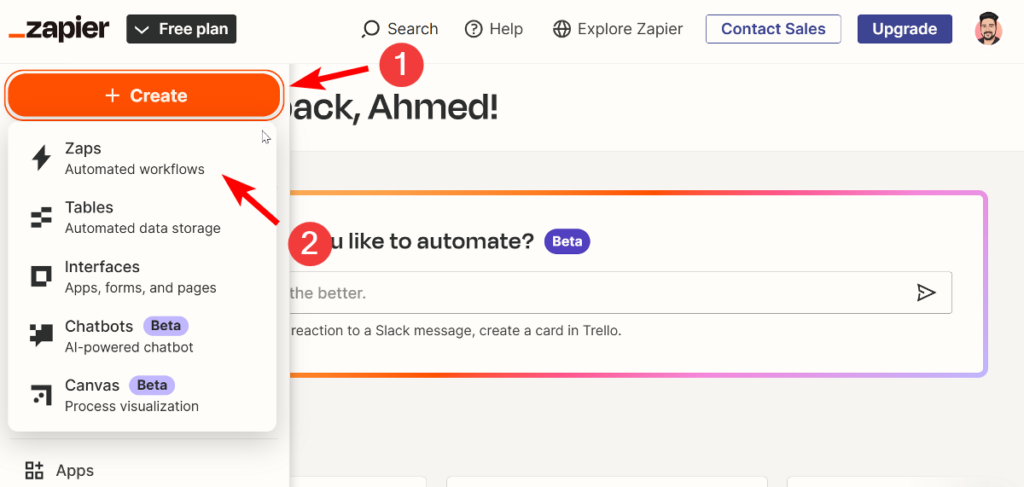
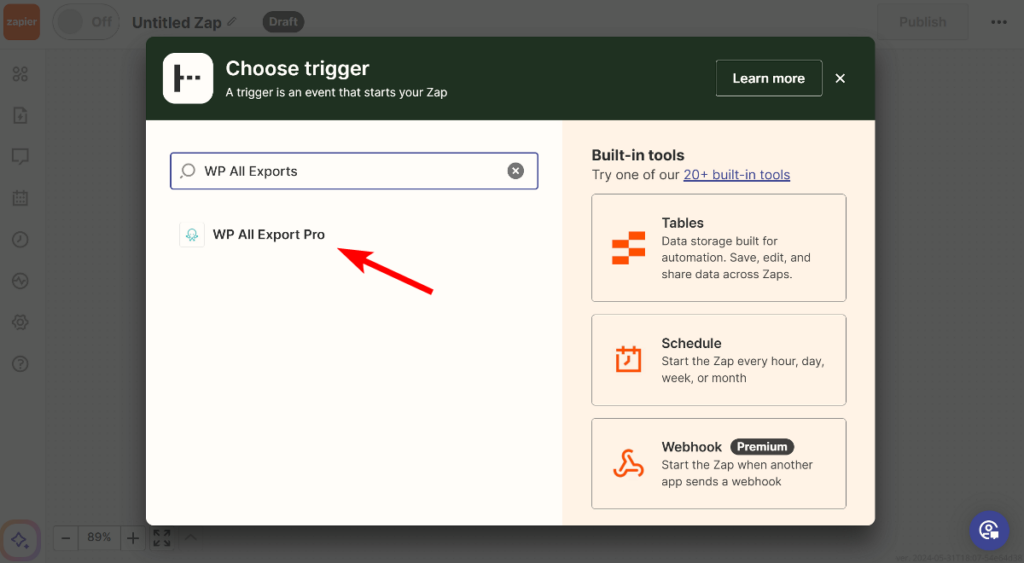
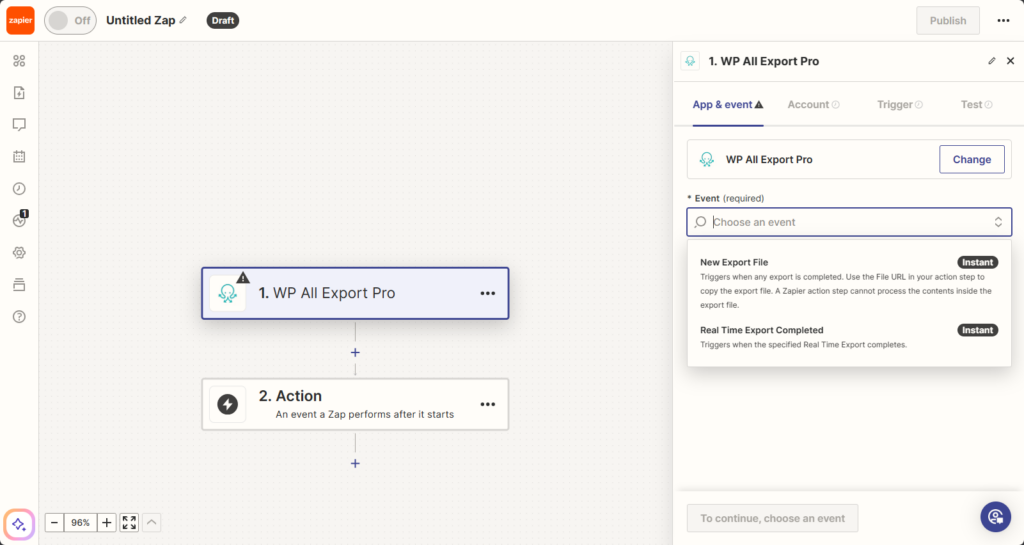
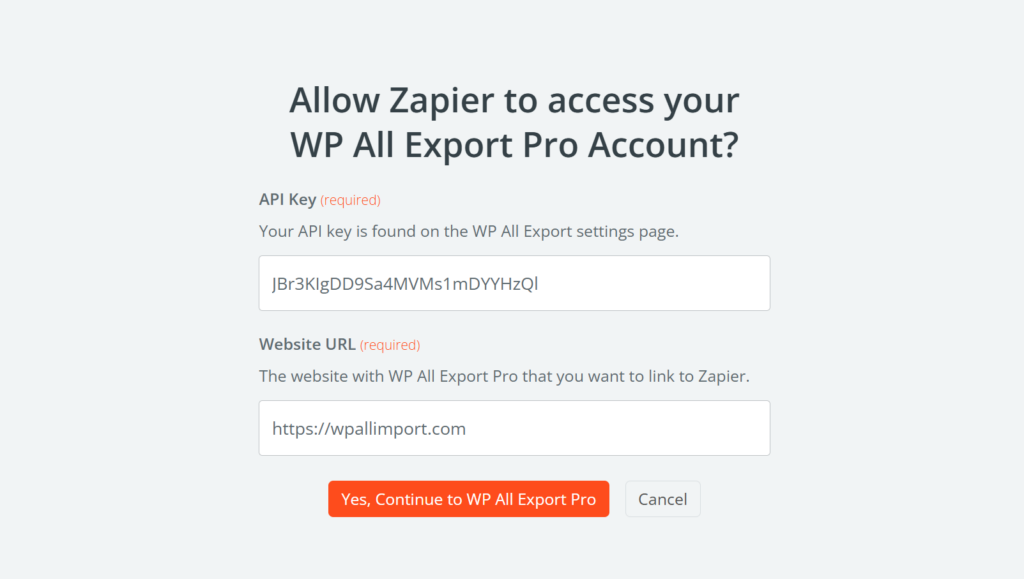
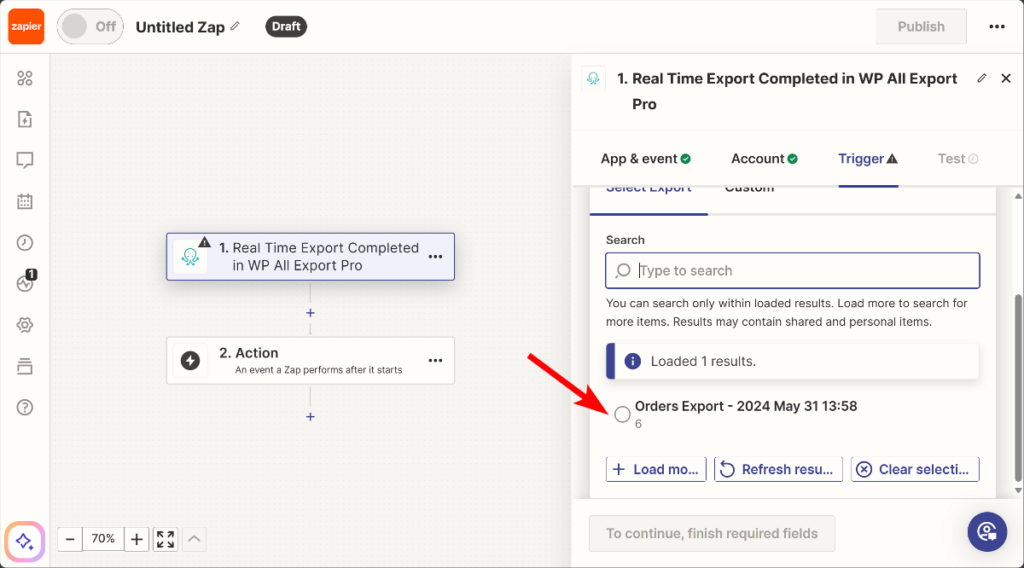
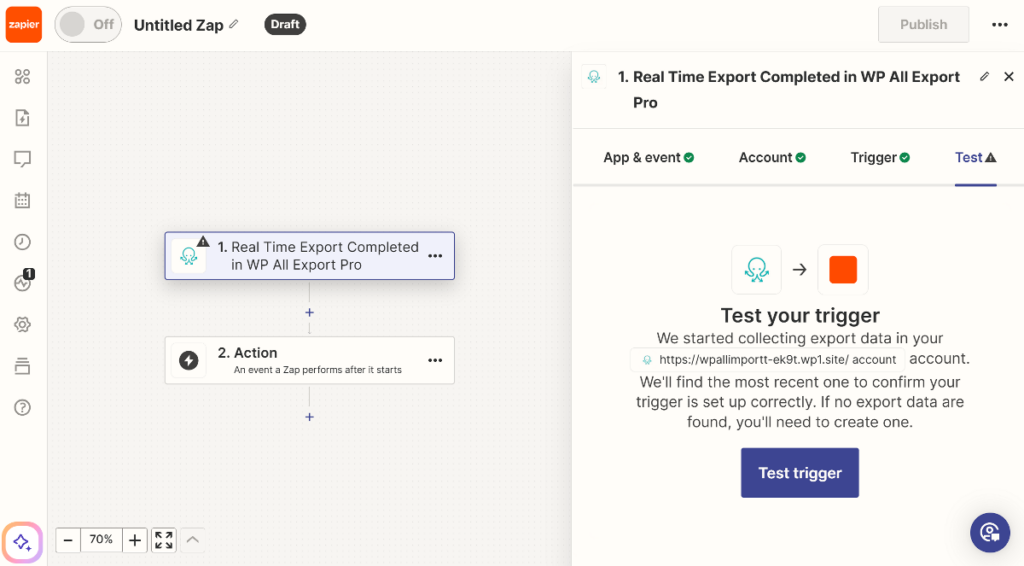
To connect your Google Spreadsheet to Zapier, you'll first need to set it up. Follow these steps:
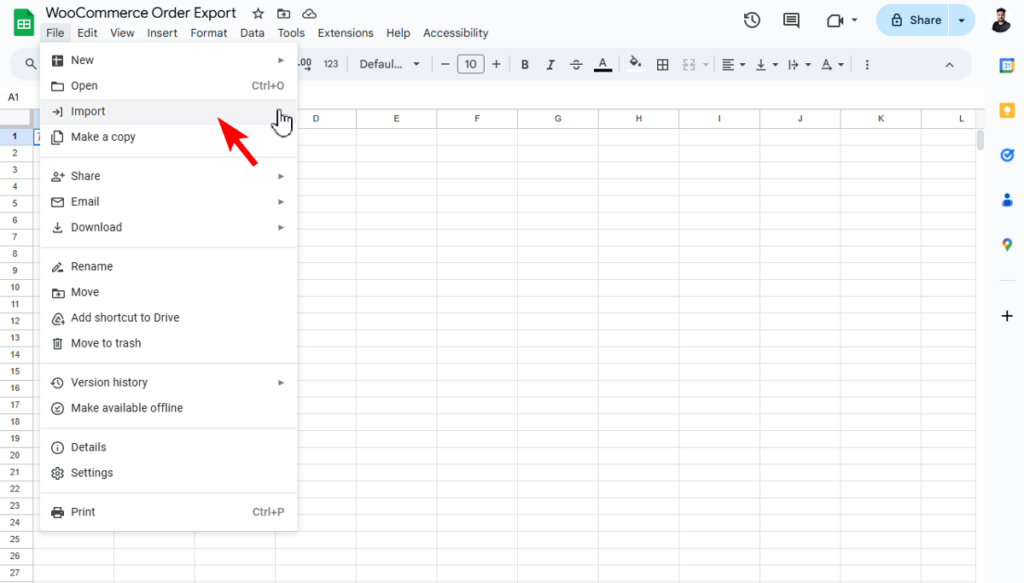
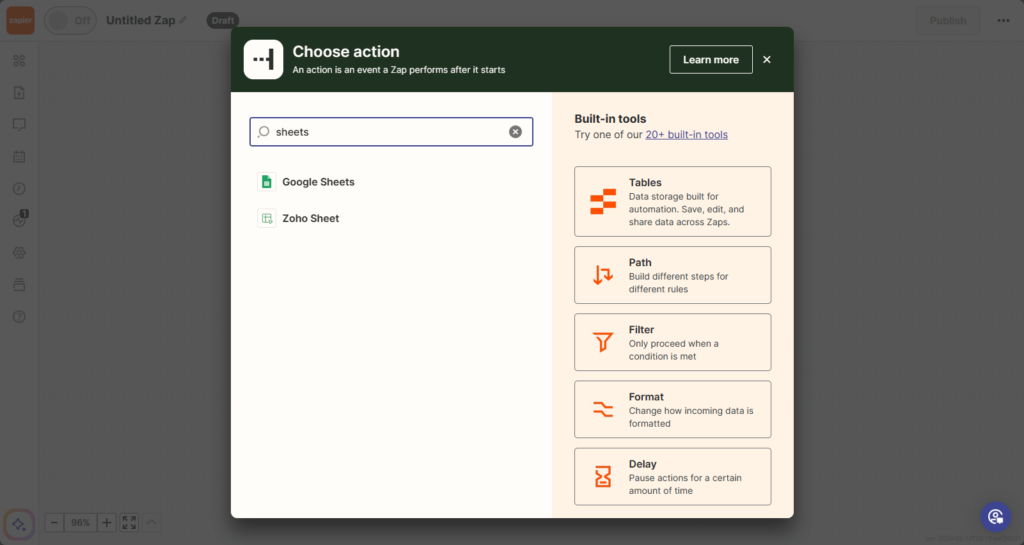
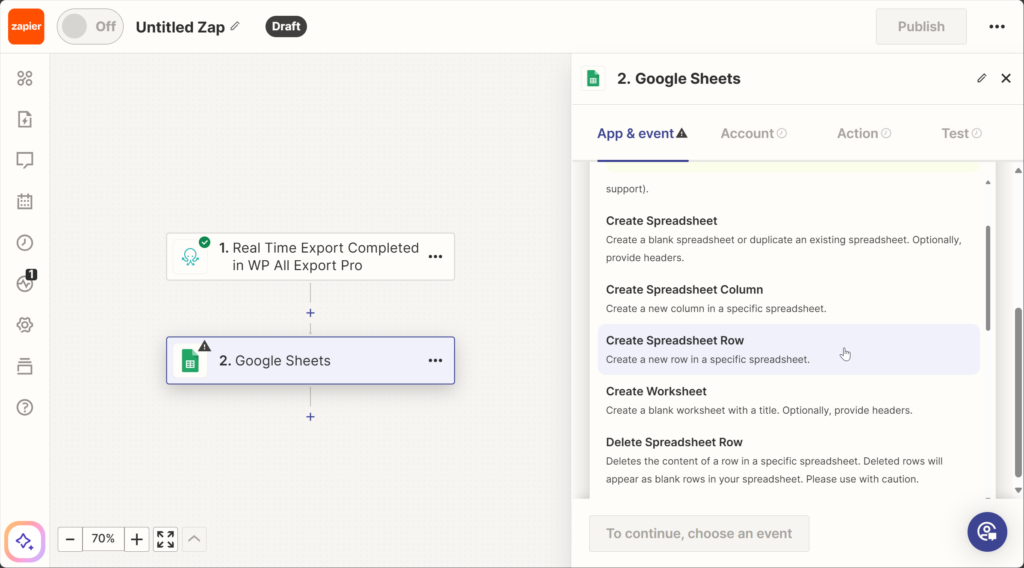
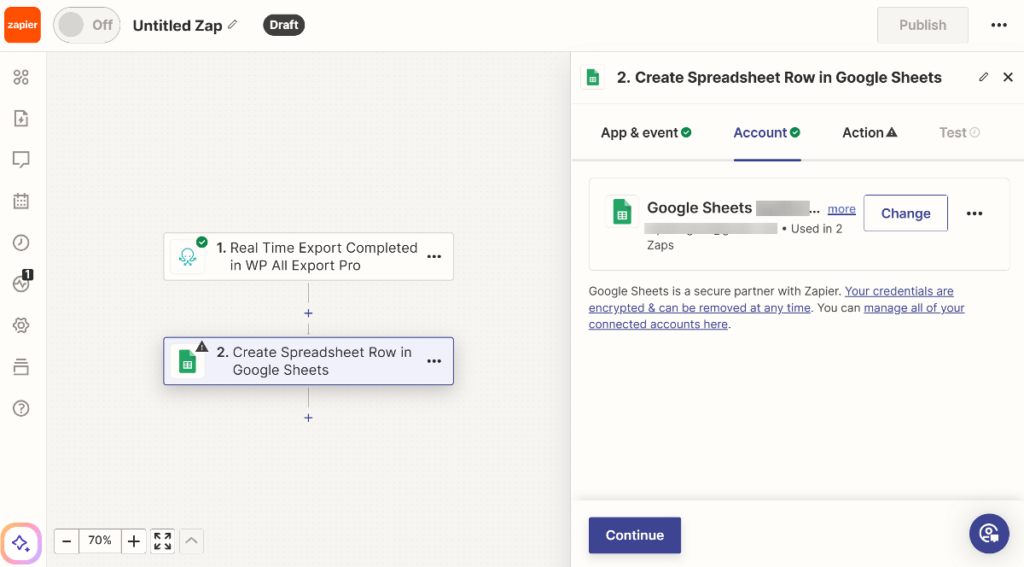
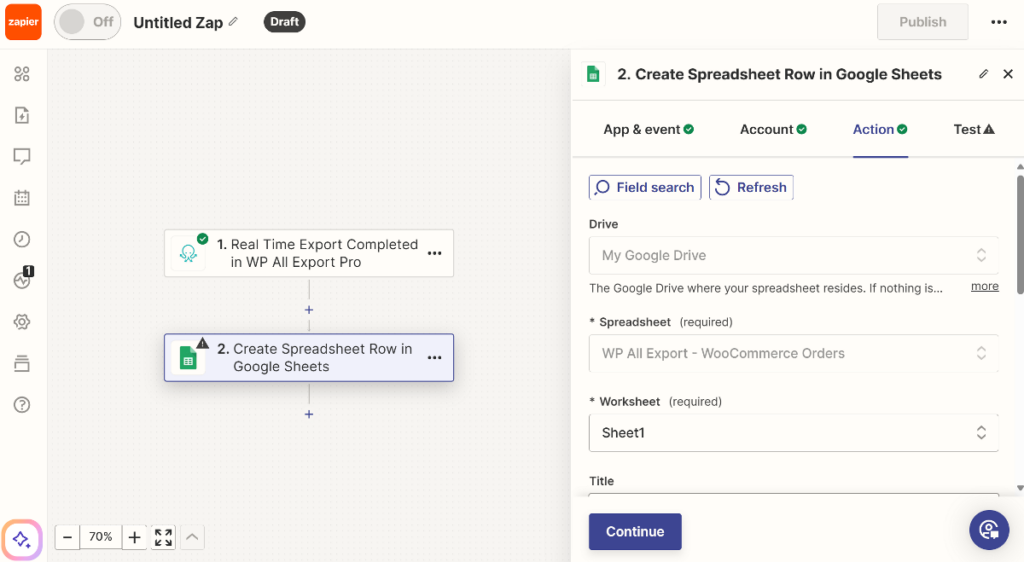
The final step is to test whether new orders automatically appear in the Google Sheet. Click the Continue button to run the test, then navigate to Google Sheets to see if the new order data appears.
If everything works as expected, give your Zap a name and publish it.
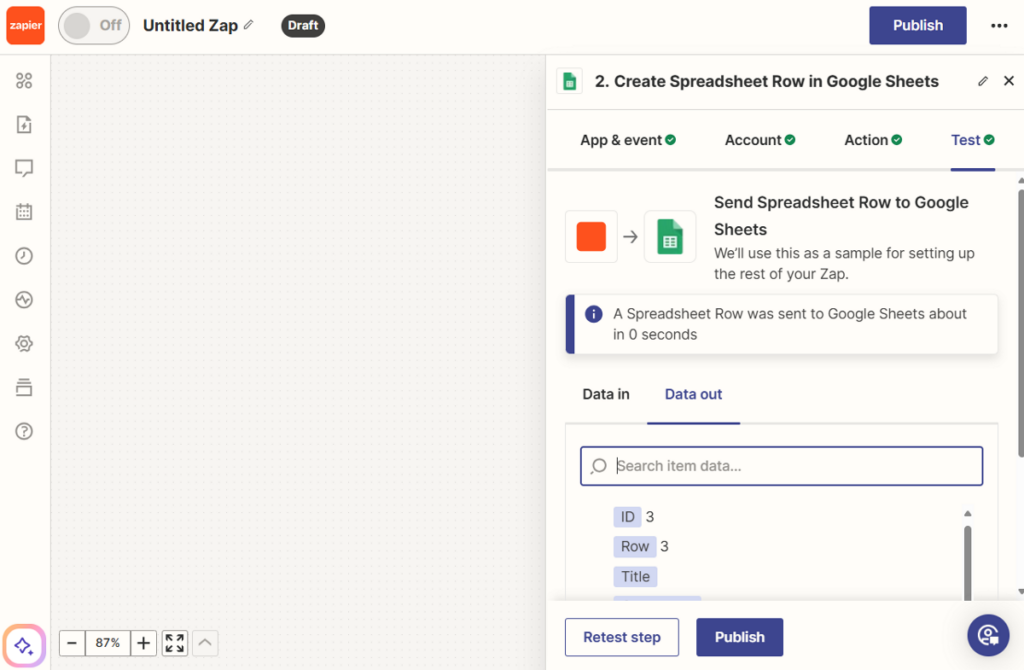
That's it! You've successfully set up real-time exports of WooCommerce orders to Google Sheets using Zapier.
Creating a real-time sync of WooCommerce orders with Google Sheets can significantly enhance your business operations. It ensures that your team always has access to the most recent orders placed on the website. This can help them with real-time collaboration and decision-making.
WP All Export is the best order export plugin that integrates with Zapier to allow you to connect to Google Sheets with any coding skills. Apart from this integration, WP All Export also includes other features that make it a great plugin.

These features include:
Ready to effortlessly export your WooCommerce order data? Download and install the WP All Export plugin today!
Yes, you can easily export WooCommerce orders to Excel using the WP All Export plugin.
Here’s how you can export WooCommerce products to Google Shopping:
WP All Export supports the export of product data. Here are the steps to follow:
To efficiently migrate data from one WooCommerce site to another, you can use a combination of the WP All Export and WP All Import plugins.
