A fairly common task with WooCommerce products is updating stock levels. This may occur because of an inventory count, a lack of automated inventory control, or because the stock levels are maintained by a third party, as happens with drop shipping.
Whatever the cause, manually updating stock levels can be very time-consuming. In this article, we show you how to automate this task using WP All Import.
There are three typical scenarios when updating stock in WooCommece:
We show you how to address each of these scenarios below.
In this scenario, a third party has sent you a file that you haven't imported before (i.e., the file structure is new), and that file contains stock levels for products that you created or imported previously. You want to apply the new stock levels to your existing products.
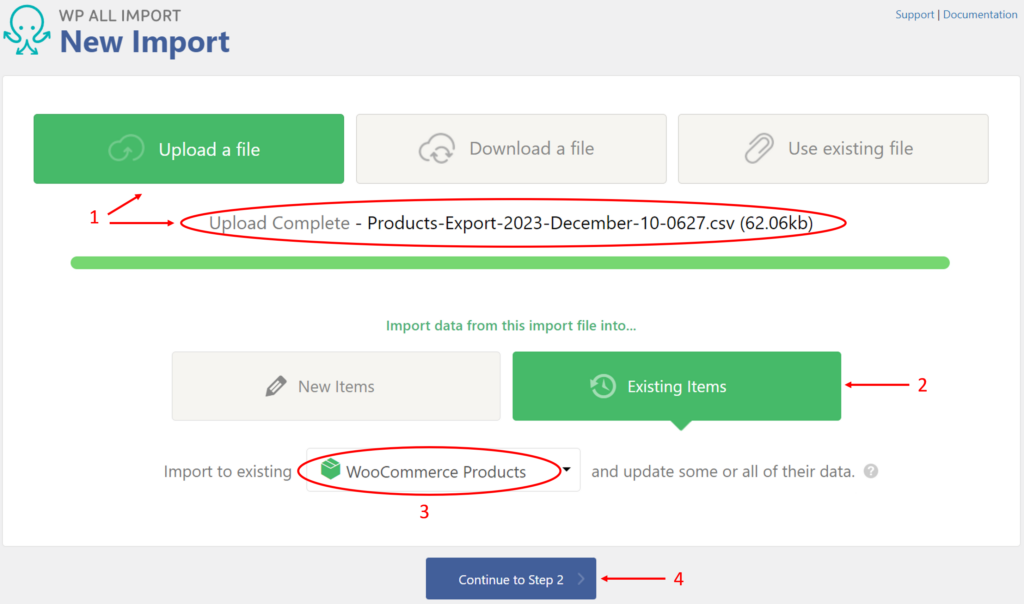
Navigate to All Import › New Import, load the product file, choose Existing Items, and select WooCommerce Products as the import type.
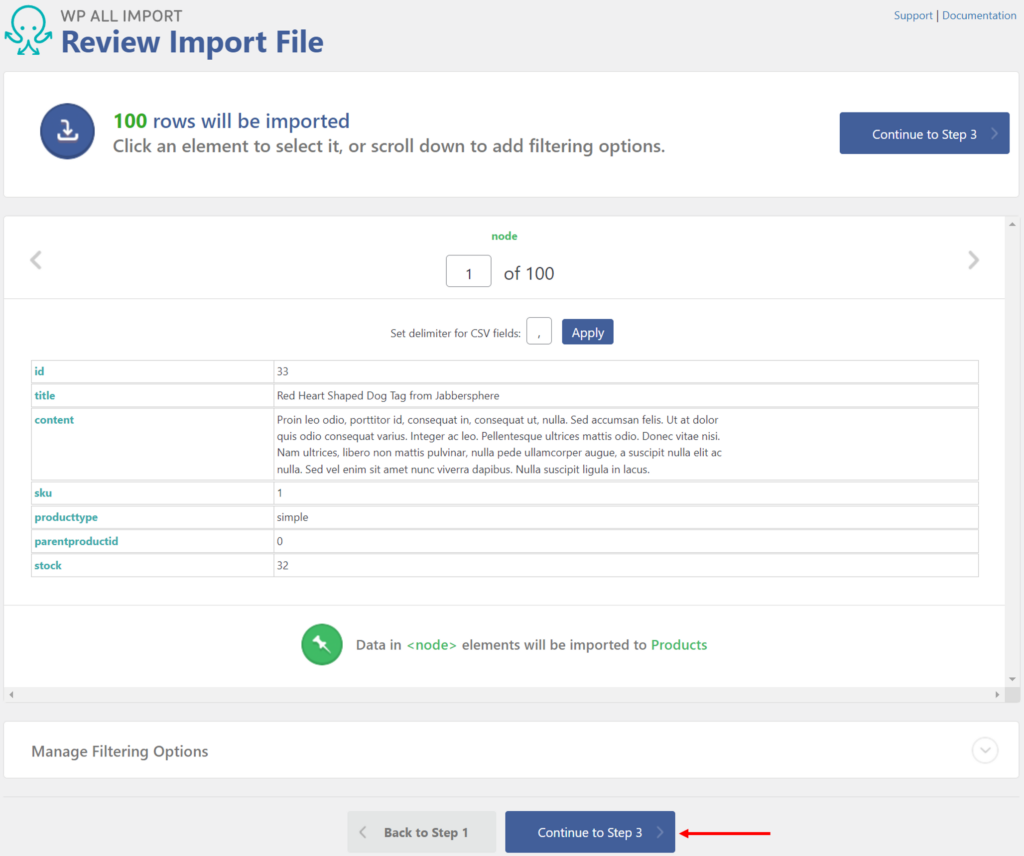
This screen lets you check the structure and content of the import file. As you can see below, the file is very simple, containing only a few key product fields along with the stock field.
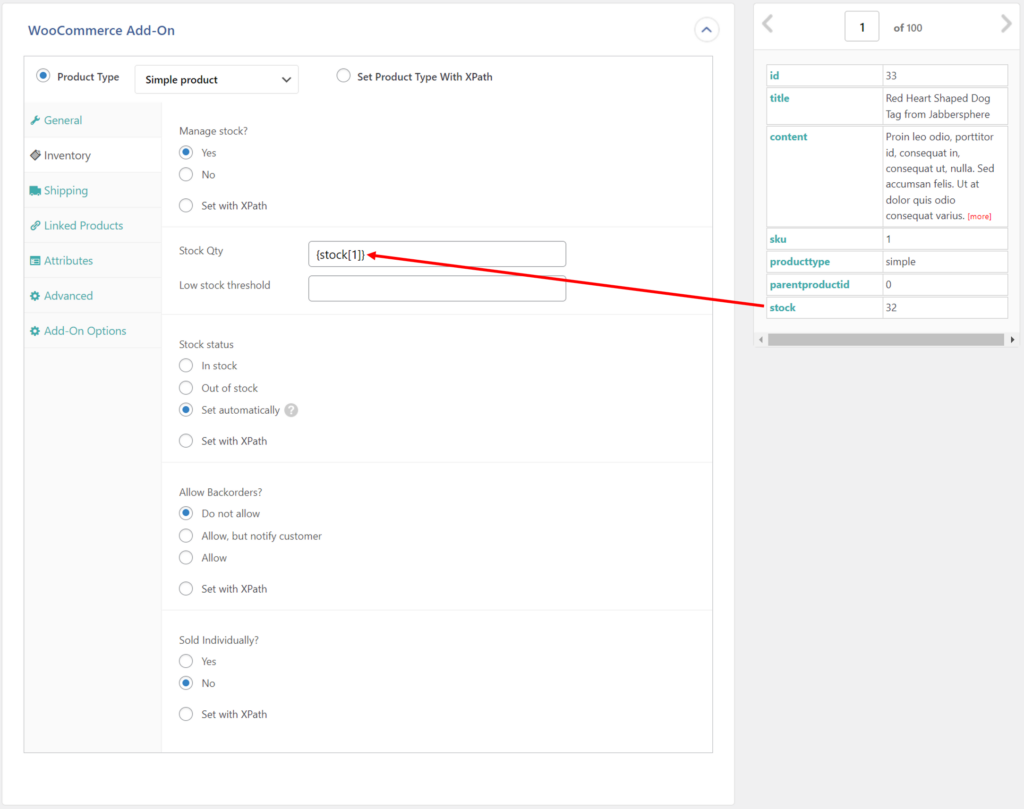
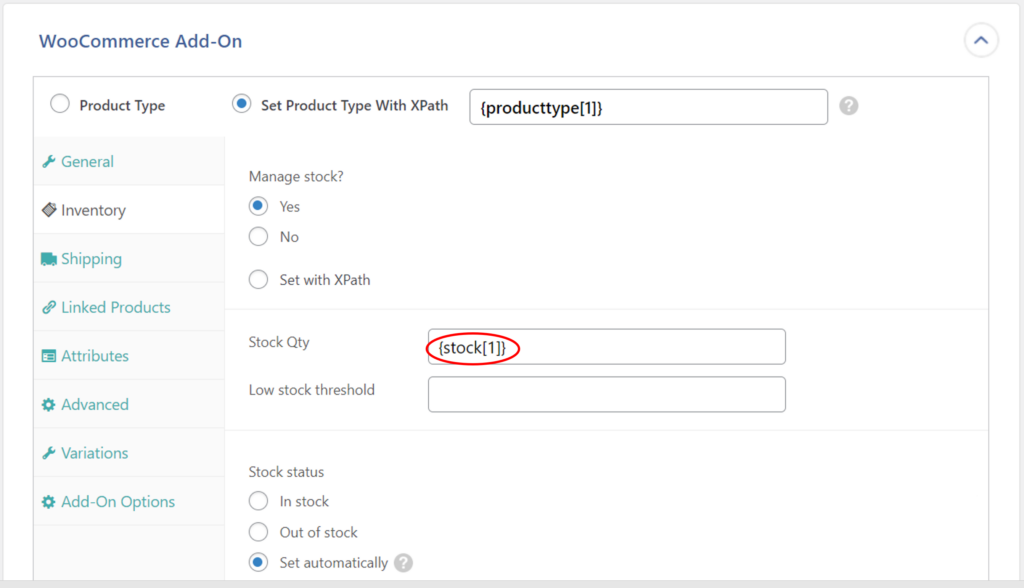
Map the incoming stock data element to the Stock Qty field in the Inventory tab of the WooCoommerce Add-On section of the Drag & Drop screen:
Click the Continue to Step 4 button at the bottom (not shown).
In the Import Settings screen:
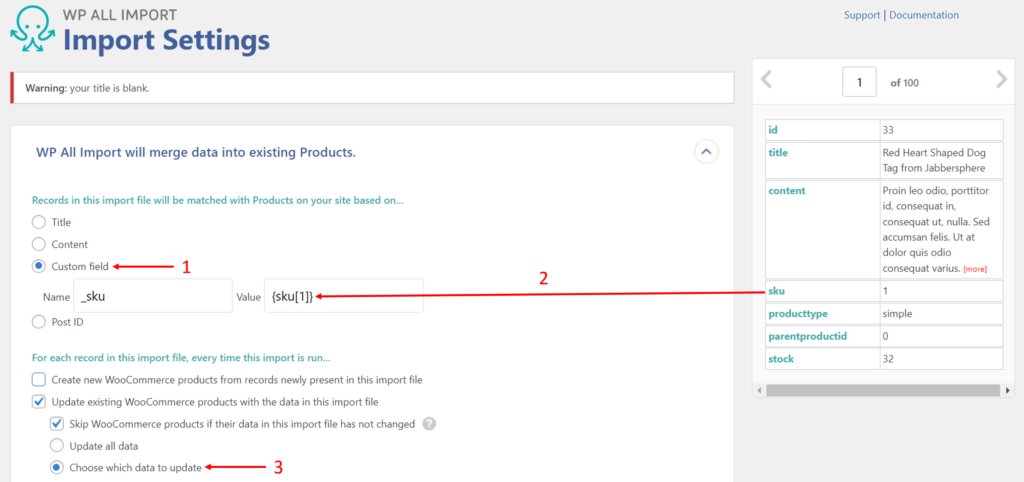
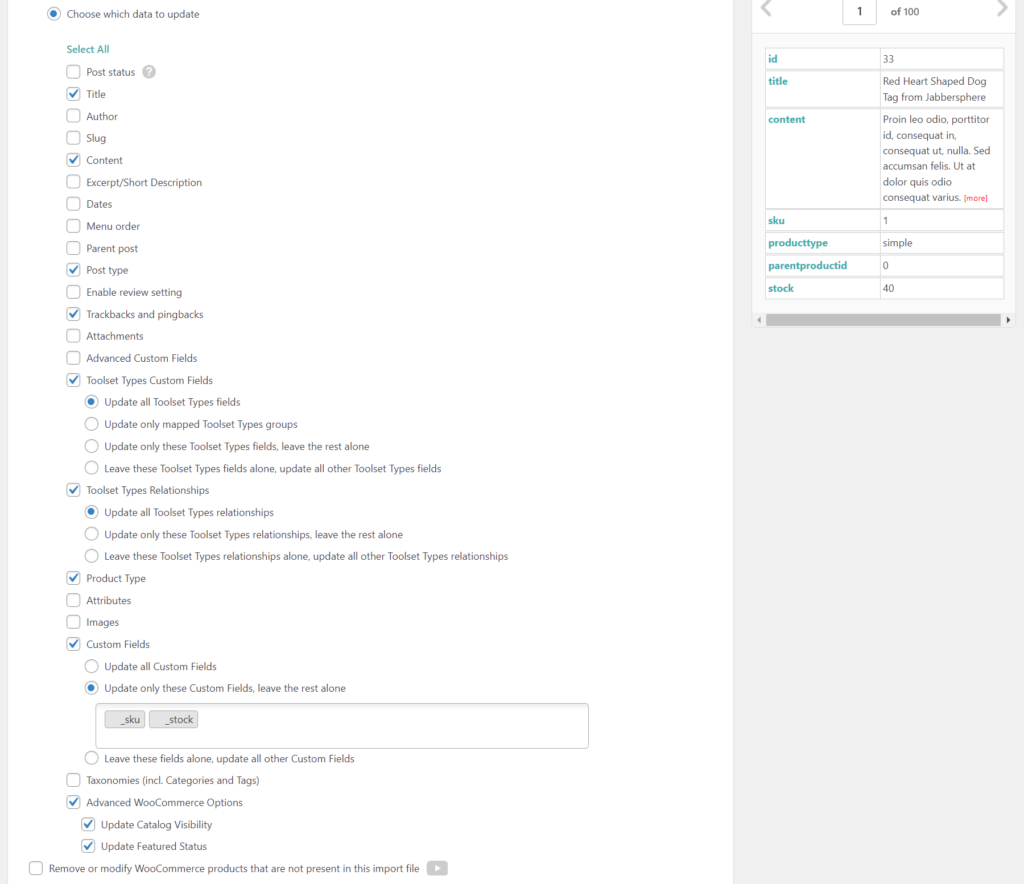
In other words, you're matching the incoming data to your existing products based on SKU, and you're only going to update specific fields, which you get to specify further down the screen:
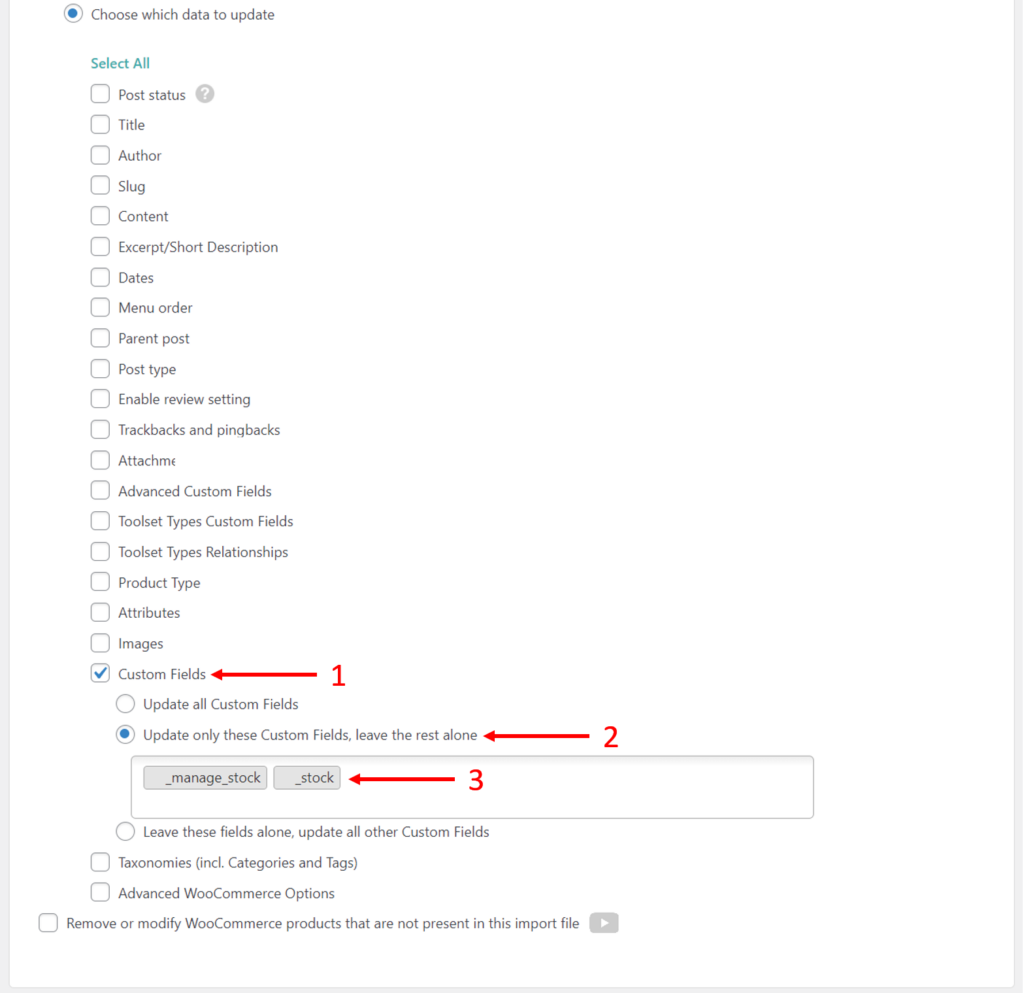
Click Continue at the bottom of the screen (not shown).
Click the Confirm & Run Import on the next screen. When the import completes, your WooCommerce stock levels should be updated as expected.
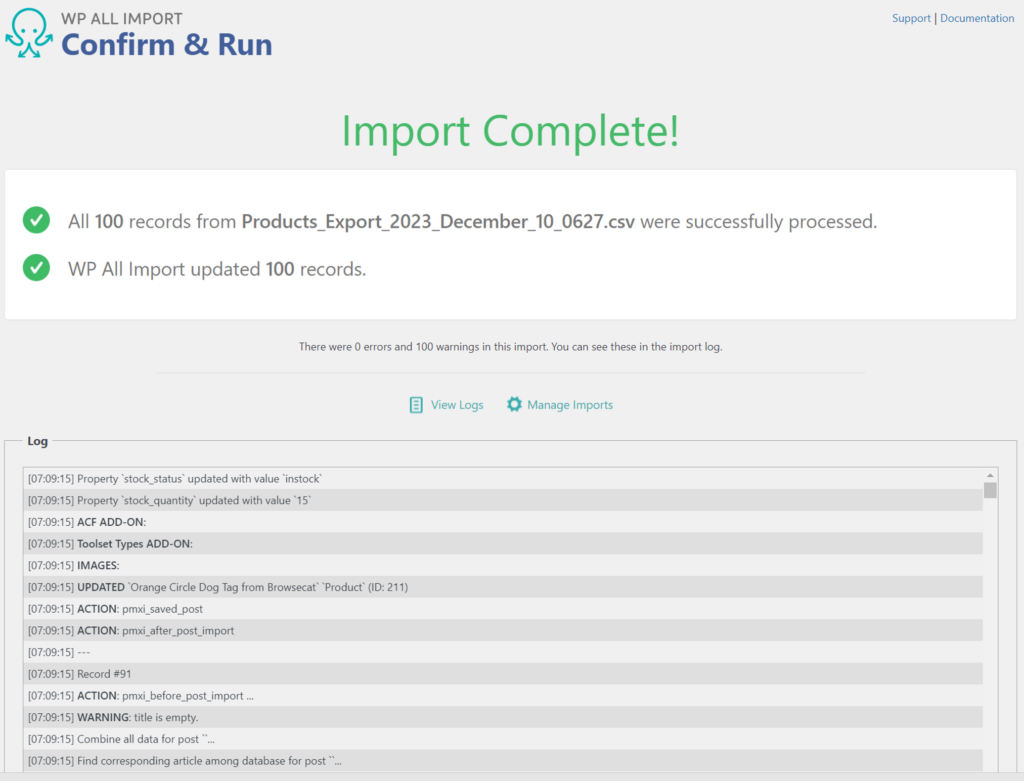
In this scenario, the third party has sent you a new version of a file that you have imported previously.
Because WP All Import records all the settings used for import, all you have to do in this situation is go to All Import › Manage Imports and click the Run Import button for the import that you ran previously.
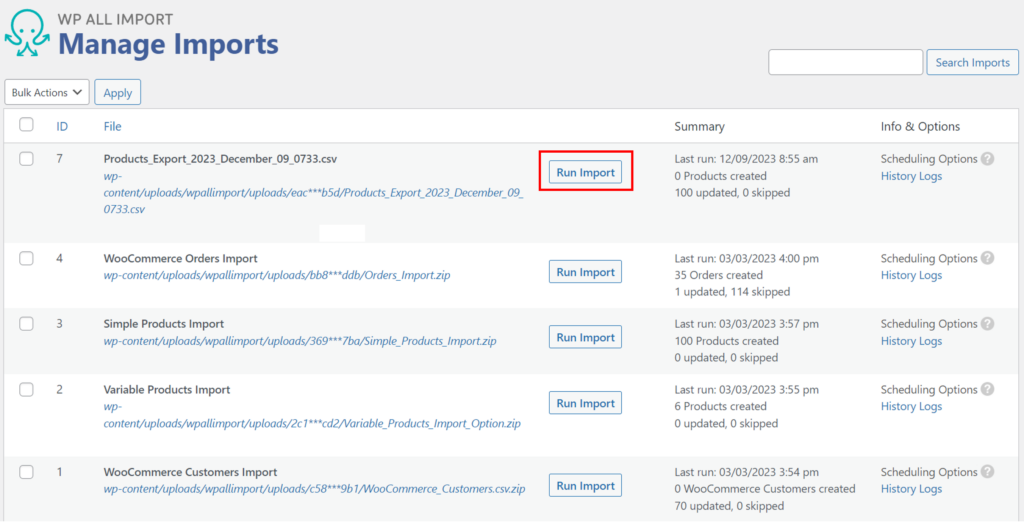
This will automatically apply the updated stock levels to the affected products.
In this scenario, you need to manually edit the existing stock levels in your WooCommerce store. Doing so through the WooCommerce interface can be tedious, so WP All Import gives you the opportunity to edit the data in a spreadsheet instead.
Navigate to All Export › New Export and create a new product export:
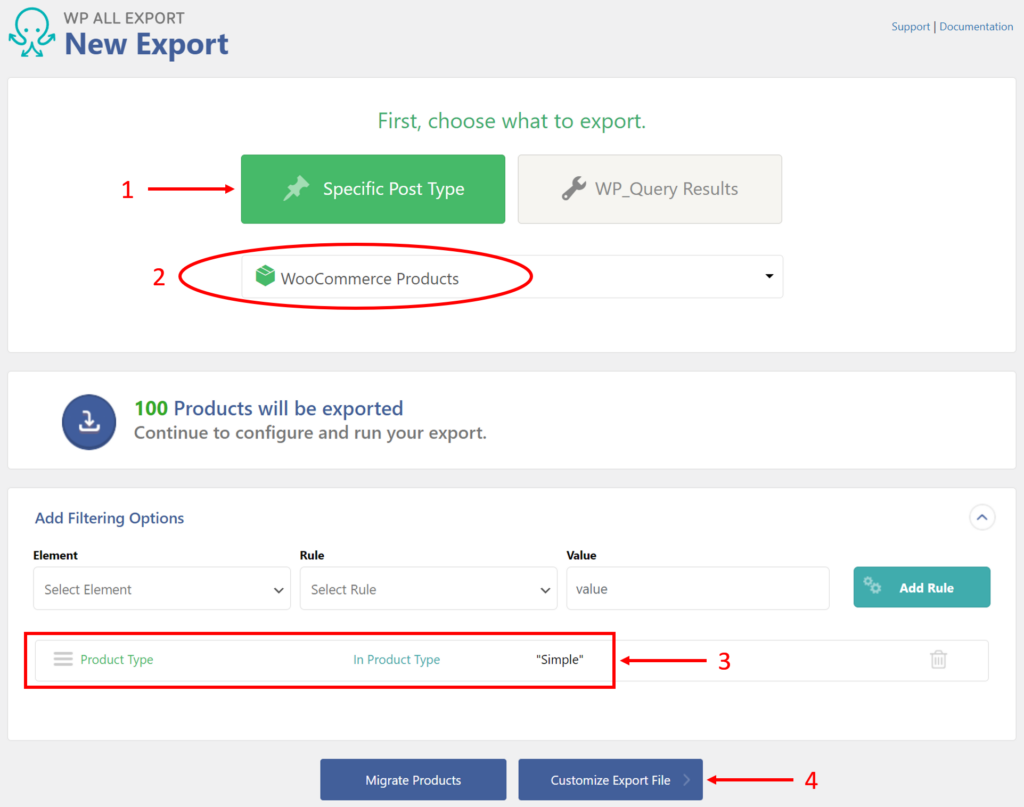
In Action 3 above, you can see that we created a filter to limit the export to simple products only. For more information on filters, see Filtering Import Data with XPath.
After you click the Customize Export File button, you'll be brought to the Drag & Drop interface. Here, you simply drag and drop your export columns from the available fields on the right into the column selection area on the left. In this case, make sure you drag and drop the Stock field:
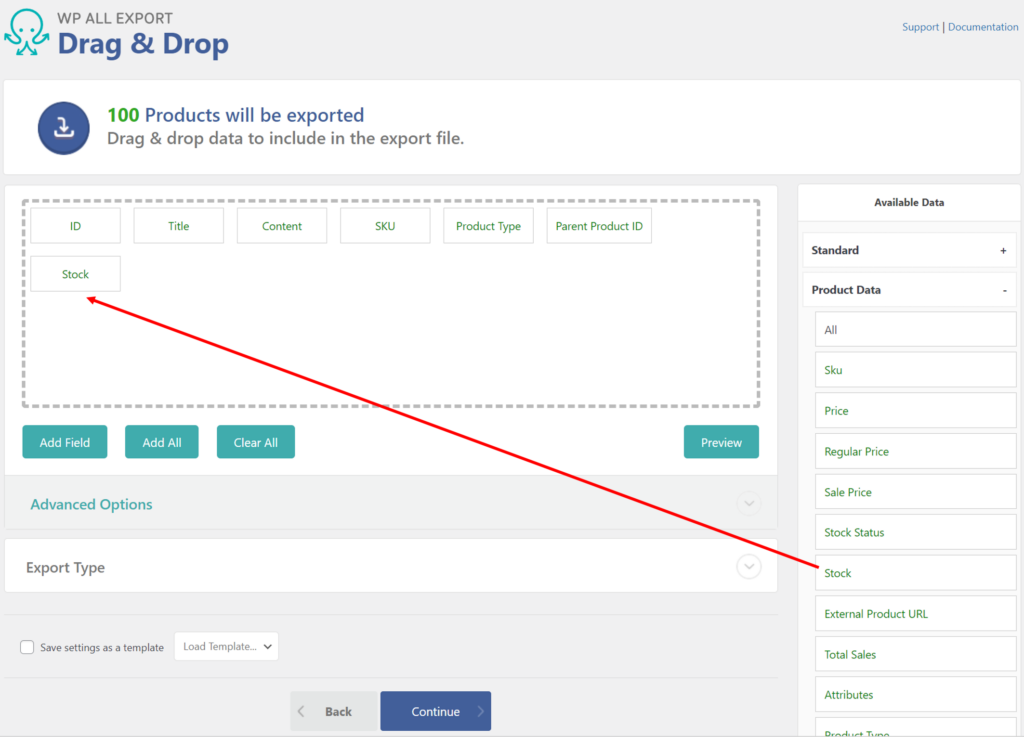
Click the Continue button, followed by the Confirm & Run Export button on the next screen. When the export completes, you'll see this screen:
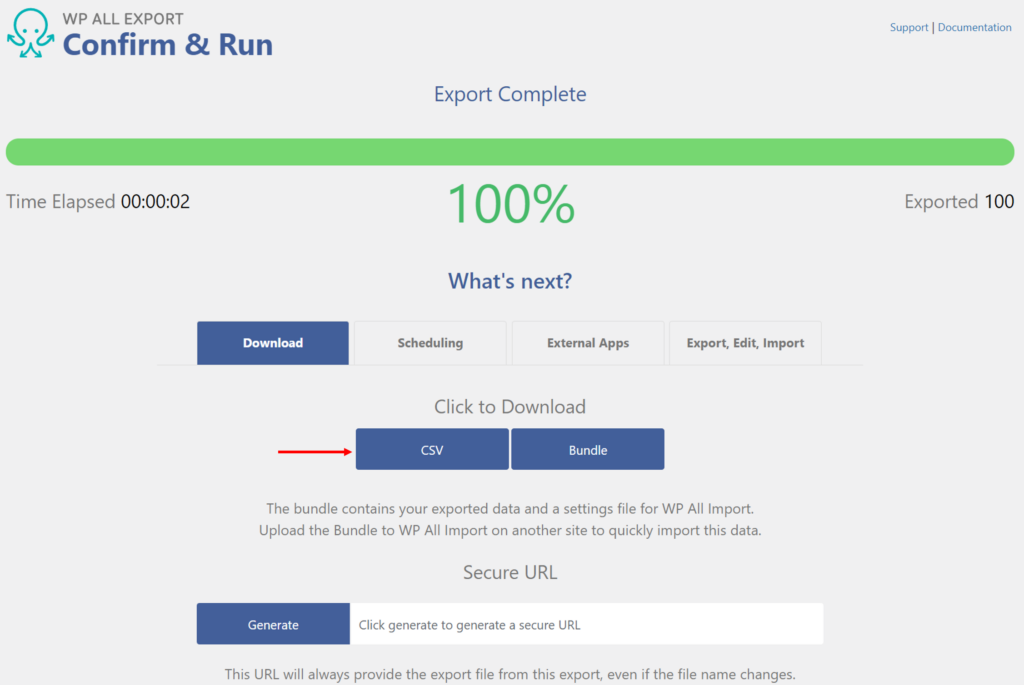
To download your export file, click the blue CSV button.
Open the product CSV file in your favorite spreadsheet and use copy-and-paste, search-and-replace, and formulas to make large-scale changes to your stock quantity data.
Save your changes.
Go to All Export › Manage Exports and locate your recent export. To import your changed file, simply click the Import with WP All Import option on the right:
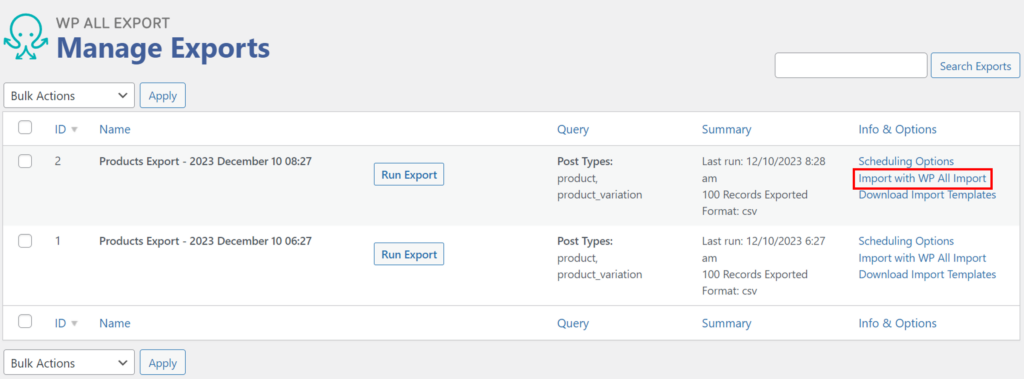
This will create a new import:
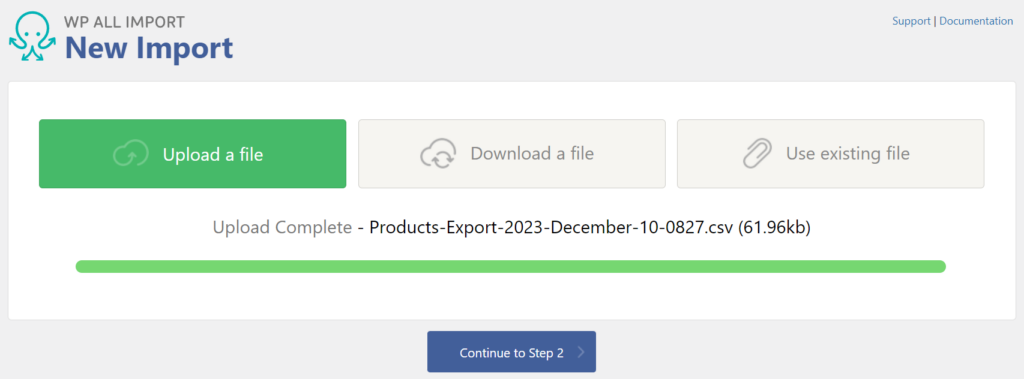
Upload your changed file, then click Continue to Step 2. This will bring you to the Drag & Drop screen. If you look at the relevant fields, you will see that WP All Import has used the information from the export to automatically map the correct fields:
It also knows which fields to update:
To apply your changes, just complete the import.
