JetEngine is a WordPress plugin that lets you create dynamic content, including custom fields. To learn more about these fields, see JetEngine Custom Fields.
WP All Export is a WordPress plugin that lets you export all types of WooCommerce and WordPress data. It also has an add-on that allows you to export data from JetEngine custom fields. To learn more about this, see Export JetEngine Data From WordPress.
In this guide, we'll show you everything you need to know about using this export solution.
Go to All Export › New Export and select the post type with the JetEngine fields that you want to export. Note that you cannot export the custom fields on their own. Instead, you must export the parent post type, which in this case is Posts, and then just include the custom fields as part of that export:
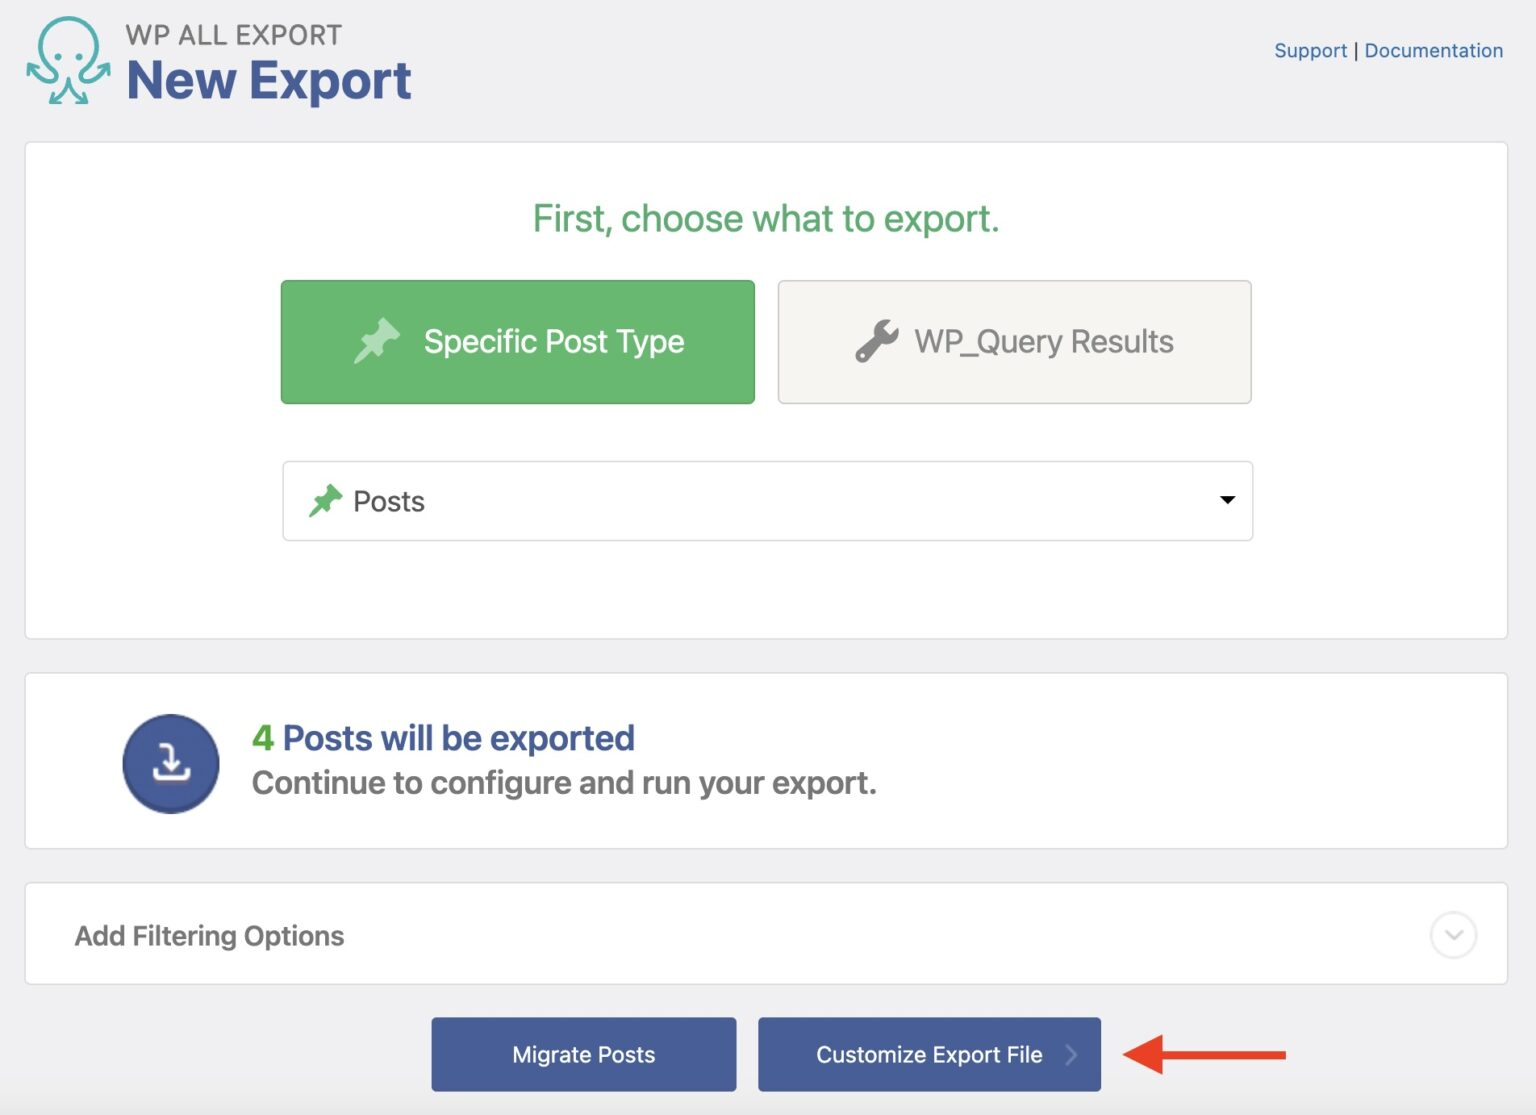
Click Customize Export File to continue.
Next up is the Drag & Drop screen, which lets you choose the fields that you want to export. The Available Data panel on the right displays the available fields, which are organized into subsections. To include fields in your export, expand the associated subsection and drag and drop the fields into the column selection area on the left.
Here, we’ve expanded the Available Data › JetEngine subsection and included all of its custom fields in our export:
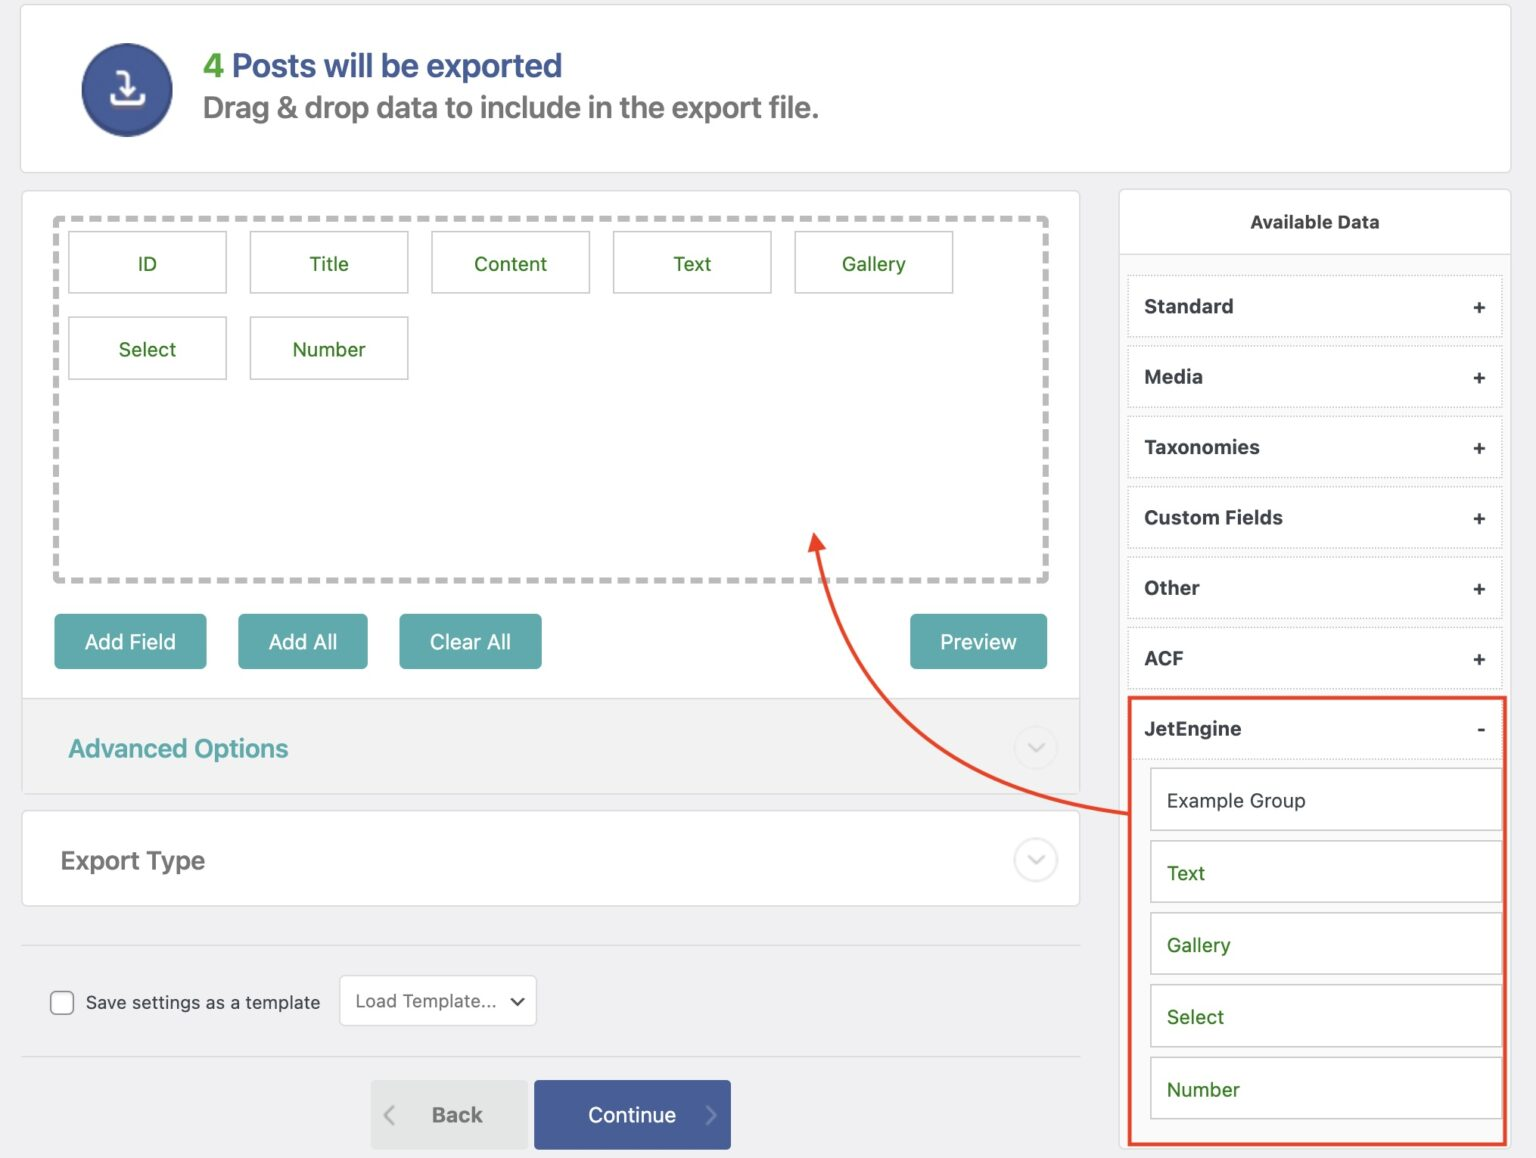
After the field selection is complete, click the Continue button.
The Export Settings screen will appear next:
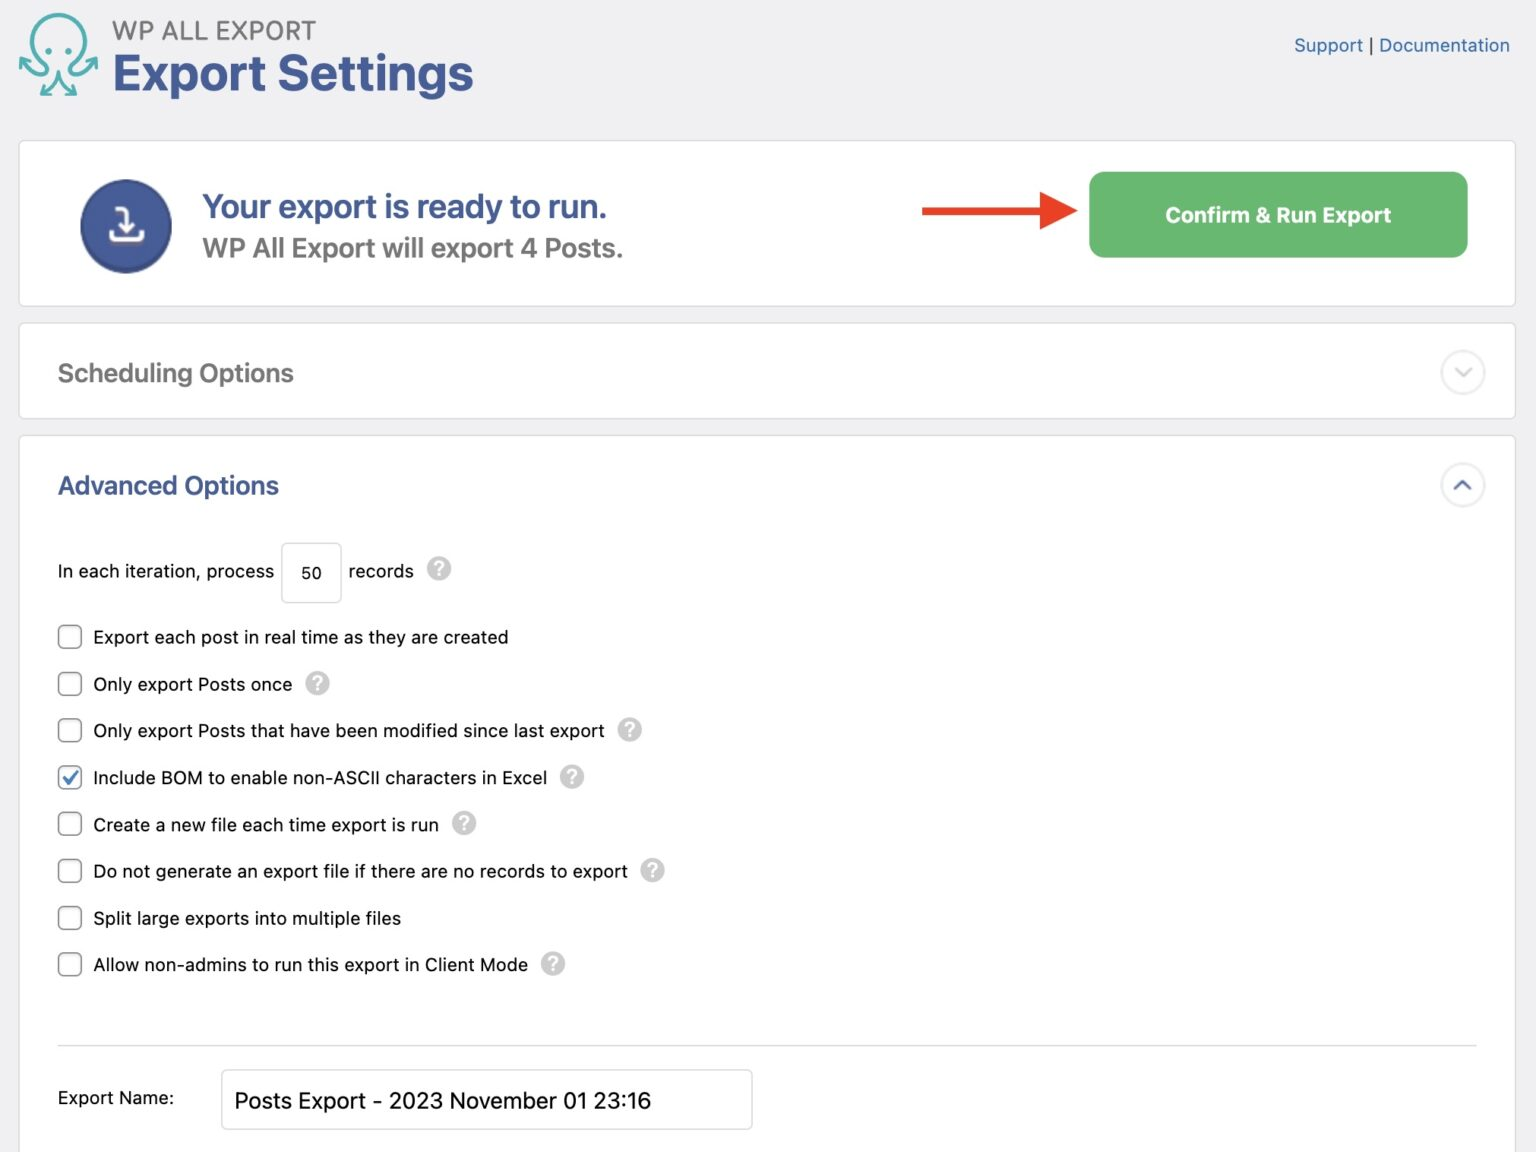
This screen consists of two sections: Scheduling Options and Advanced Options.
The Scheduling Options section lets you schedule your export to run automatically, typically on a recurring basis. You can read more about this in the Can I Schedule My Exports? section of this article.
The Advanced Options section lets you control whether to create a new export file each time the export is run, split the export into multiple files, and many other important settings. For a complete explanation of these, see WordPress Export Settings Explained.
For now, just click the Confirm & Run Export button.
When the export is finished, WP All Export will display the following screen:
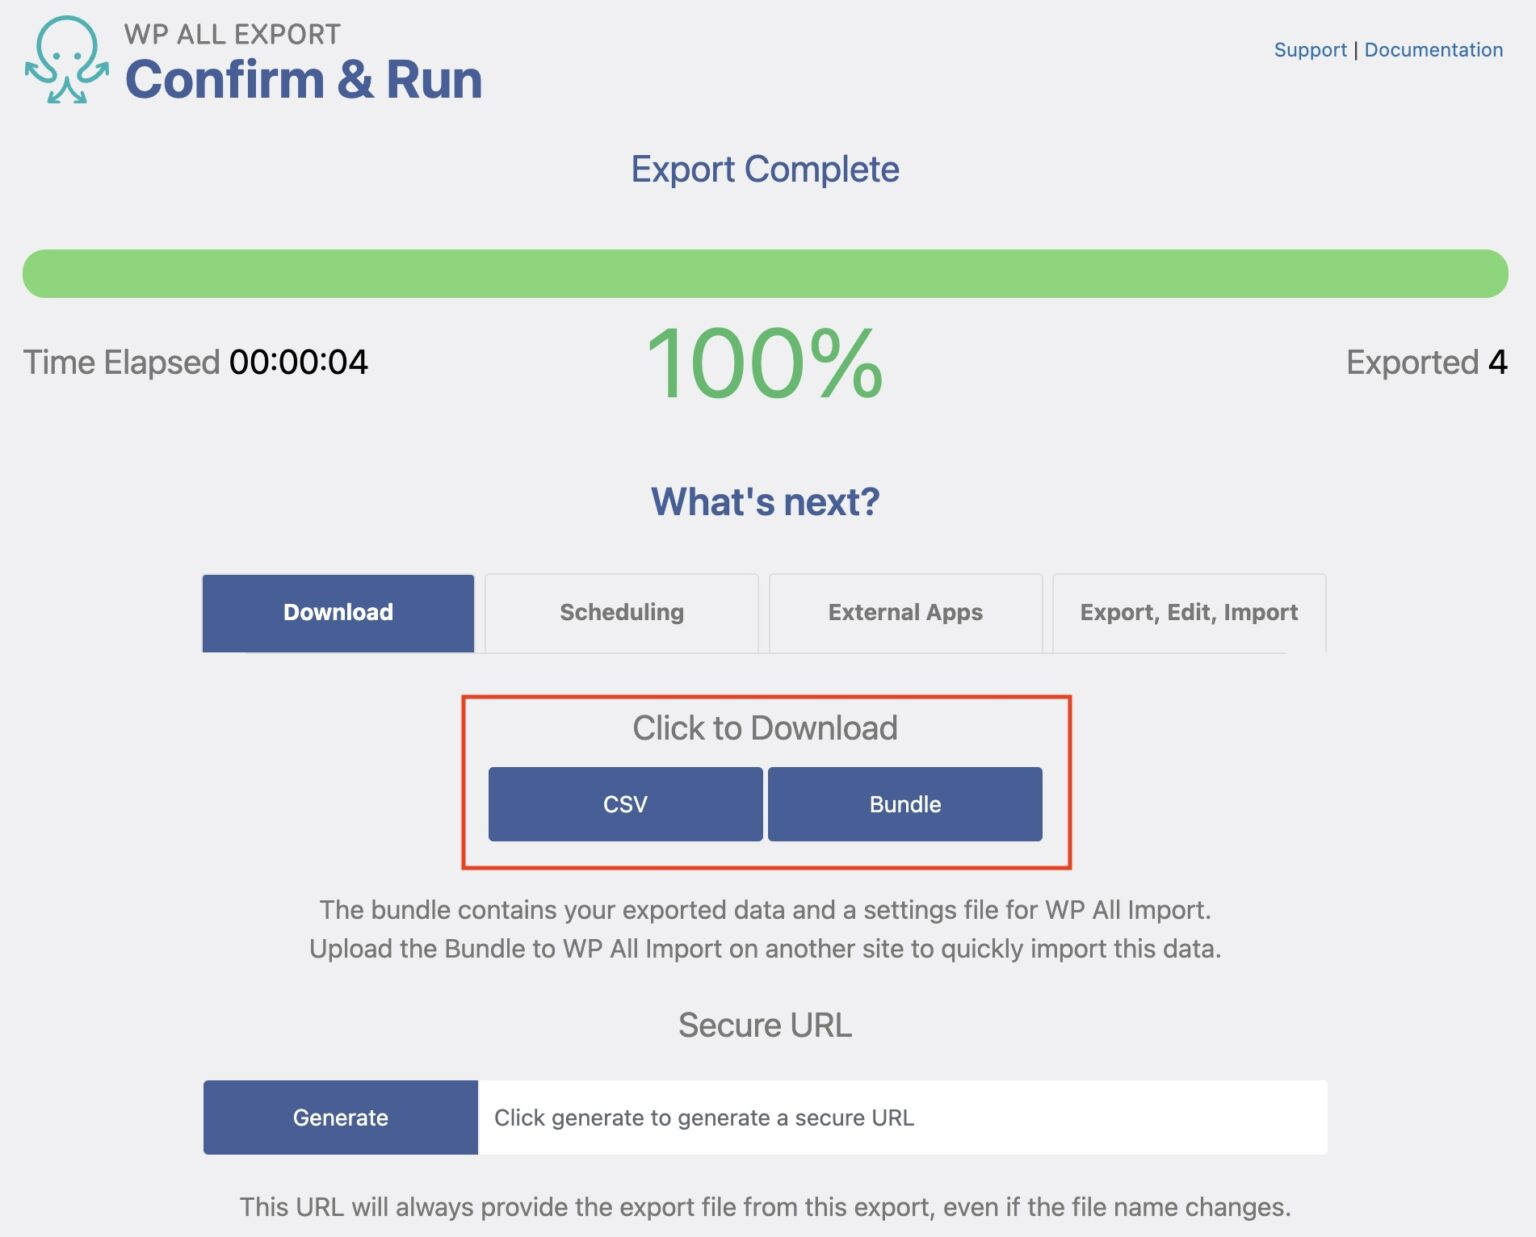
This screen first gives you feedback on whether the export was completed successfully.
Assuming it did, you can download your export file by clicking the CSV button near the center of the screen. Note that your export file is in the CSV format because that's the default. You can also export to other file types. For more information on this, see the Can I Export to Different File Types? section of this article.
In addition to different file types, there are two other options on this screen:
WP All Export supports the following JetEngine custom field types:
To learn more about exporting data from each field type, click it.
If you want to see the export details for all the custom field types in one place, see Export Details for Each JetEngine Custom Field Type.
Yes. To filter your data, first expand the Add Filtering Options section on the New Export screen. A filter consists of one or more filter rules, and each rule consists of an Element, a Rule, and a Value:
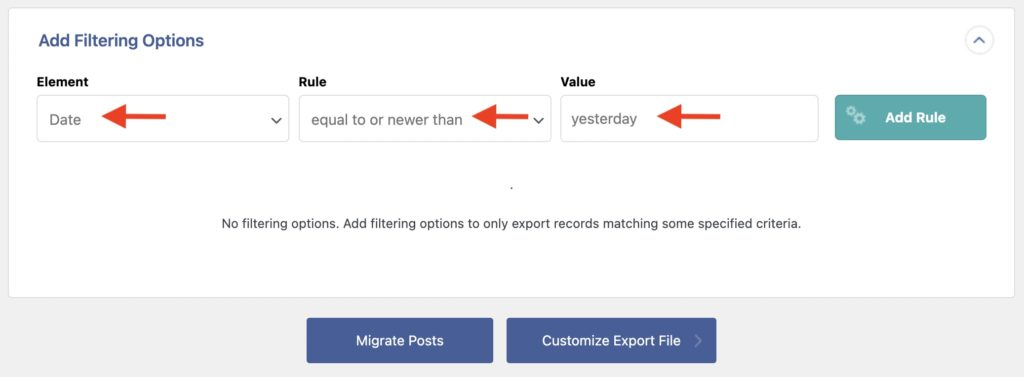
In the image above, we've created a rule that selects all export records with a date that is equal to or newer than the relative value of "yesterday".
To apply the rule, you must click the Add Rule button.
You can create as many filter rules as necessary, which you then connect by using either an AND or OR condition:
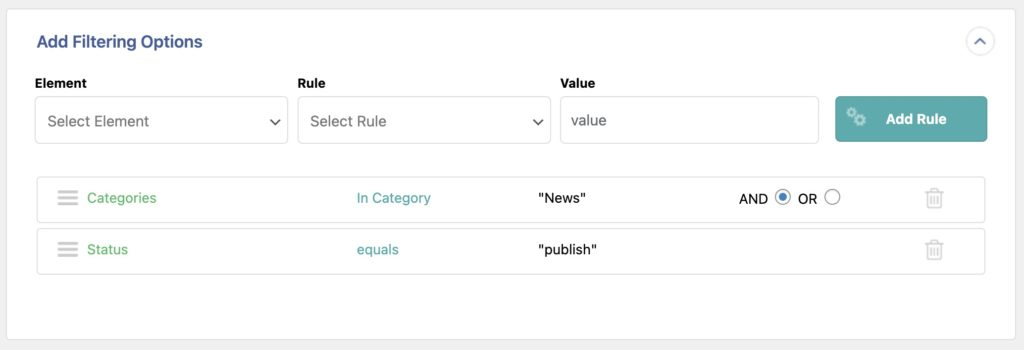
In this example, we've created a filter that will only export records that have both a category of "News" and a status of "publish".
For more information, see How to Filter WordPress Data.
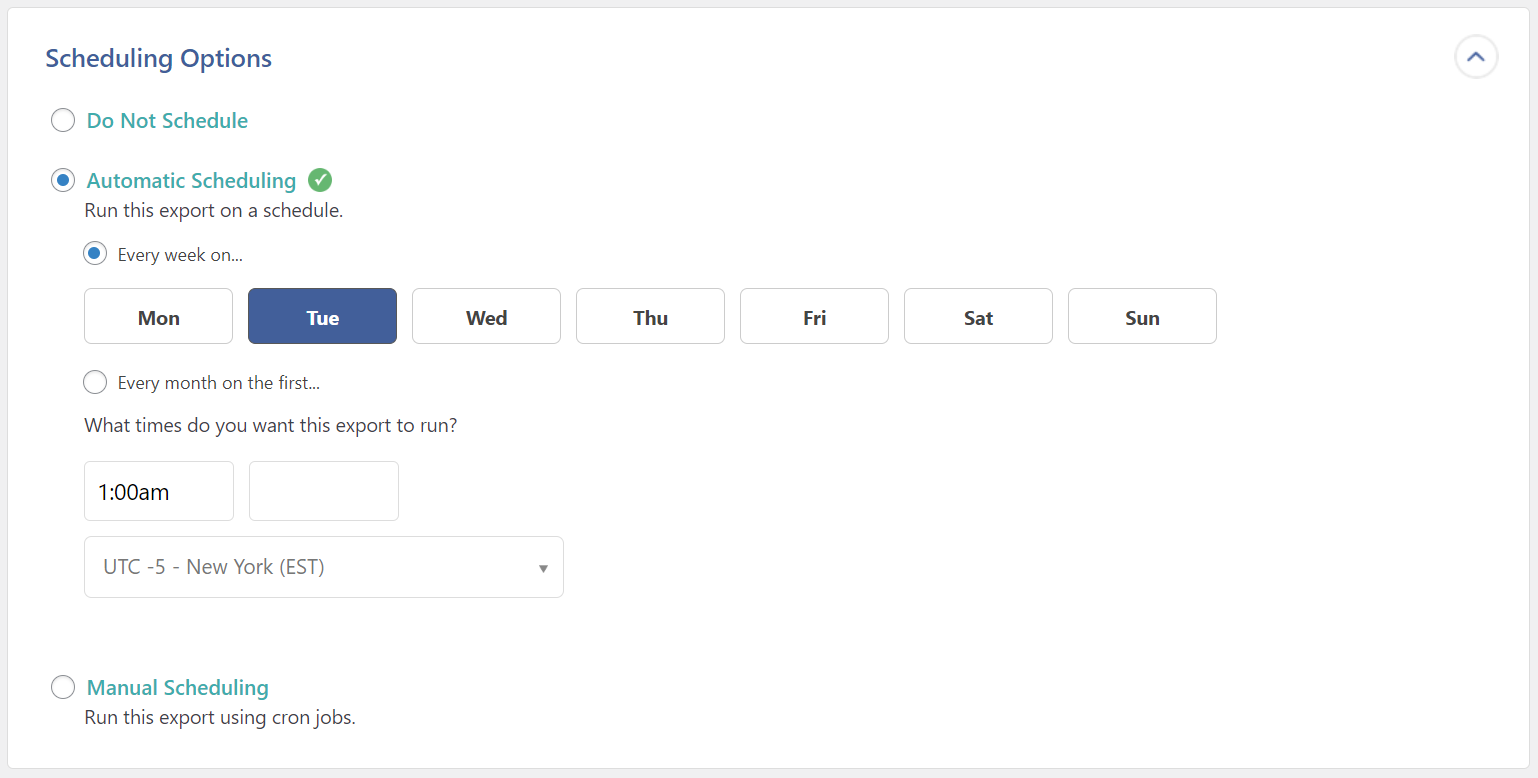
Yes. You do this in the Scheduling Options section of the Export Settings screen, which offers you three options:
The most convenient of these options is Automatic Scheduling, which costs $9 per month but lets you schedule your export directly through WP All Export’s interface. It will also verify that your export is completed on time.
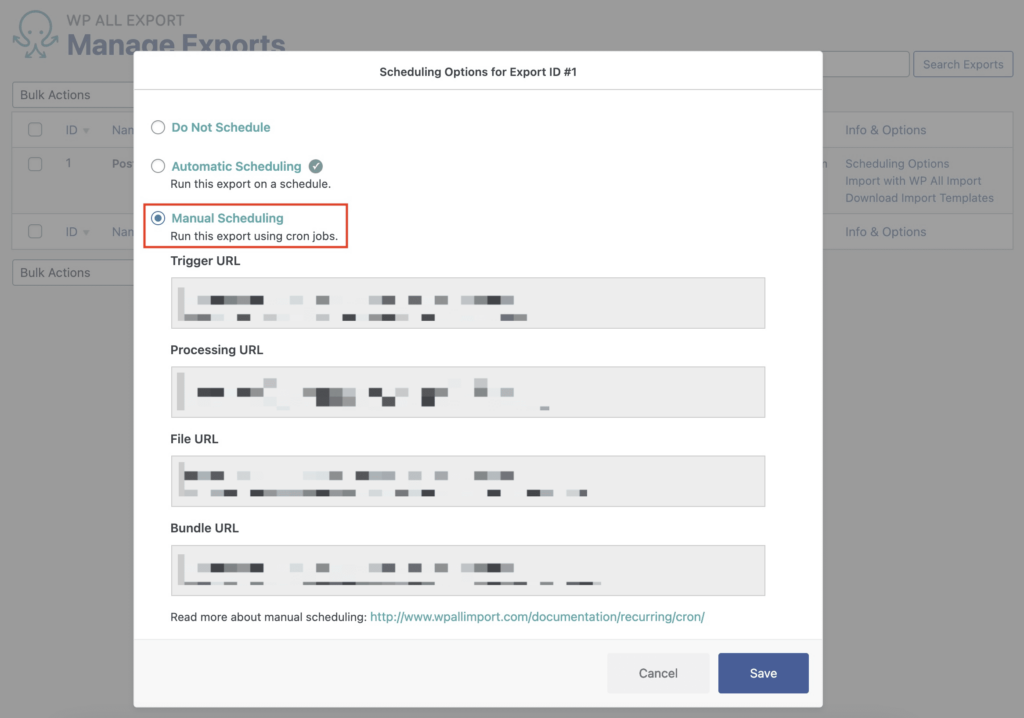
If you want to save yourself the $9, you can instead choose Manual Scheduling. As the name implies, this requires you to manually set up cron jobs on your server:
For more information, see How to Schedule WordPress Exports.
If you are trying to export data to a third party or to another system, the data requirements for that third party or system may differ from the way that data is stored in your system, including the data in JetEngine custom fields.
To meet these requirements, you have two options:
Fortunately, WP All Export has several powerful features to help you use the first approach. To start with, you can combine multiple fields into one export column:

You can also combine static values with field values:

You can use native PHP functions. As there are scores of these, you can perform significant data modifications using just this feature alone:

If all that's not enough, you can create your own custom PHP functions and use those, allowing you to apply things like conditional logic to your exports:

In short, the export requirements are not a problem. If the data is in your system, you can use one or more of these features to extract and format it exactly as required.
To learn more, see Custom Export Fields and Custom PHP Functions.
Yes. In addition to CSV, you can export to XML and to either Excel format (.xls and .xlsx). In the case of XML, you can generate simple feeds or custom feeds of unlimited sophistication.
To change the file type, expand the Export Type section of the Drag & Drop screen, and then make your selection:
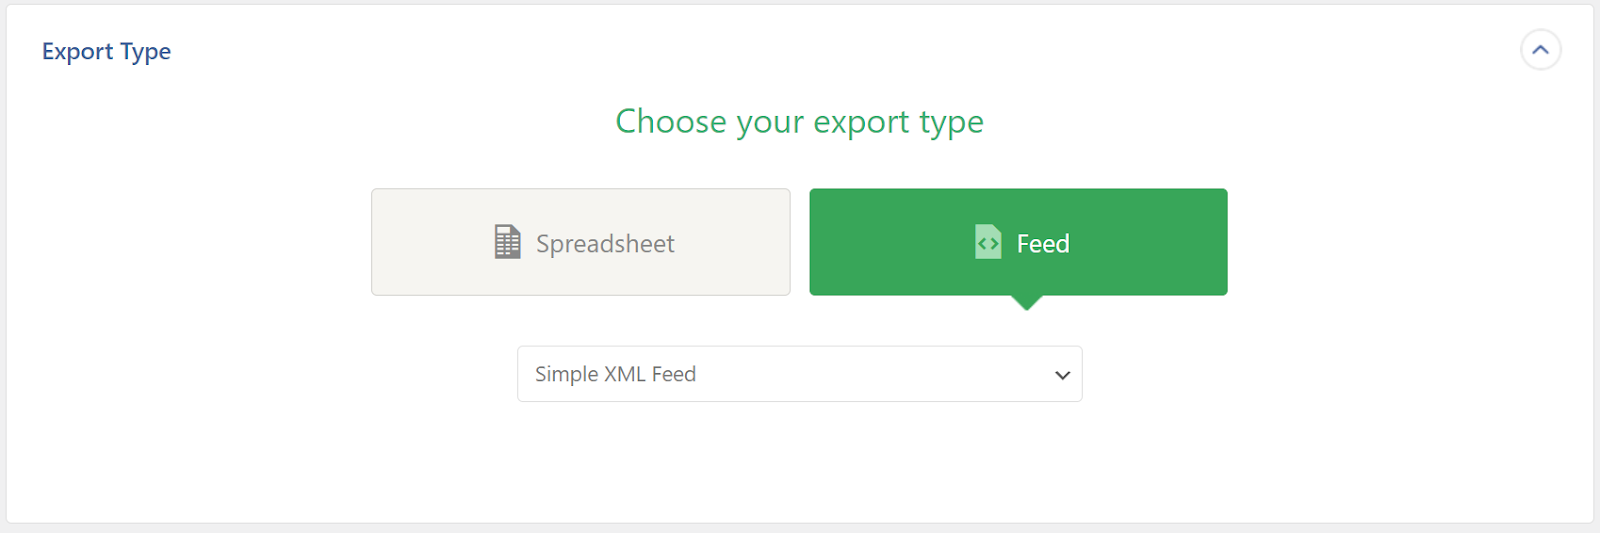
In the above image, we’ve selected Feed as the main export type and Simple XML Feed as the subtype.
To learn more, see Export WordPress to CSV, Excel, or XML.
Yes. WP All Export works well with WPML, which is a multilingual plugin for WordPress. Together, these two plugins help you export JetEngine custom fields in multiple languages. For more information, see Importing Multiple Languages with WP All Import and WPML.