One of the most common tasks with WooCommerce products is updating product prices. This is a task that can take hours to perform manually, especially if you have a lot of products. In this article, we show you how to do it automatically using WP All Import.
There are three common scenarios when updating product prices in WooCommece:
We show you how to handle each of these scenarios below.
In this scenario, a supplier has sent you a file that you haven't received previously (i.e., the file structure is new). The file contains updated product prices. Presumably, you either imported the products previously or you created them manually. In any event, the key issues here are a) matching the incoming products to your existing products and b) updating the price fields only.
Go to All Import › New Import and create a new product import:
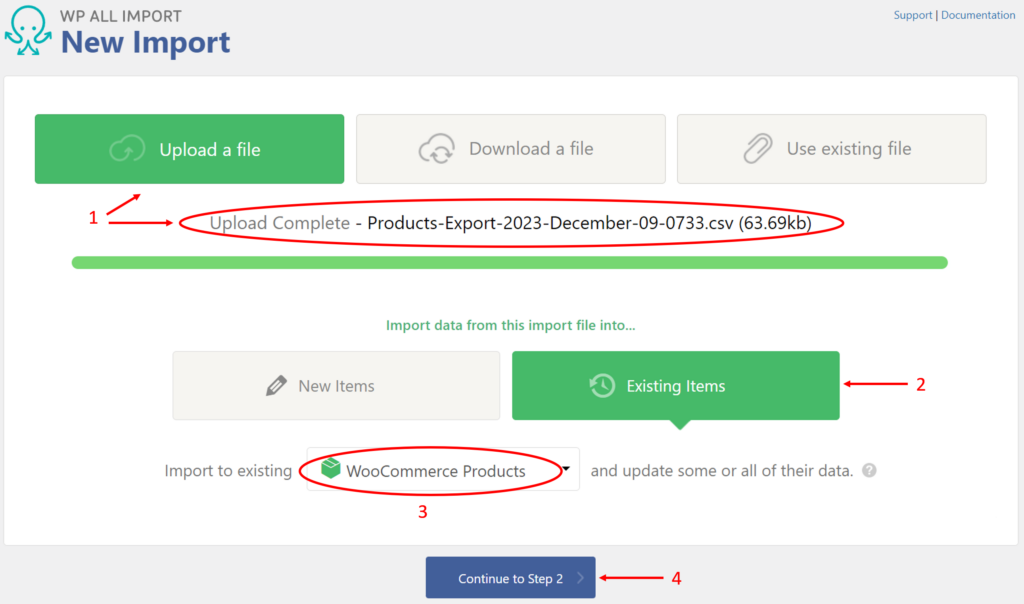
In this step, you are merely checking the structure and content of the import file. As you can see from the image below, the file is very simple, containing only a few product identifier fields along with new price and sales price data:
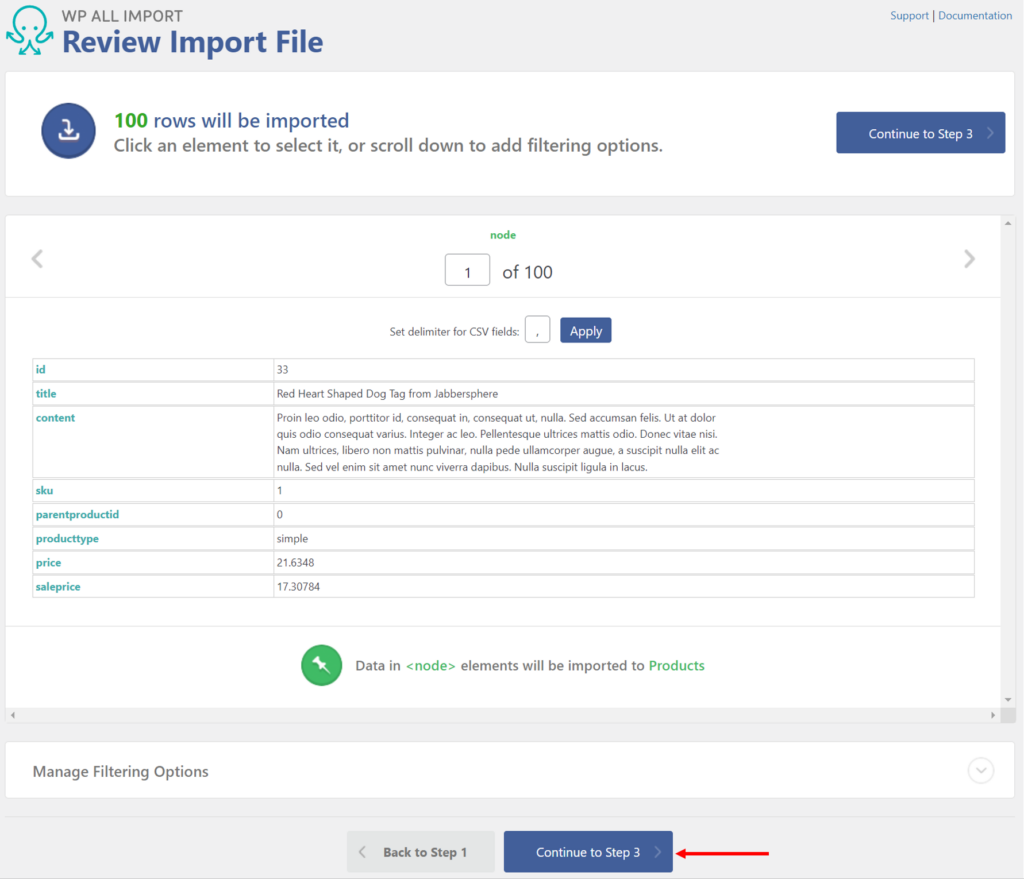
In the WooCommerce Add-On section of the Drag & Drop screen, map the incoming price data to the product price fields that you want to update:
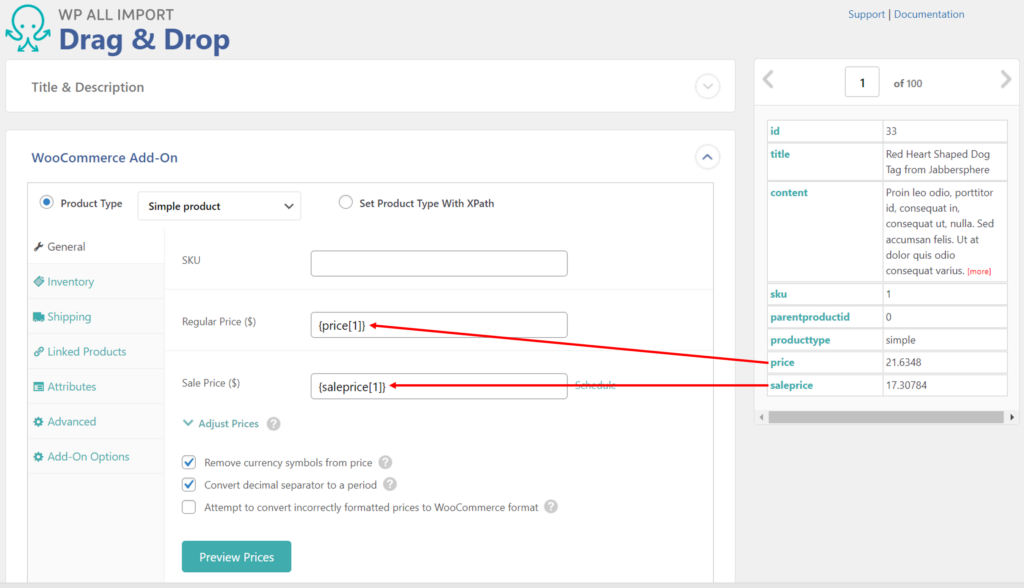
Make sure to click the blue Continue to Step 4 button at the bottom (not shown).
The next screen to appear is the Import Settings screen. Here, you want to instruct WP All Import on how to match the incoming products to the products in your store, which you do in actions 1 and 2 below:
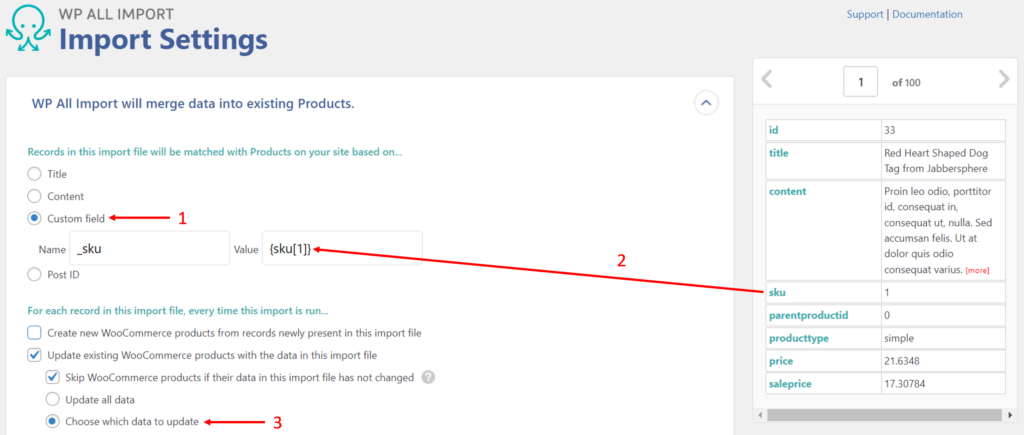
Action 3 allows you to tell WP All Import exactly which fields to update, which you do a little further down the screen:
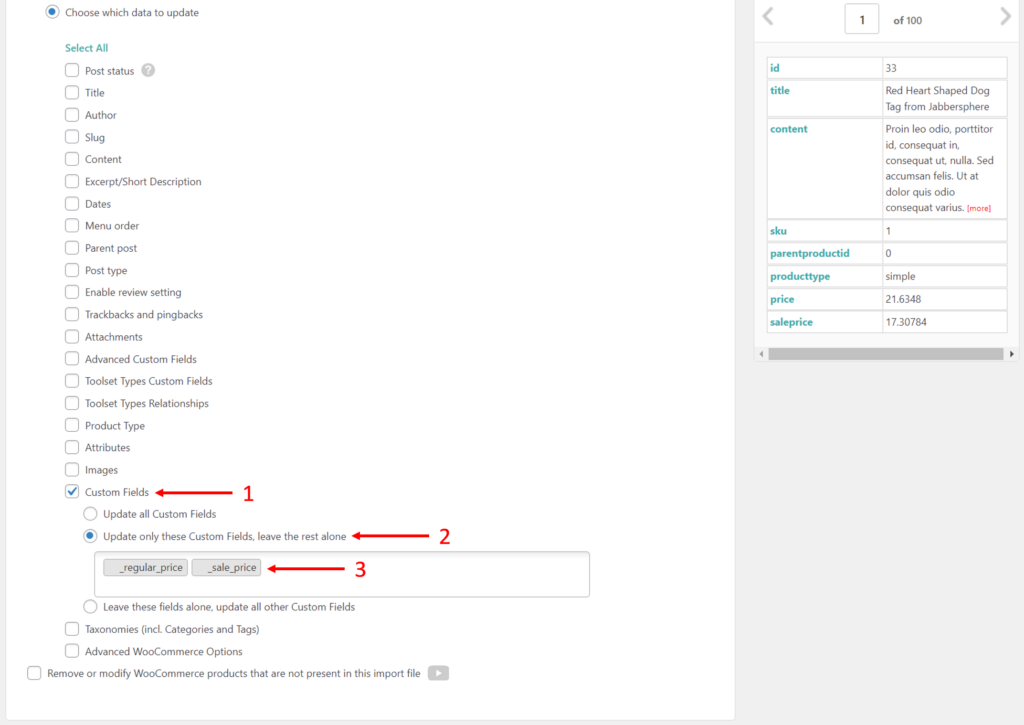
Click the blue Continue button at the bottom (again, not shown).
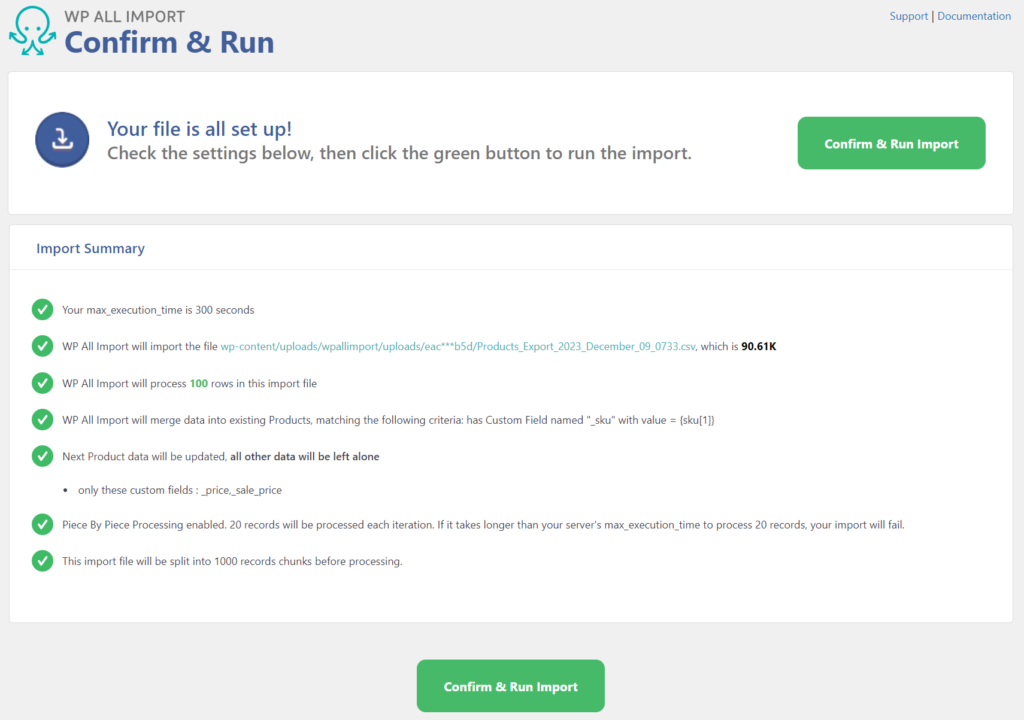
At this point, all you have to do is click the Confirm & Run Import on the next screen, and, voila, you have updated your Woocommerce product price data and only that data!
In this scenario, you receive an updated file that has the same name and structure as a file previously sent to you. For example, you get a new set of price changes from the same supplier.
Lucky for you, WP All Import remembers all its previous imports, so all you have to do is navigate to All Import › Manage Imports, locate the import that you ran previously, and click the Run Import button:
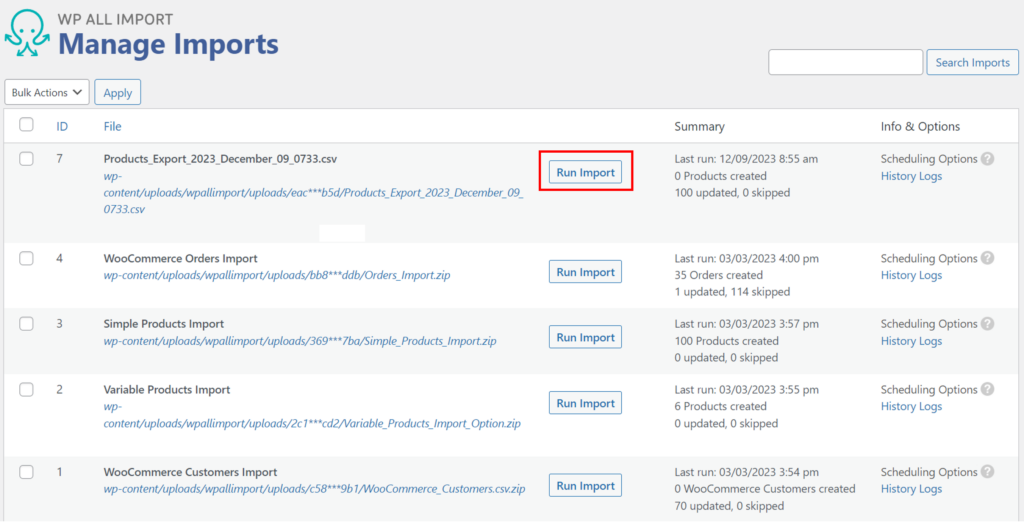
This will run the import using the same settings as before, which will automatically update your product prices.
In this scenario, you want to update the prices for your existing products. You just don't want to do it manually through the interface, so instead, you follow these steps.
Go to All Export › New Export and create a new product export:
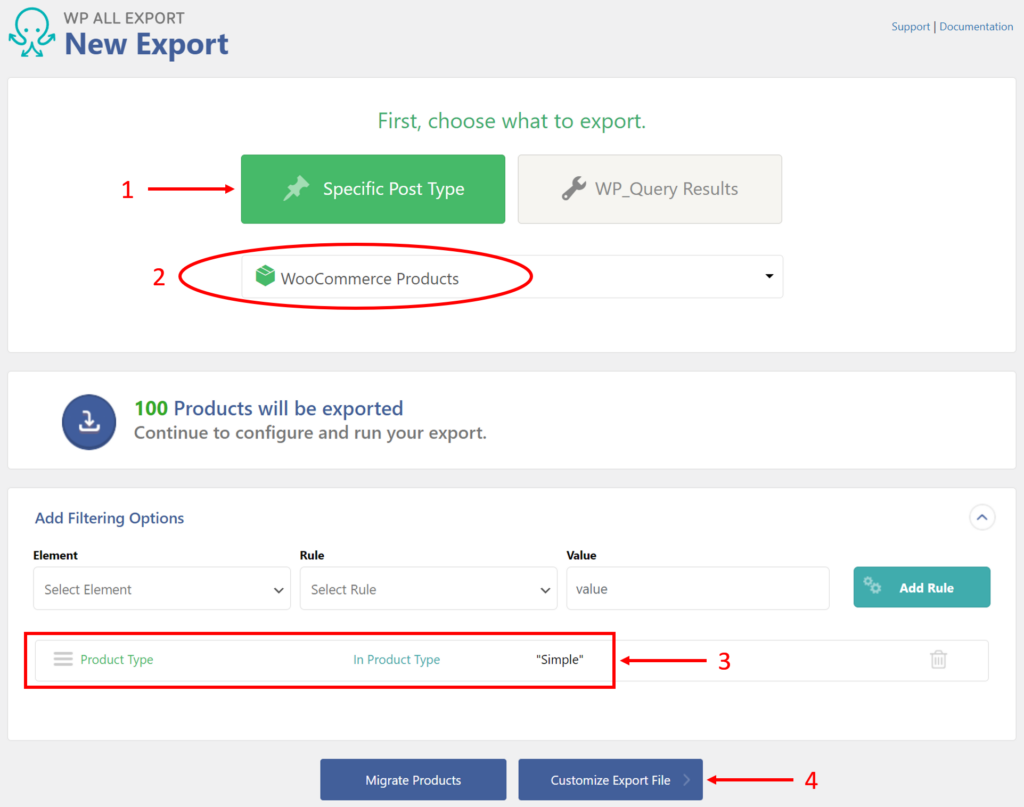
Note the filter that we created in Action 3, which restricts the product export to simple products only. You can create incredibly complex filters with WP All Export. To read about these, see Filtering Import Data with XPath.
After you click the Customize Export File button, you'll be brought to the Drag & Drop interface. Here, you simply drag and drop your export columns from the available fields on the right:
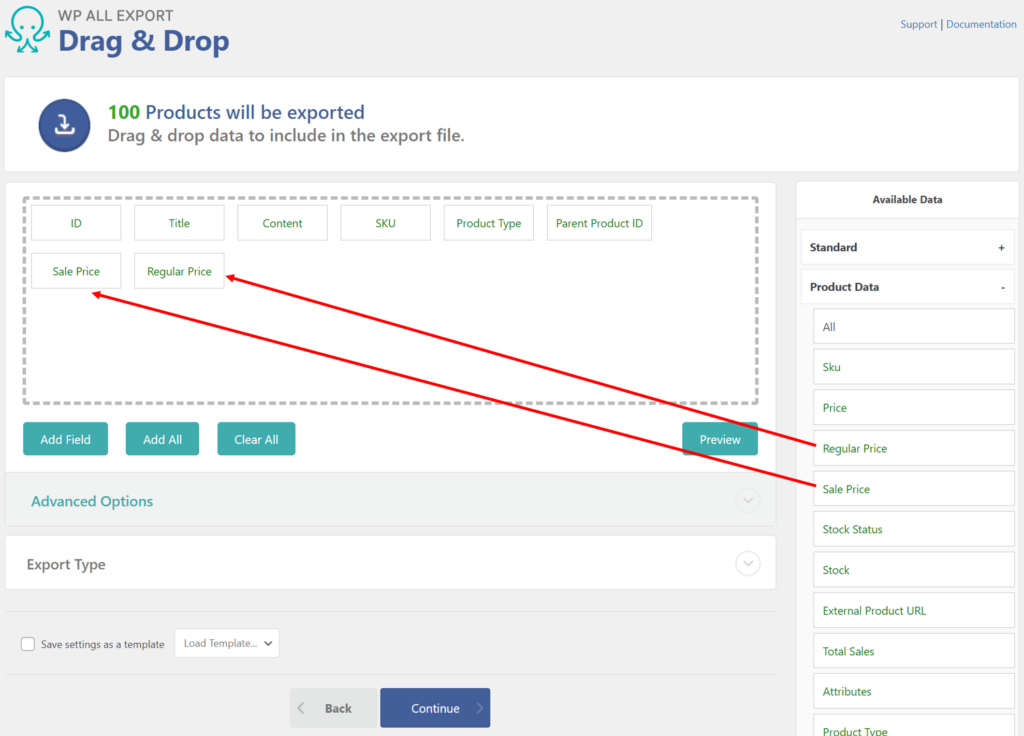
Since we want to modify price data, you must export the price fields.
You then click the Continue button, followed by the Confirm & Run Export button on the next screen. The export will then run, at which point you will see this screen:
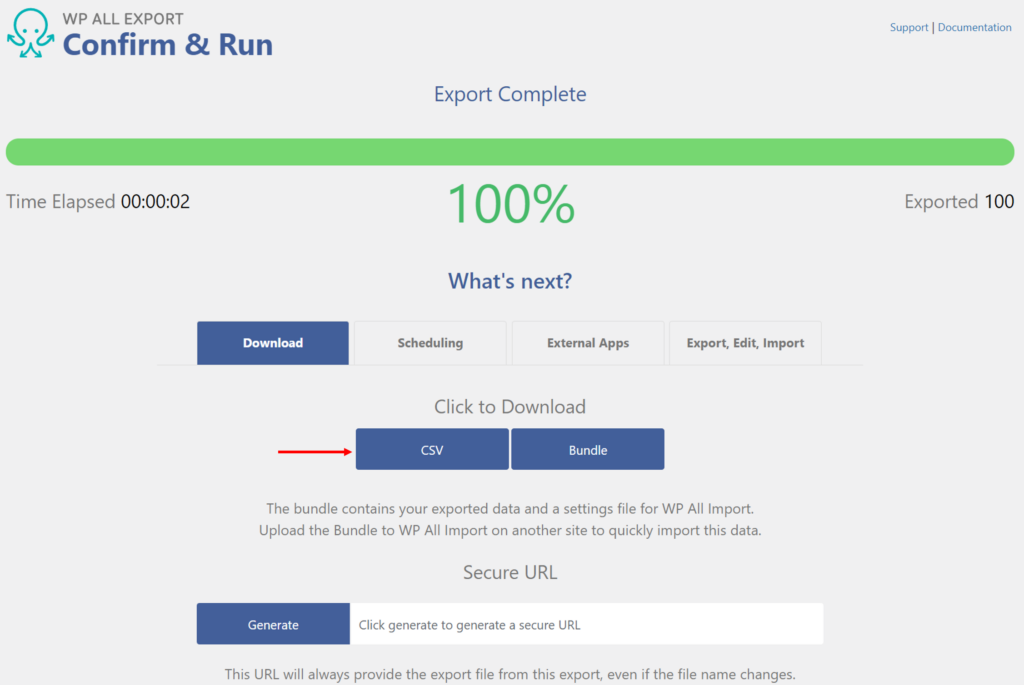
Just click the CSV button, and WP All Export will download your CSV file to your computer.
Next, open the product CSV file in your favorite spreadsheet and change the prices as you wish. Using features like copy-and-paste, search-and-replace, and formulas should be substantially more efficient than making the same changes through the WooCommerce interface.
Make sure to save your changes.
Now, we get to the beauty of how WP All Export and WP All Import work together. If you navigate to All Export › Manage Exports, you will see your recent product export. To import your changed file, simply click the Import with WP All Import option on the right:
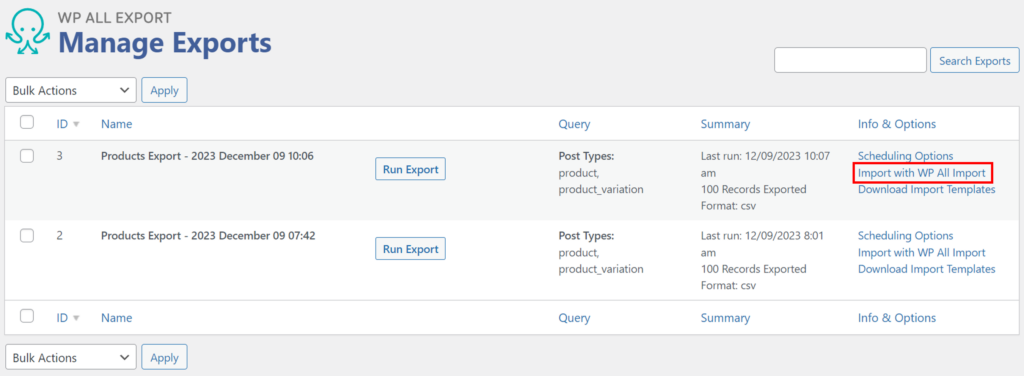
This will launch a new import:
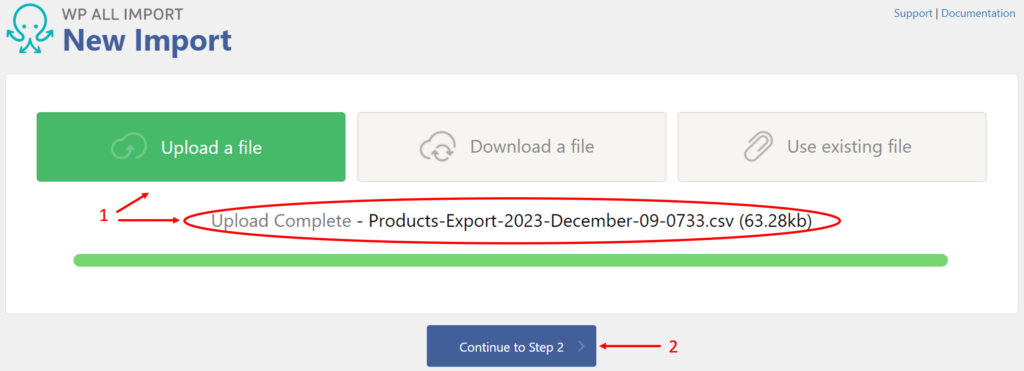
Upload your changed file, then click Continue to Step 2, which brings you to the Drag & Drop screen:
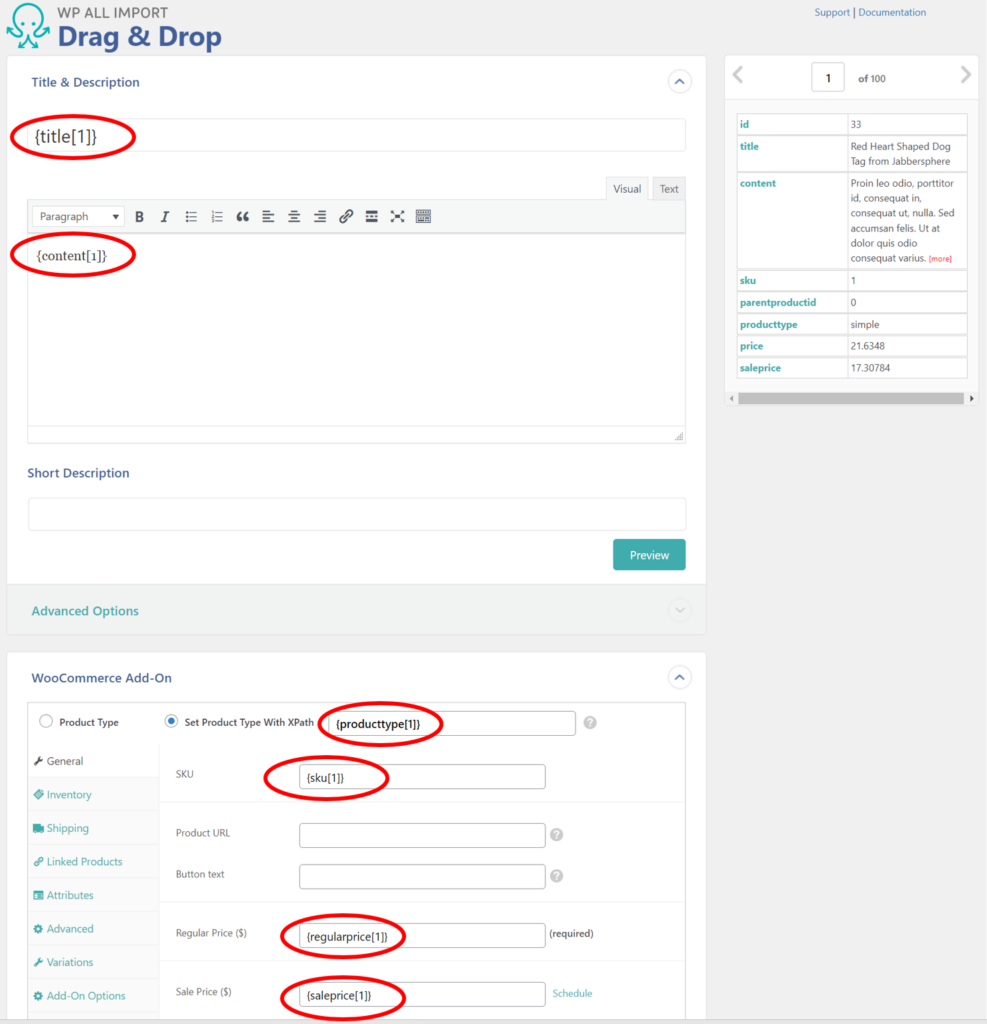
This is where the magic occurs. Because WP All Import has access to the settings used by WP All Export during the product export process, it already knows how to map the incoming data.
It even knows which fields need to be updated:
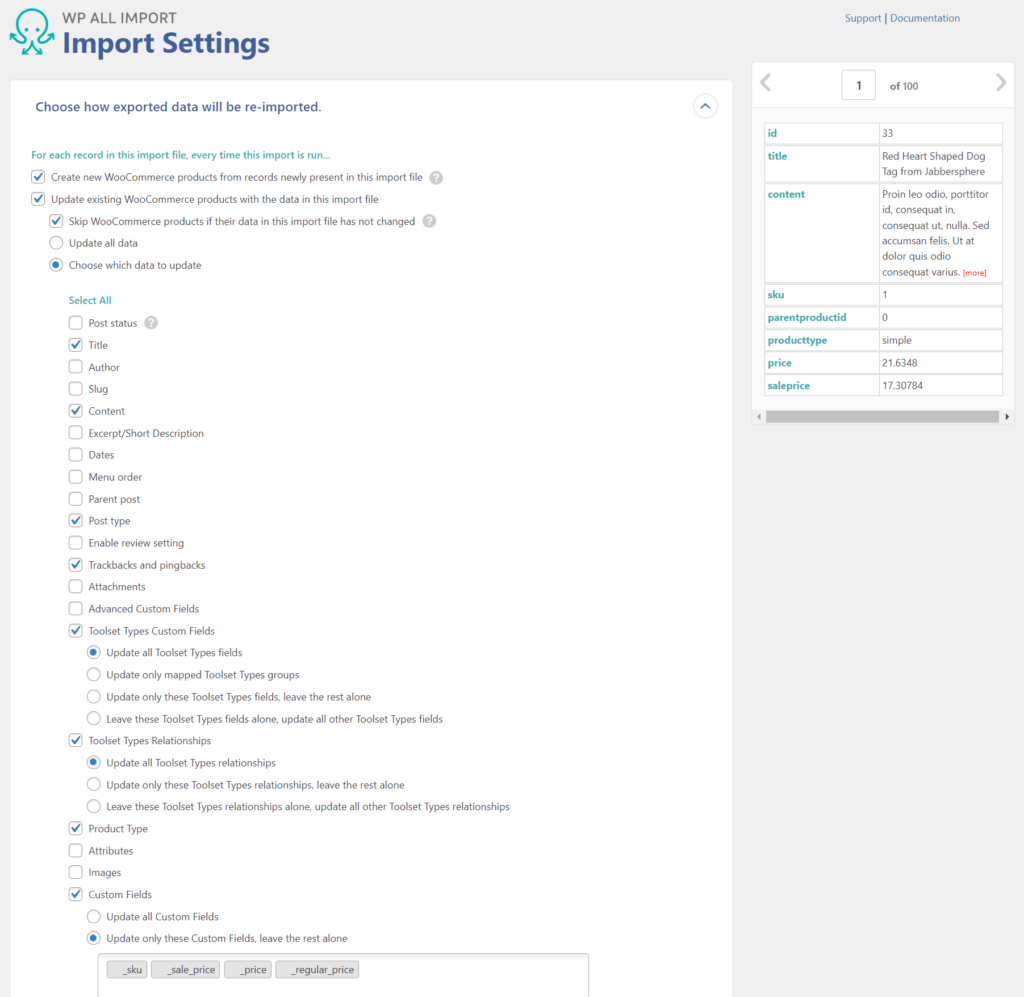
You can simply ignore all other settings, complete the import, and your changes will be applied.
