In this tutorial, learn how to use FacetWP with the Oxygen Products List element to filter the products on the Shop page of your site.
To begin with, install FacetWP.
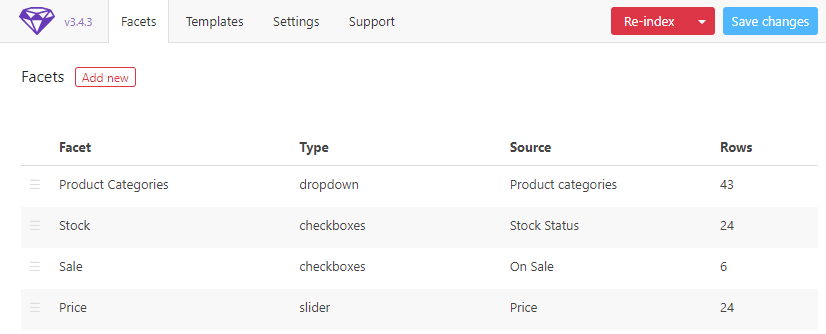
Next, create your Facets by clicking Settings > FacetWP in the WordPress admin area. In this tutorial, three Facets are used:

Once you've created your Facets, click Re-index in the top right. This is so that FacetWP can look through your data and categorise your products correctly.
Now that your Facets have been created, it's time to create a Shop template via Oxygen > Templates. Give the template a title and assign it to the Shop page via "Where does this template apply" > Archive > Post Types > product. If you have other templates that could apply, you will need to set the Priority to a higher number.
Publish the template and click "Edit with Oxygen".
Add a Section element to your template and add a Columns element to the section. Select a two column layout. Set the width of the first column div to 20%.
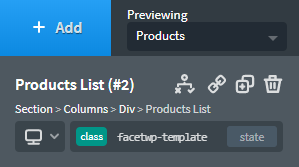
Add the Products List element to the second column div via +Add > WooCoommerce > Products List. Add the class "facetwp-template" to the Products List element by selecting the element and typing the class name in the top-left of the builder.

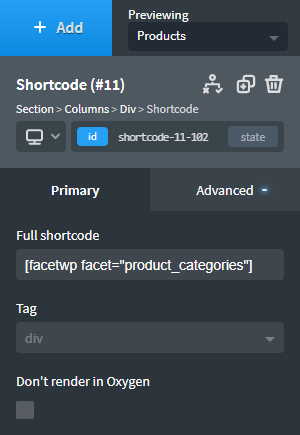
In first column div, add a Heading element. Double click the text and change it to"Search". Add a Text element and change the text to "Category". Add a Shortcode element via +Add > WordPress > Shortcode. Copy the shortcode for your Products Categories Facet from Settings > FacetWP and paste it into the Shortcode field.

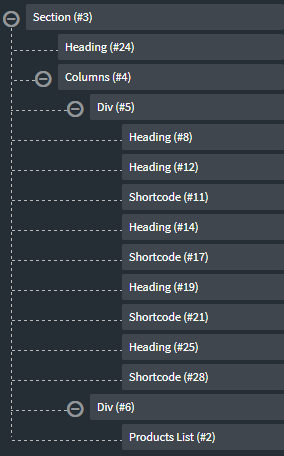
Add another three Text Elements and Shortcode elements for the next three Facets. Here's how your finished element structure should look.

Save the page and view it on the front-end of your site. You should now be able to use the Facets to filter your products.
Please note that the Facets likely won't render in the builder.
