How to Export and Import WordPress Users and WooCommerce Customers
Are you looking to migrate your WordPress users and WooCommerce customers seamlessly between two sites?
There are various scenarios where you might need to import export WordPress users and customers between sites such as merging multiple websites into one. Handling user data effectively is important to ensuring a smooth transfer of your online store.
In this article, we will guide you through the step-by-step process of exporting and importing WordPress users and WooCommerce customers.
Difference Between WordPress Users and WooCommerce Customers
Before diving into the steps for migrating users and customers, it’s important to understand the difference between WordPress users and WooCommerce customers. In simple words, every WooCommerce customer is a WordPress user, but not every WordPress user is a WooCommerce customer.
A WooCommerce customer is assigned the user role “Customer,” which grants additional capabilities, including access to billing and shipping address fields. A WordPress user is converted to a WooCommerce customer when they place their first order.
This means that if you migrate all WordPress users, it will automatically include WooCommerce customers.
Now that we know the difference, let’s look at which export and import plugin to use for migrating WordPress users and WooCommerce customers.
Which Is the Best WordPress User Migration Plugin?
When it comes to migrating users and customers, WordPress has a built-in export feature that downloads user data in an XML file. However, there is no built-in option to import the same user data into a new WordPress site. Additionally, the data obtained from the built-in option is limited to core user fields.
This limitation leaves us with no option but to rely on third-party plugins to export and import user and customer data between WordPress websites.
The WP All Export and WP All Import plugins integrate seamlessly with each other and stand out as the best user and customer migration plugins for WordPress.
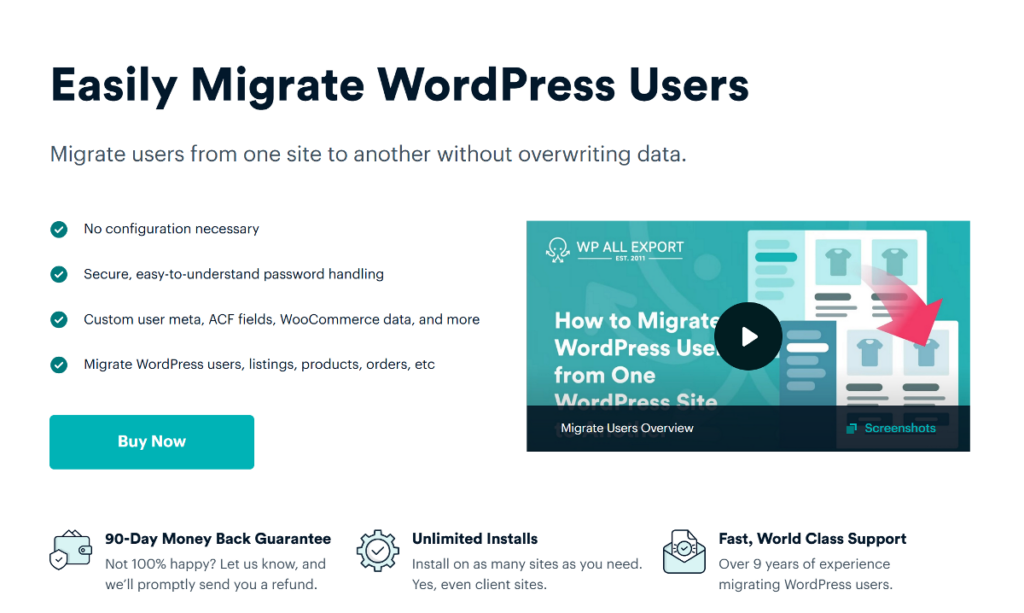
Both plugins offer a user-friendly wizard, meaning you only need to learn the process once for both export and import tasks.
When used together for user migration, they include key features such as:
- Automatic mapping of import fields from the template file generated during the export process.
- Support for all user data, including custom fields added by WooCommerce, ACF, Meta Box, and JetEngine plugins.
- Powerful filtering options to select exactly which users to export and import.
- Automatic scheduling of the export and import processes between WordPress sites.
How to Export and Import WordPress Users and Customers
The WP All Export and Import Suite simplifies the user and customer migration process and requires only a few steps.
To begin, you need to install the premium version of WP All Export on the source site and WP All Import on the destination site. Additionally, you will need to install the special Export Users and Import Users add-ons on both sites, respectively.
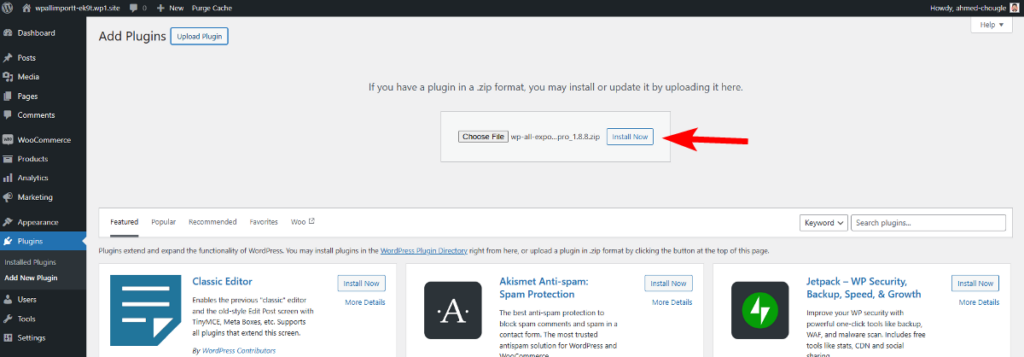
Once you have everything set up, let’s look at the migration steps in detail.
Step 1: Create a New Export for WordPress Users
To start the WordPress user export process, navigate to All Export > New Export on the source site. On the New Export screen, click the dropdown menu and select Users as the export type.
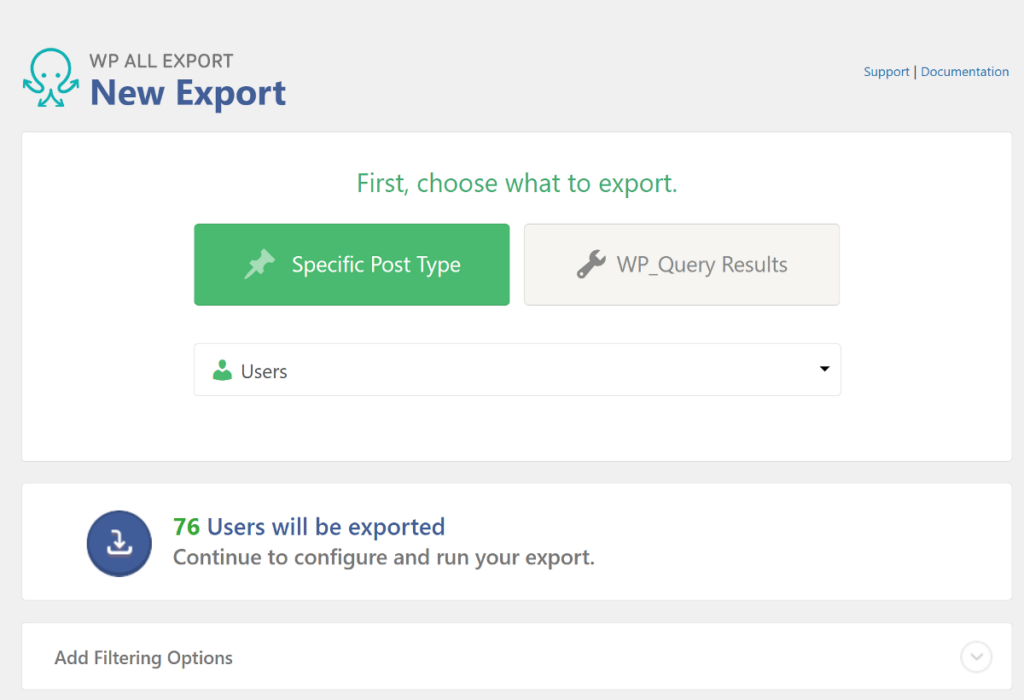
There is also a separate option for WooCommerce Customers, which will exclude general users and only include users with the user role of Customers. For this tutorial, we want to export and migrate both WordPress users and customers, so we’ll select Users as the export type.
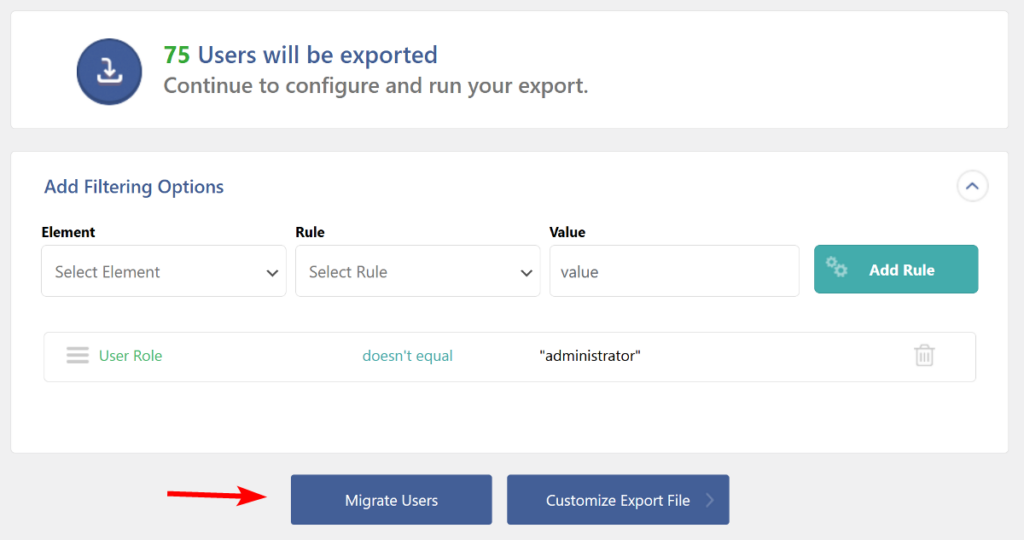
After selecting the export type, WP All Export will scan your database and display the total number of users on your website. If you do not want to export all users, WP All Export includes filter options to selectively exclude specific users. Each filter rule consists of three criteria; you can choose the first two values from the dropdown menu and enter the actual value you want to filter for the third one.
For example, if you only want to export users with the “Subscriber” and “Customers” roles while excluding administrators, your filter should look like this.

WP All Export also allows you to customize the export file by selecting specific user fields to include. Since we are migrating user data, we will skip this step and include all available user data.
Once you’ve applied your filters, click the Migrate Users button at the bottom to proceed to the next step.
Step 2: Download the User Data Bundle File
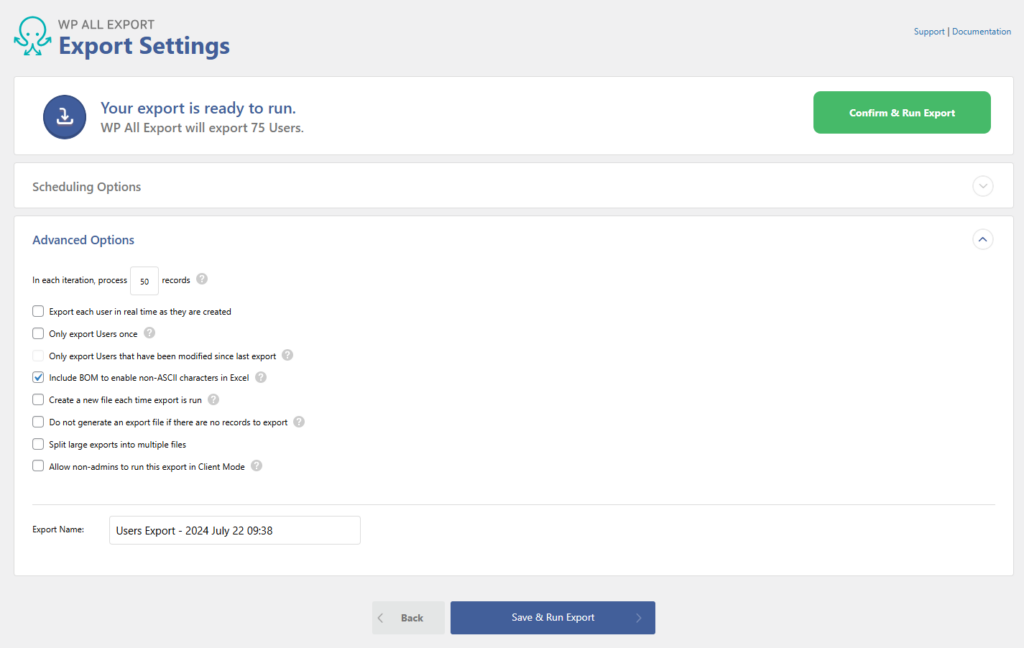
WP All Export will skip to the Export Settings page, where you can configure automatic scheduling for recurring exports and advanced options, such as exporting users in specific batches or splitting the export file into multiple files.
After finalizing your settings, click Confirm & Run Export to start the export process. WP All Export will take a few minutes to complete the export.
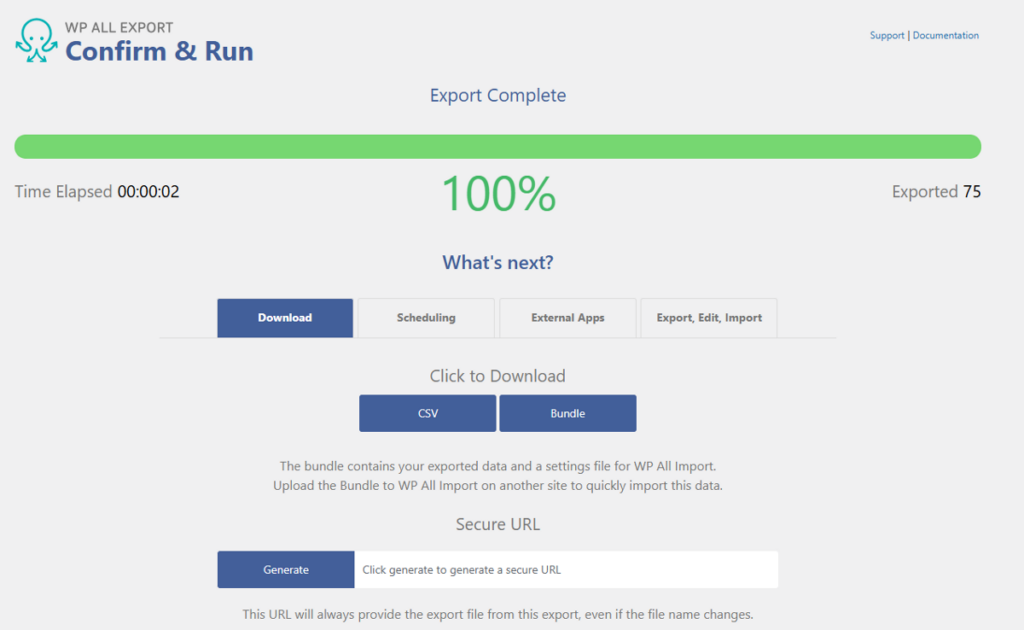
Upon completion, you’ll get two options to download your user data. Click the blue Bundle button to download a zip file containing your exported WordPress users alongside a settings file for WP All Import.
Step 3: Start a New User Import on the Destination Site
Once you have the user data from the source site, navigate to All Import > New Import on your destination site.
WP All Import will present you with three options to load the user data. Since you’ve downloaded the user data to your local computer, select the option to upload the bundle zip file that was previously exported.
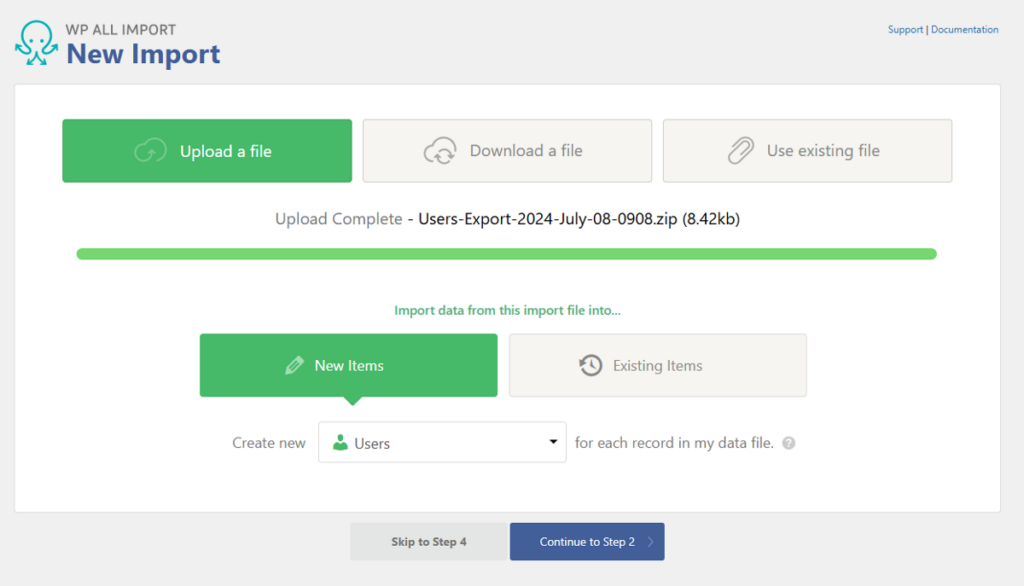
As the bundle zip includes a template file for WP All Import, it will automatically select Users as the Import type under New Items.
Next, you can click Continue to Step 2 if you wish to customize the import and settings. Alternatively, you can opt to Skip to Step 4 to allow the bundle file to manage the import mappings automatically. For this tutorial, we’ll click the Continue to Step 2 button.
Step 4: Verify the Mapped fields and Run the User Import
On the Drag & Drop page, all import fields and settings will be pre-mapped using the template from the zip file, although you can adjust them if needed.
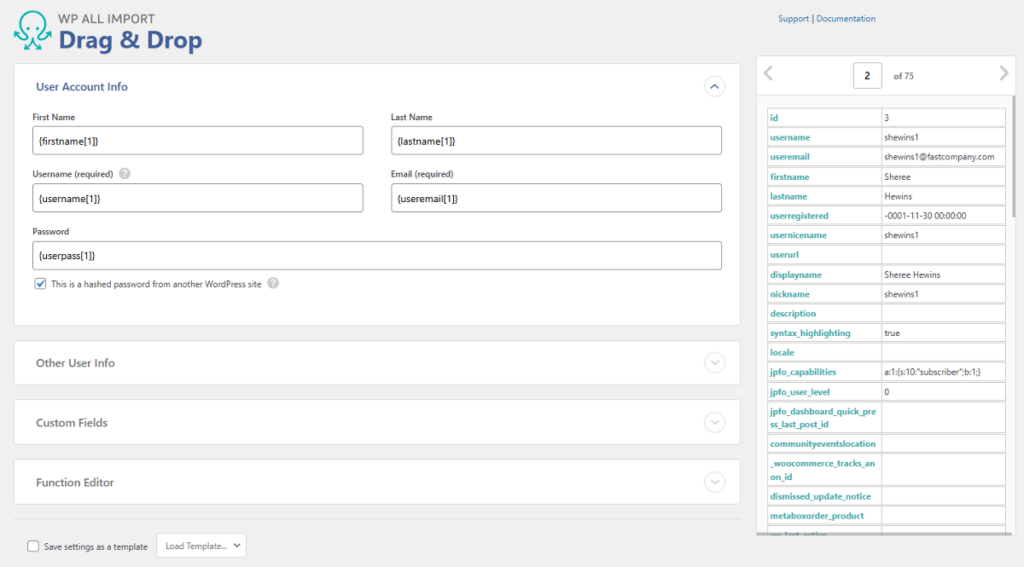
Since the import file is an export from another website, the user password field contains hashed passwords. You can check the box below the password field to inform WP All Import that the passwords in your import file are hashed.
Once you have verified that all fields are properly mapped, click the Continue to Step 4 button to move to the next step.
The next step is the Import Settings page, where you can select the Unique Identifier to help WP All Import differentiate between users and prevent duplicate imports. This will be auto-selected from the import template in the bundle zip, but you can set it manually by clicking the Auto-detect option.
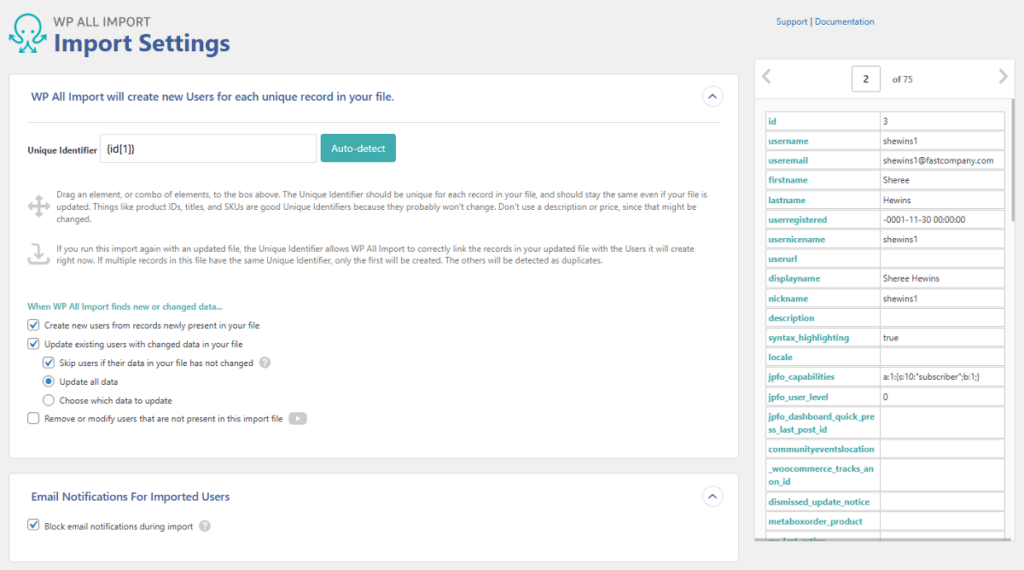
Scrolling further, you’ll find a panel that allows you to block email notifications during the import process. This is important, as it contains the password reset link that we don’t want to send.
On the same page, you can also set scheduling options for recurring imports and configure advanced settings to limit the number of records imported at once.
To finalize the process, click Continue to move to the last step of the migration process. WP All Import will present you with a checklist to verify the import settings before running the import.
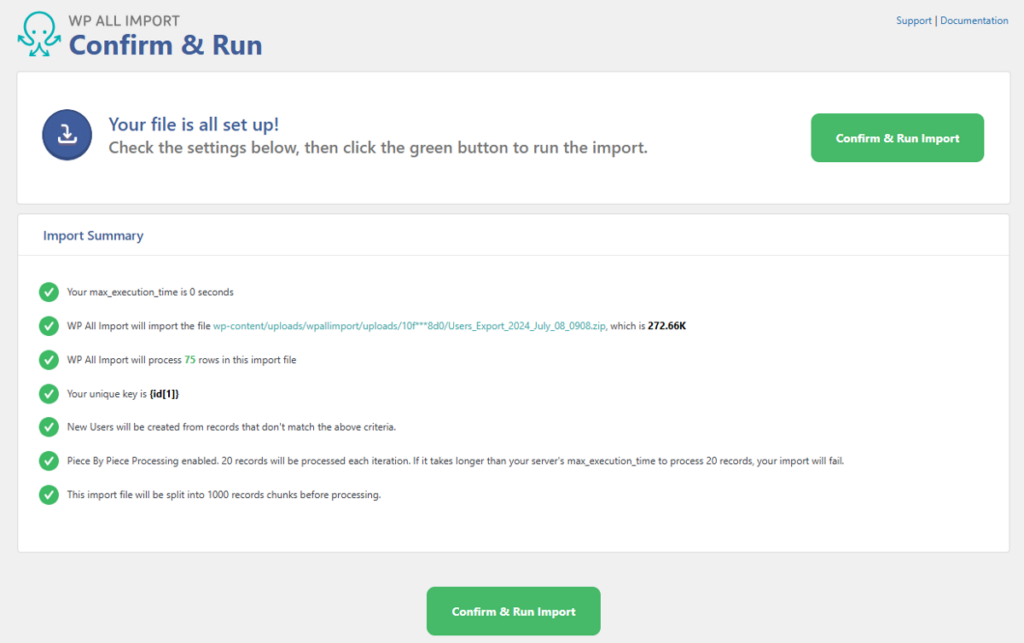
Once you have confirmed all the settings, click Confirm & Run Import to start the process.
You will receive a live log as users are imported one by one. Once the import process is complete, WP All Import will provide a confirmation that includes information on how many users were imported and whether existing users were updated.
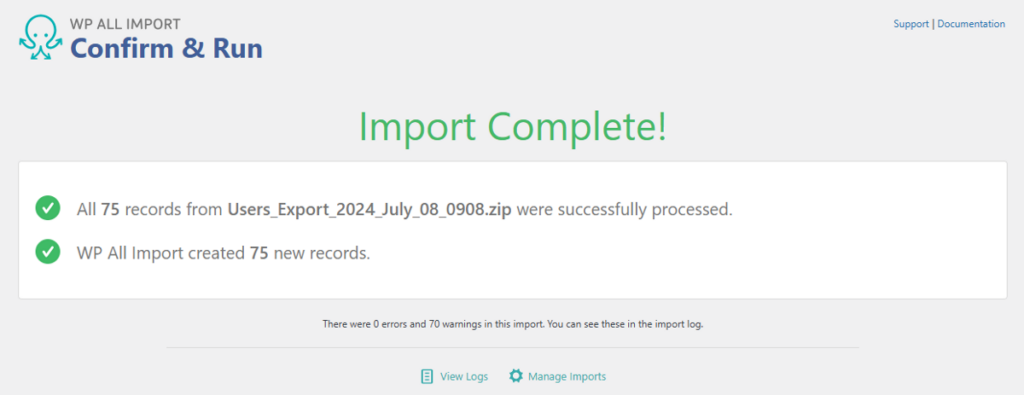
After the import completes, you can verify the user migration by navigating to Users > All Users on the destination site. You can also check individual user profiles to ensure that all user data has been successfully imported.

That’s it! Isn’t it easy to migrate WordPress users and customers using the combination of WP All Export and WP All Import plugins?
Import Export WordPress Users and Customers – Frequently Asked Questions
How Do I Export All Users From WordPress?
Follow these steps to export all WordPress users:
- Go to All Export › New Export and select Users as the export type.
- Configure your export columns using the Drag & Drop interface.
- Apply additional export settings and run the export.
- Download the export file.
How To Import Bulk Users in WordPress?
Any import involving more than one user is technically a bulk import, and here are the steps to bulk import users in WordPress.
- Navigate to All Import › New Import.
- Choose how you want to load your data (upload a file, download from a URL, or use an existing file).
- Select your import file and choose Users as the import target.
- Use the Drag & Drop interface to map incoming data to your WordPress user fields.
- Run the import.
How Do I Export Customer Data From WordPress?
You can use the WP All Export plugin to export all customer data from WordPress. Here’s how:
- Go to All Export > New Export.
- Select to export WooCommerce Customers. Do not set any filters.
- Set up the export by customizing the export file.
- Configure and run the export.
- Download the exported Woocommerce customers.
How Do I Import Customers From CSV to WordPress?
WP All Import supports importing WooCommerce customers from a CSV file and here are the steps to follow:
- Navigate to All Import › New Import.
- Upload your CSV file containing customer data and select Users as the import type.
- Use the Drag & Drop interface to map customer data to your WordPress/WooCommerce user fields.
- Run the import.
