Importing Data into Meta Box Custom Fields: A Complete Guide
Are you looking to import Meta Box custom field data to your WordPress website?
Meta Box is a free WordPress custom fields plugin and framework that lets you customize your website with meta boxes and custom fields.
In this article, we’ll share a detailed guide on how to bulk import data into Meta Box custom fields from an external file.
Table of Contents
- Importing Data into Meta Box Custom Fields – The Basics
- Exploring the Meta Box Custom Field Types
- What File Formats Can I Use to Import My Meta Box Data?
- What If the Import Data Doesn’t Match My Meta Box Field Requirements?
- How Do I Filter Meta Box Imports?
- How Do I Update the Data in My Existing Meta Box Fields?
- How Do I Schedule Meta Box Imports to Run Automatically?
- Can I Import Data into Meta Box Fields Using Other Languages?
- Related Docs
Importing Data Into Meta Box Custom Fields With WP All Import
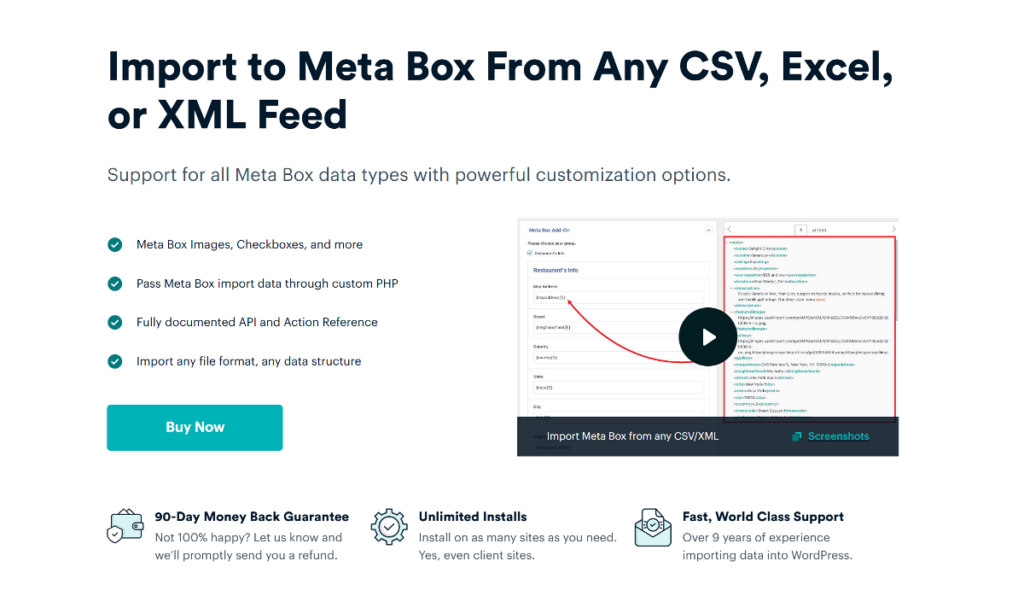
WP All Import is the market leader for importing all types of WordPress and WooCommerce data. It also has a dedicated Meta Box Import Add-On that allows you to quickly and easily import data into Meta Box custom fields.
It comes with many advanced features that make it a top choice for Meta Box import. These features include:
- Support for multiple file formats including CSV, Excel, and XML.
- Drag and drop interface for mapping fields from your import file to Meta Box custom fields.
- On-the-go customization using PHP functions.
- Automatic import of Meta Box data on a fixed schedule.
To get started, you’ll need to install the premium version of the WP All Import plugin along with the Meta Box Import Add-On. Once you’ve installed the plugin, it only takes a couple of minutes to import Meta Box custom fields into WordPress.
Let’s look at the whole import process in detail.
Step 1: Create a New Import
To start, navigate to All Import › New Import and load your import data. In this example, we’re uploading a local file.

You can also use an existing file that’s already on your server or download a file from a URL or FTP/SFTP site.
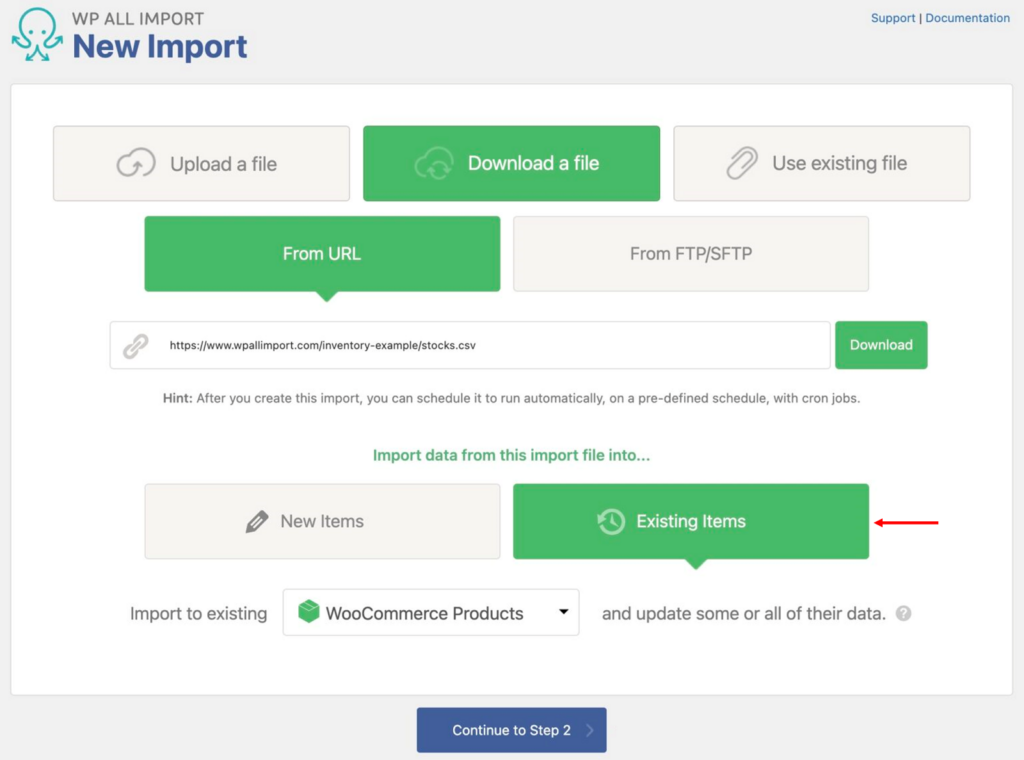
Next, select New Items unless you specifically intend to update the data already in your custom fields, in which case you should select Existing Items. This will impact some of your interface options later in the process.
Finally, select the post type for your import, i.e., the one that contains the Meta Box fields that you’re trying to populate. In this example, we selected the custom post type of Properties.
If your custom fields are used in a site built with a page builder, don’t worry as Meta Box works great with both Divi and Elementor. This means your imported data will integrate cleanly into your builder-based layouts, whether you’re creating property listings, forms, or product showcases.
When you’ve completed these selections, click Continue to Step 2.
Step 2: Review the Meta Box Import Data
The Review Import File screen will appear next. It lets you preview the import data before continuing with the import.
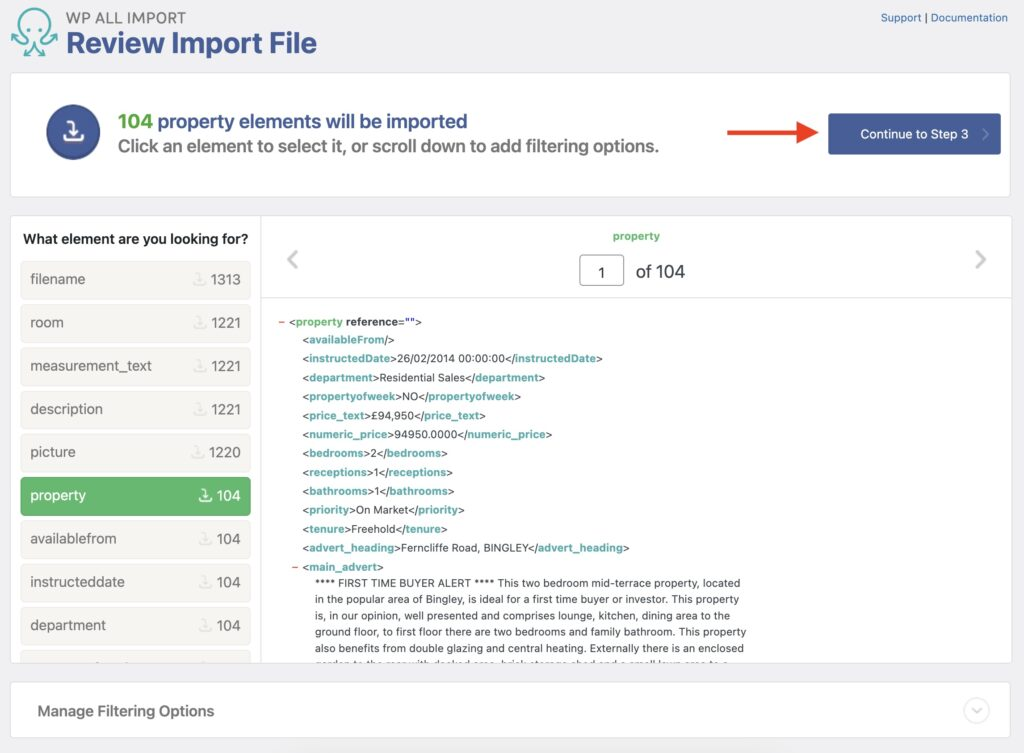
If the data has major problems, fix the file and try again. But if it has only minor layout or formatting issues or is already perfect for your import, click Continue to Step 3.
The reason that you can ignore minor layout and formatting issues is that WP All Import has several powerful features to modify incoming data during the import.
Step 3: Map the Import Data to the Meta Box Fields
The Drag & Drop screen is up next. This screen lets you map incoming data elements, shown on the right, to their corresponding WordPress fields, shown on the left. Here, we’re mapping import data to the main Properties fields.
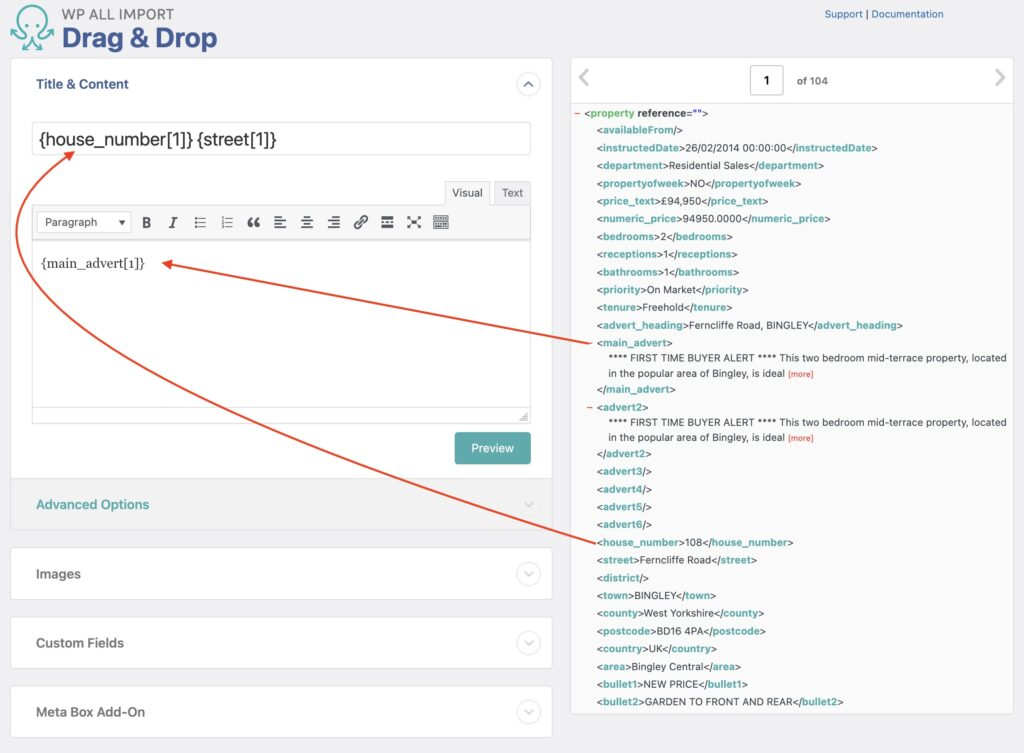
You use the same mapping mechanism for all the Meta Box custom fields. Just scroll down, expand the Meta Box Add-On Section, and drag and drop the custom fields the same way you do standard fields.
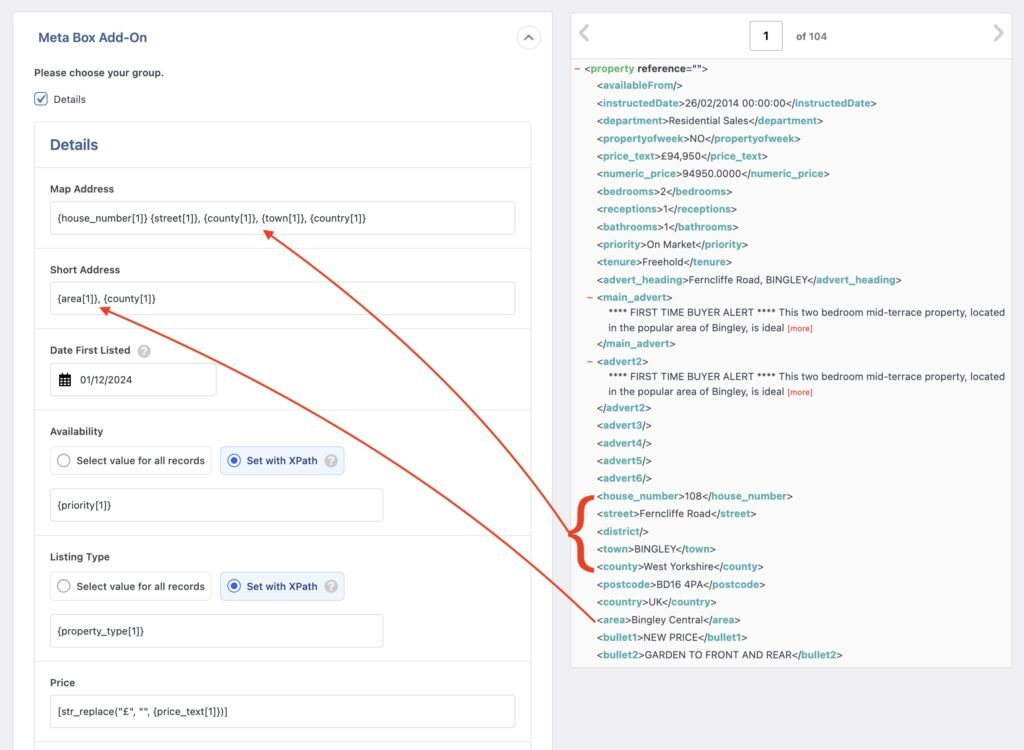
This is one of the great advantages of using WP All Import: it lets you handle fields of every type using the same process.
When you’ve finished mapping your import data, click Continue to Step 4 (not shown).
Step 4: Update the Import Settings
As the name implies, the Import Settings screen lets you control several important settings, starting with the Unique Identifier, which helps WP All Import identify records so that it can perform updates and avoid creating duplicates.
The best way to generate a Unique Identifier is to click the Auto-detect button.
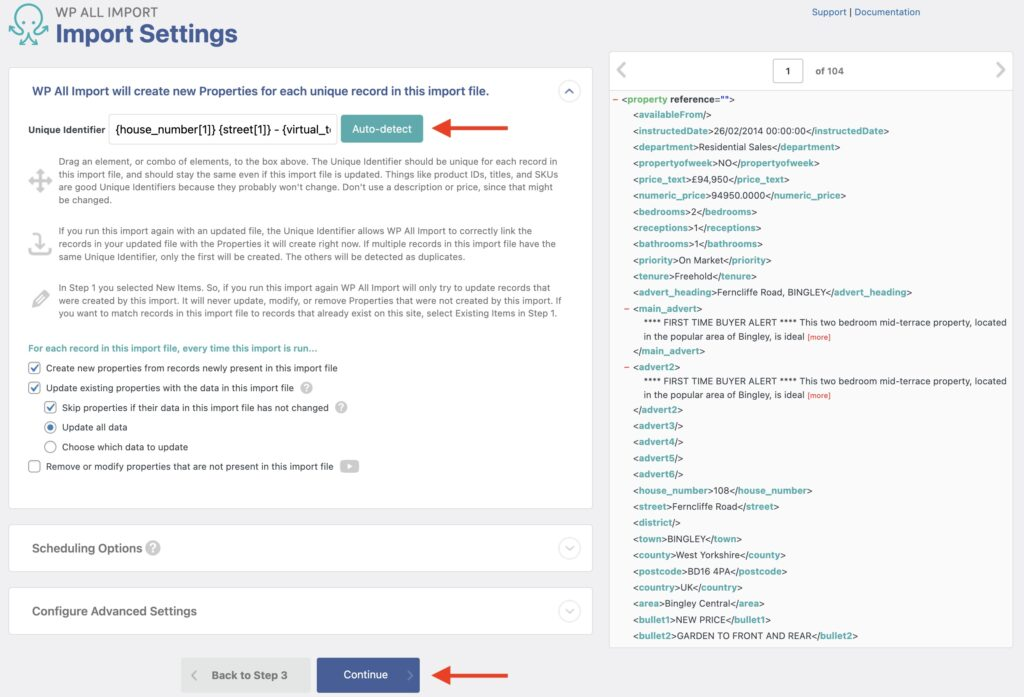
Several more settings are available midway down the screen. These let you select whether an import should create, update, or remove existing records. When updating existing records, you can even specify what happens to each field, though this isn’t shown in the above image.
Farther down the screen, you can use the Scheduling Options section to configure your import to run automatically.
Below this, you can use the Configure Advanced Settings section to control the batch processing size for the import, whether to split your import file into chunks, and other options that may improve performance.
Leave these settings alone for now and click the Continue button.
Step 5: Finish the Import and Verify the Results
The last screen in the process is the Confirm & Run screen, which displays a checklist of what will happen during the import process. If everything looks okay, click the Confirm & Run Import button. If there is a problem, click the or go back to Step 4 link at the bottom to return to the previous step.
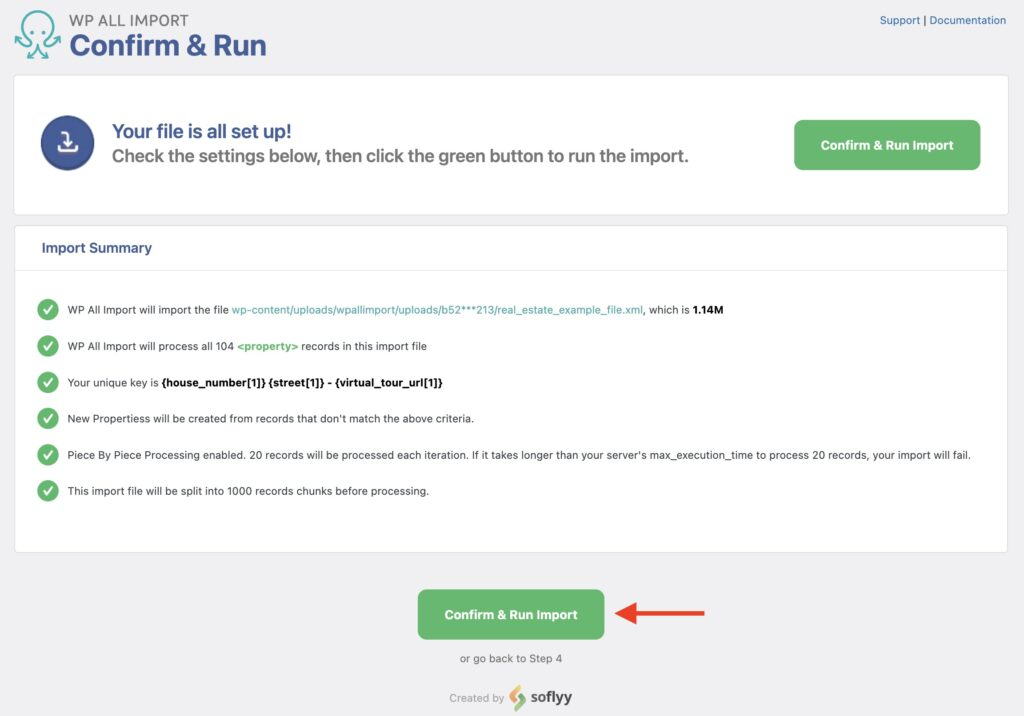
WP All Import will update the screen as soon as the import completes.

Assuming that all went well, your last step should be to verify this in the WordPress interface by checking a few of the new or updated records.
Exploring the Meta Box Custom Field Types
WP All Import supports the following Meta Box custom field types:
Text
Textarea
Checkbox
Checkbox List
Radio
Select
Post
Sidebar
Taxonomy
Taxonomy Advanced
User
File
File Advanced
File Input
File Upload
Click on your field of interest to learn more about importing data into it.
Importing Data into Meta Box Custom Fields – Frequently Asked Questions
What File Formats Can I Use to Import My Meta Box Data?
You can import data from CSV, XML, JSON, Excel, and many other file types. If you’re uncertain, just contact WP All Import’s Support department.
What If the Import Data Doesn’t Match My Meta Box Field Requirements?
It depends on what is wrong with the data. If data elements are missing or contain erroneous data, there is nothing you can do about that except obtain a new import file with the correct data.
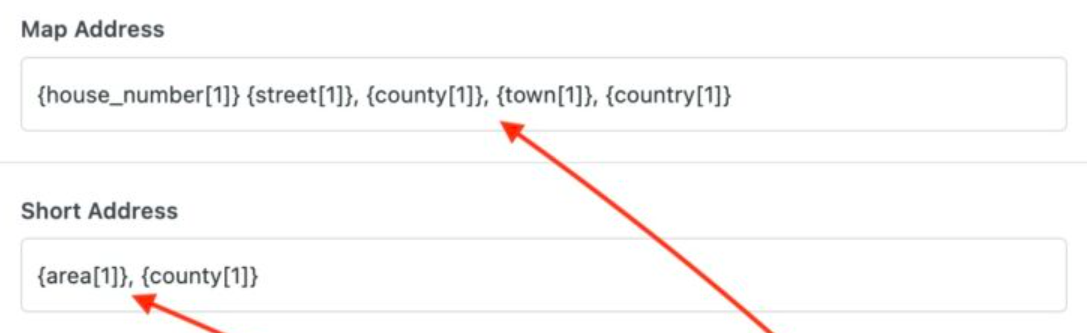
However, if the basic data is okay but lacks the correct layout or formatting, this is typically not a problem, as WP All Import offers several features to help you modify the data during the import.
For example, you can map several incoming data elements to the same field and even insert literal values between or around them:
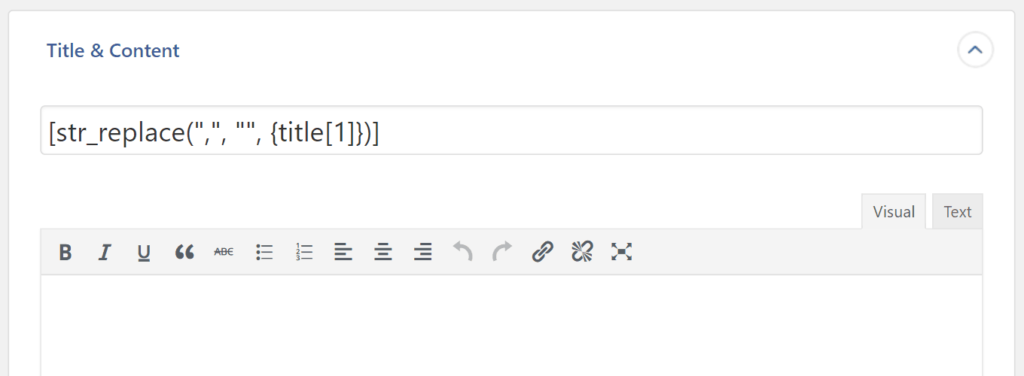
You can also apply standard PHP functions to incoming data elements, such as this str_replace() function that is being used to remove commas from the title data element.
There are many of these standard functions, giving you the ability to modify your incoming data in sophisticated ways.
If this isn’t sufficient, you can even create custom PHP functions in the Function Editor.

You can then apply these custom functions to incoming data elements just like you would a standard PHP function.
There are very few data layout or formatting issues that you can’t address with WP All Import. To learn more, see Using PHP to Extend WP All Import’s Functionality.
How Do I Filter Meta Box Imports?
You can filter your imports in the Add Filtering Options section of the Review Import File screen. Each filter rule consists of three components:
- The incoming data Element that you wish to apply the filter to;
- The Rule;
- The filter Value, if applicable;
Here, we’re including records only where the interestedin element equals “Sales Team”:

You can also combine two or more filter rules by separating them with either the AND or OR operator. In this example, we’re telling WP All Import to filter the import data for any records where the category element contains either “NYC” OR “New York City”:
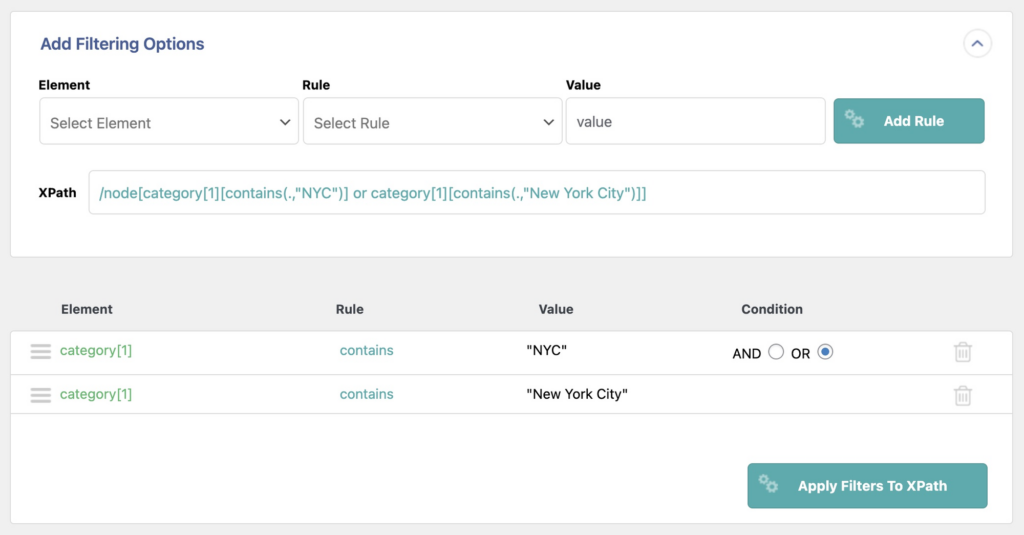
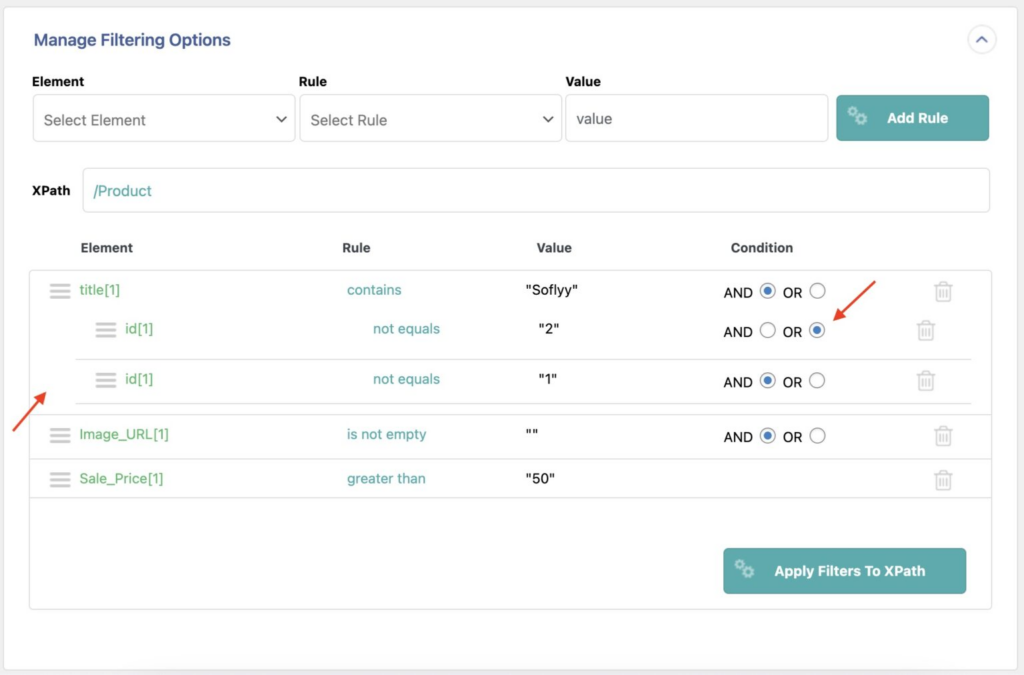
You can build even more sophisticated filters by nesting filter rules, which is the equivalent of using parentheses:
Note that data intended for Meta Box custom fields is not treated any differently in filters than data intended for standard fields.
For more information, see Filtering Import Data with XPath.
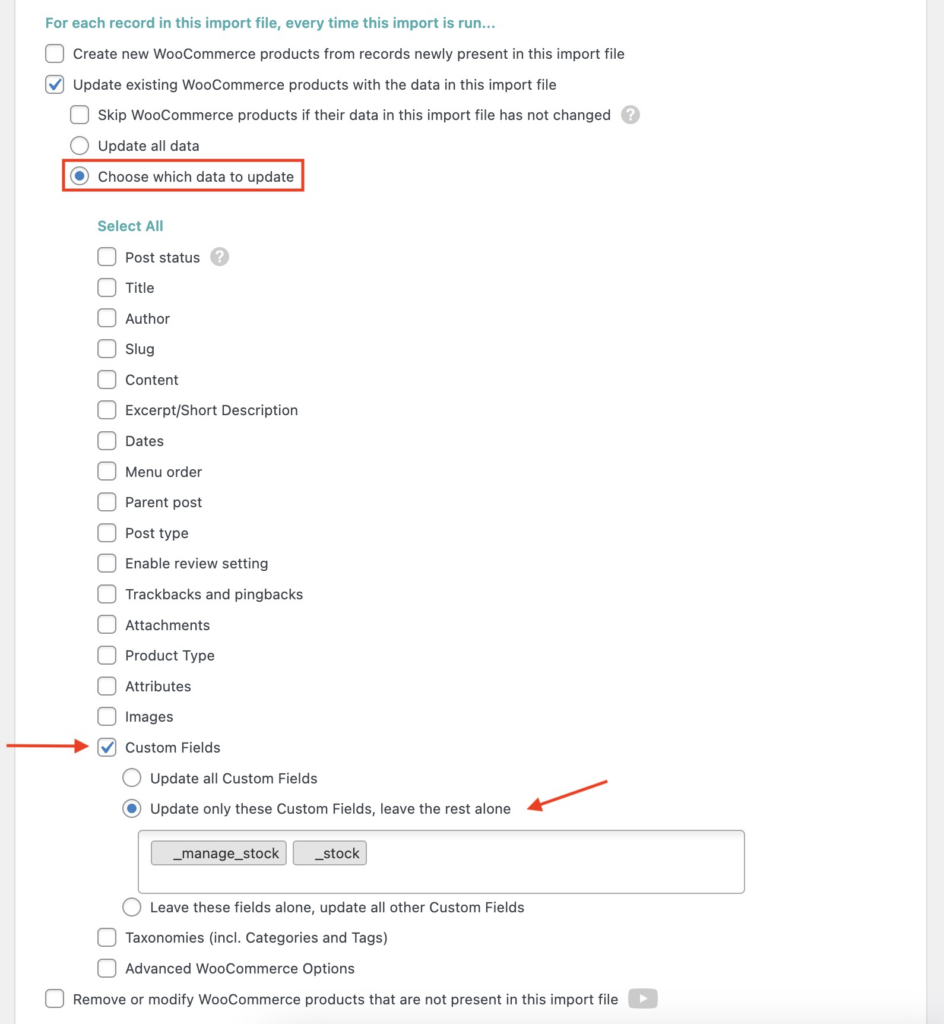
How Do I Update the Data in My Existing Meta Box Fields?
To update data that’s already in your existing Meta Box fields, choose the Existing Items option when creating your import:
When you get to the Import Settings screen, you’ll then see a section that lets you specify how to match the incoming data to your existing records:

Finally, just specify which fields you want to update:
To learn more, see Recurring Imports Overview.
How Do I Schedule Meta Box Imports to Run Automatically?
You have two options to schedule your imports:
- WP All Import’s Automatic Scheduling service;
- manual scheduling.
The Automatic Scheduling service is the most convenient but costs $9 per month. You can configure this in the Scheduling Options section of the Import Settings screen:
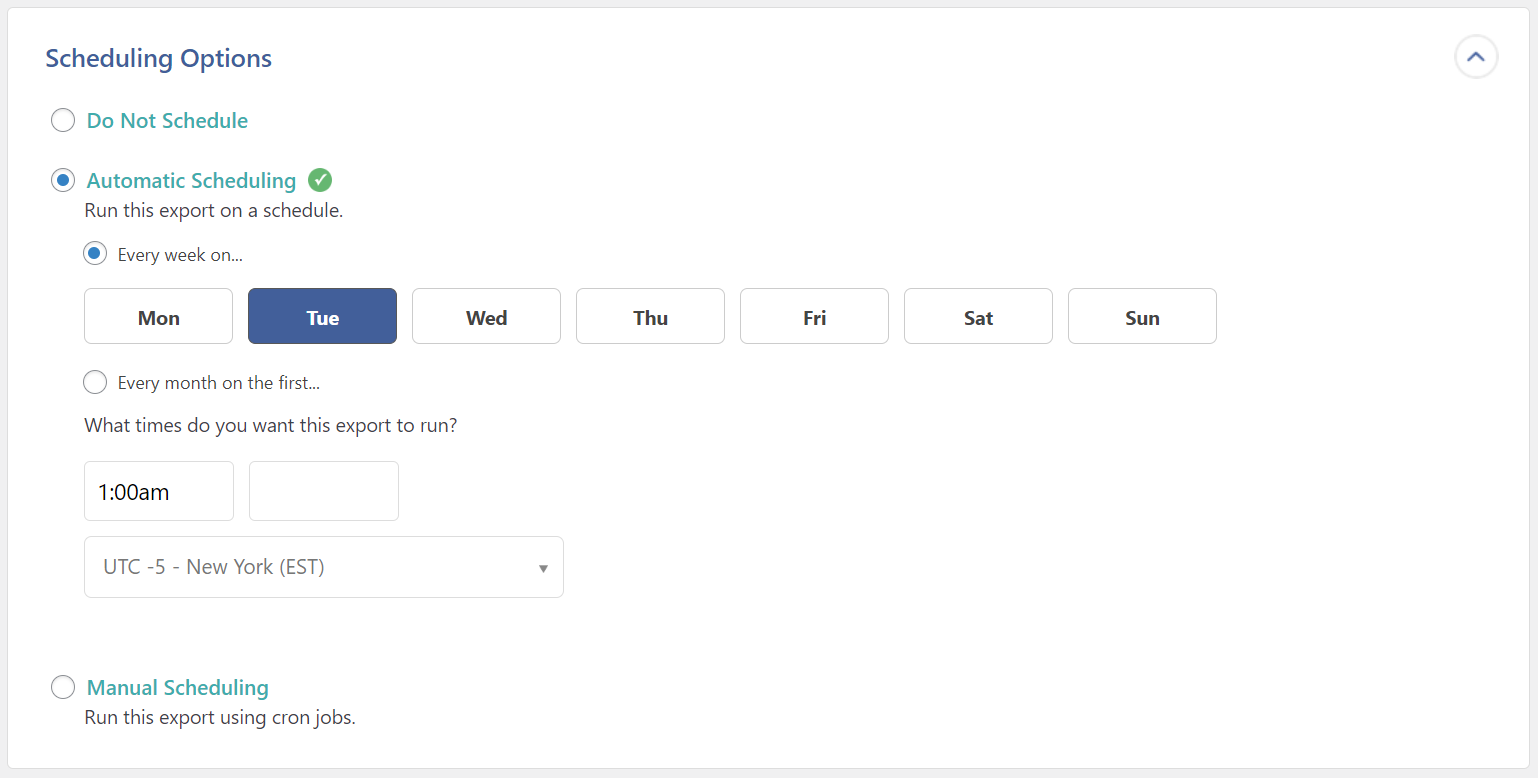
The settings are straightforward. Here, we’ve scheduled our import to run every Tuesday at 1:00 a.m. New York City time. In addition to an easy setup, this service will also verify that your import is completed on time.
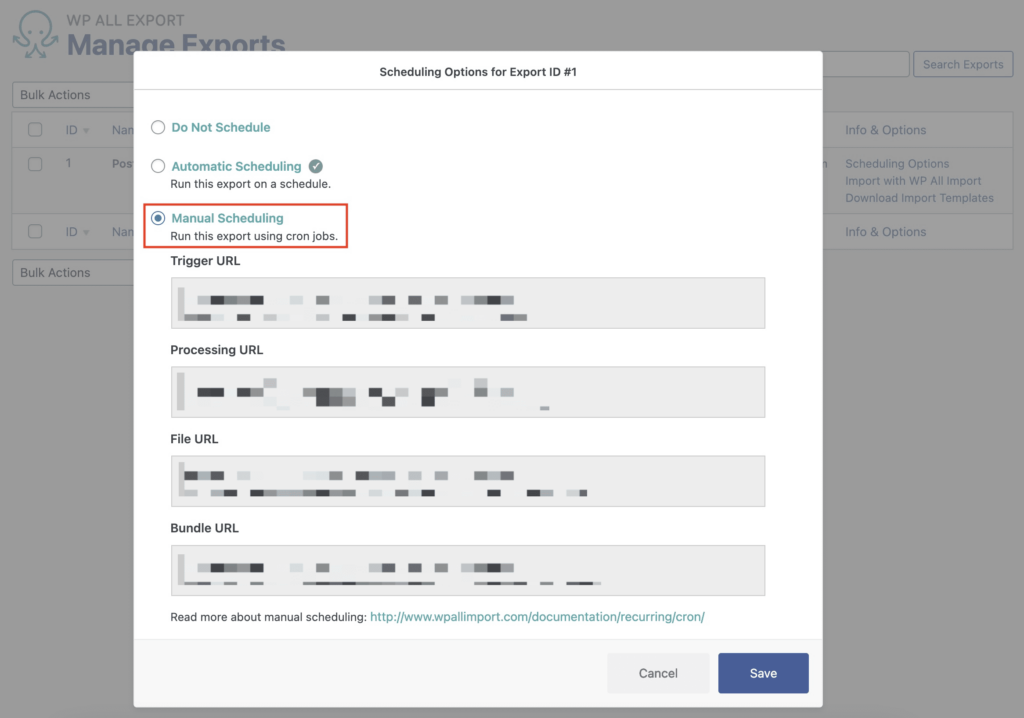
Manual scheduling is free but requires you to manually set up cron jobs on your server:
Scheduling is most often used for recurring imports. To learn more, see Recurring Imports Overview.
Can I Import Data into Meta Box Fields Using Other Languages?
Yes. This is done using the WPML plugin. For detailed instructions, see how to import in multiple languages with WP All Import and WPML.