A Complete Guide to Importing Data into JetEngine Custom Fields
JetEngine is a WordPress plugin that lets you create dynamic content primarily for Elementor and Gutenberg. For this guide, we’re interested in its ability to create custom fields. For more information on these fields and what you can do with them, see JetEngine Custom Fields.
WP All Import is a leading plugin for importing all types of WordPress and WooCommerce data. Their developers have created a JetEngine Import Add-On, which you can obtain here: Import to JetEngine From Any CSV, Excel, or XML Feed. This add-on allows you to import data into JetEngine custom fields.
In this guide, we’ll tell you everything you need to know about using this add-on.
Table of Contents
- Importing Data into JetEngine Fields – The Basics
- Understanding the Available JetEngine Custom Field Types
- Does It Matter What File Format I Use for My Import Data?
- What If the Incoming Data Doesn’t Exactly Match My Custom Field Requirements?
- Can I Filter My Imports?
- Can I Synchronize My Custom Field Data With an Updated Import File?
- Can I Schedule Updates to Run Automatically?
- Does the JetEngine Import Add-On Support Multilingual Imports?
- Related Docs
Importing Data into JetEngine Fields — The Basics
Step 1: Create a New Import
Go to All Import › New Import and load your import file. In this example, we’re loading a file locally:
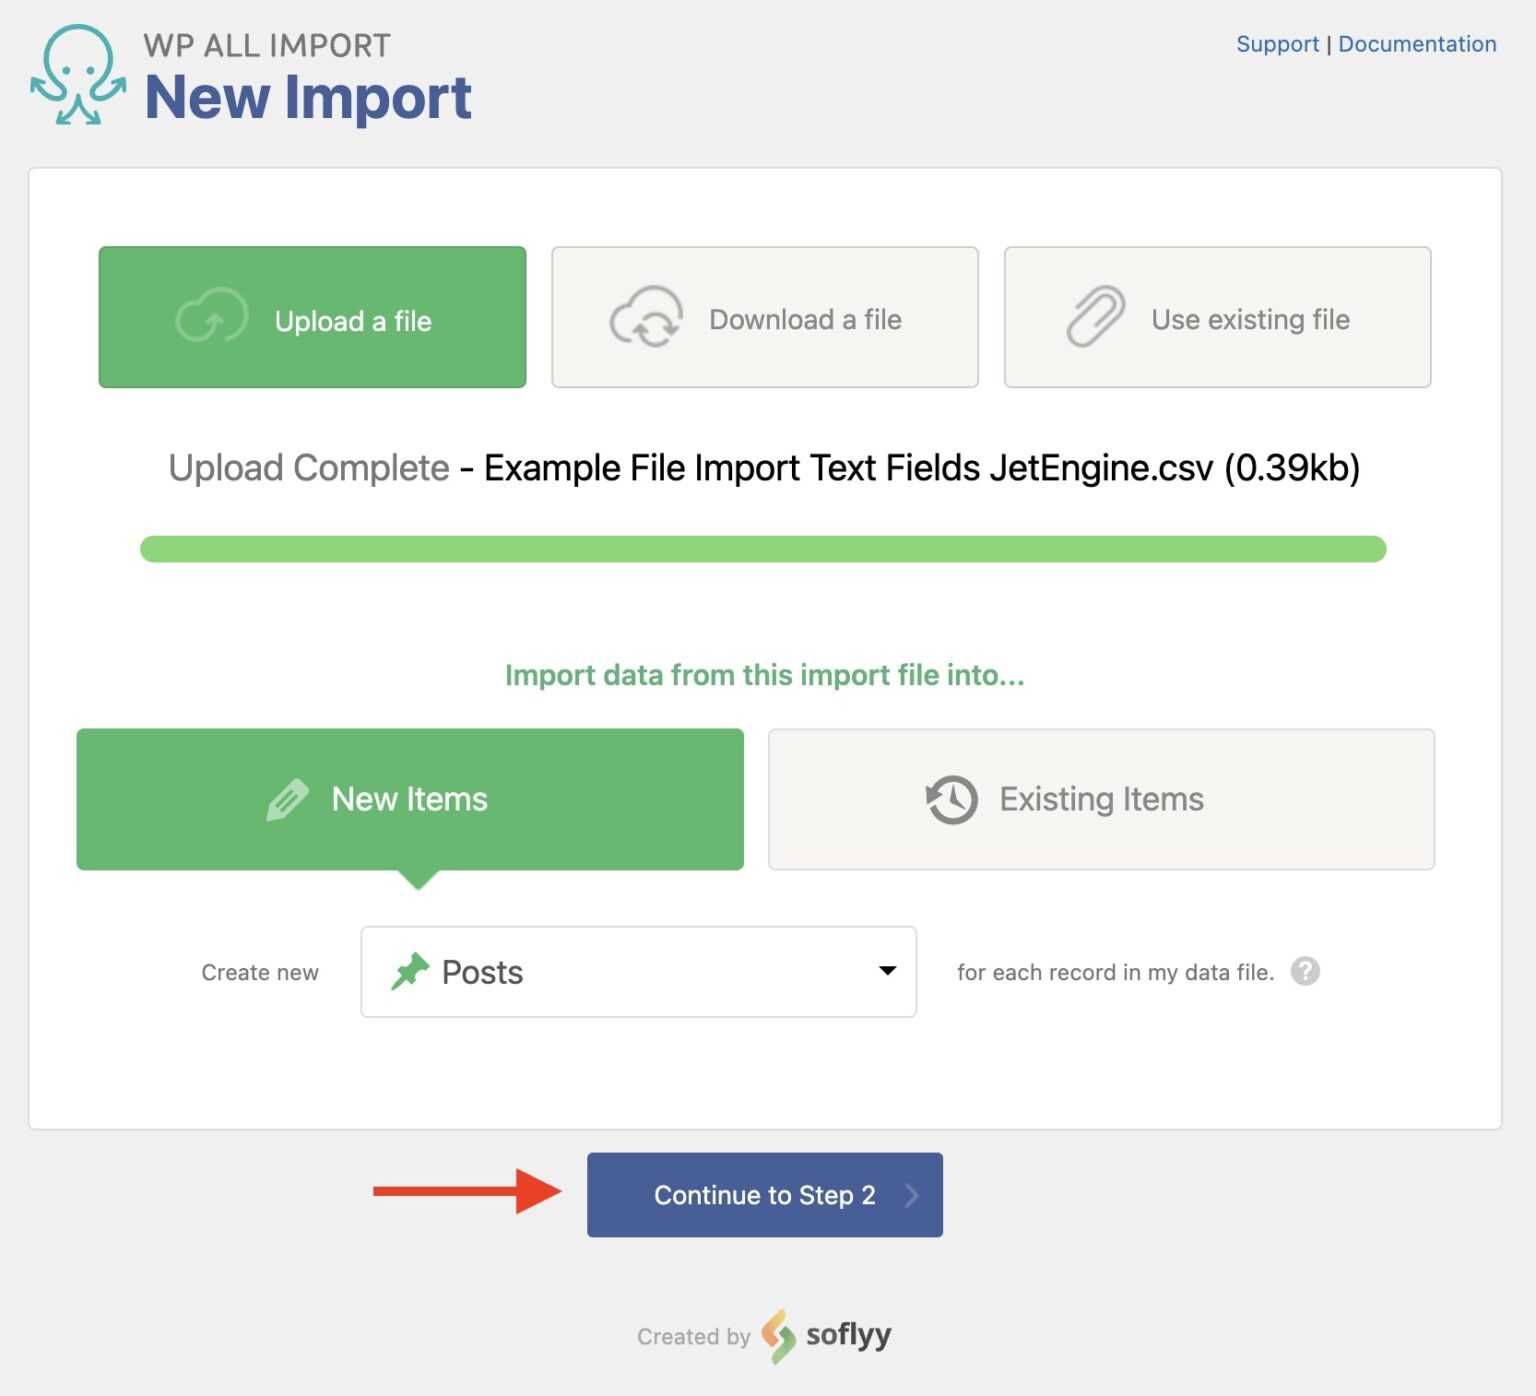
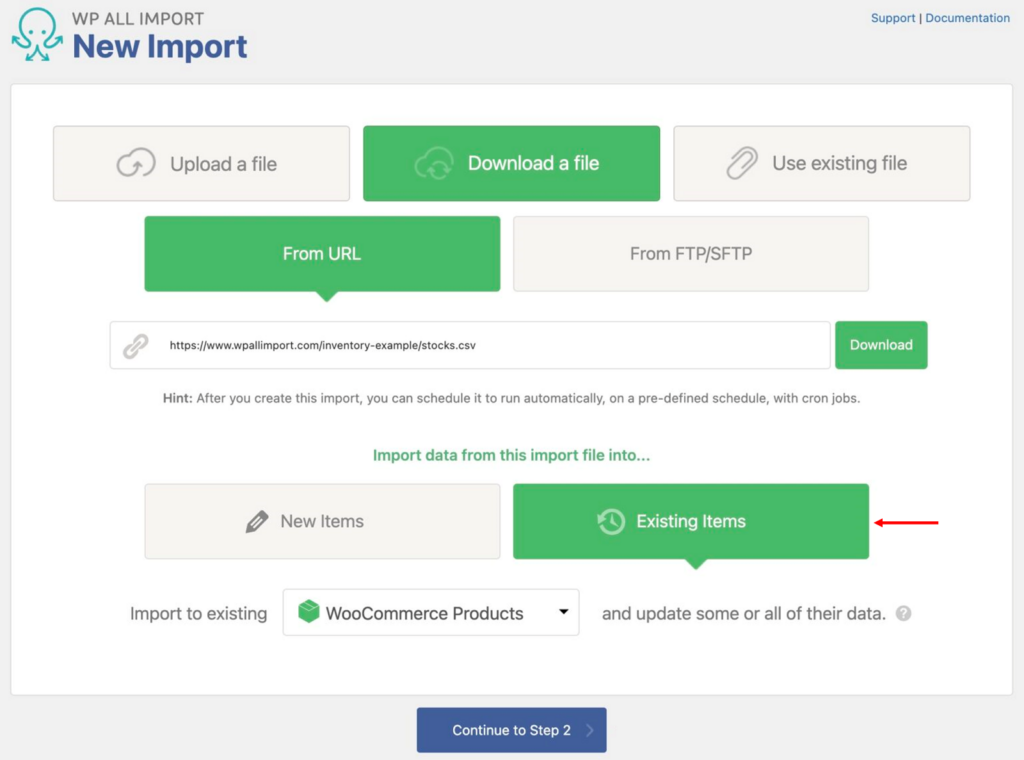
You can also download your file from a URL or FTP/SFTP site or load an existing file that you’ve previously used with WP All Import (i.e., typically the same file name but with updated data)
In the lower half of the New Import screen, choose Existing Items if you’re trying to update records that are already on your site. Otherwise, select New Items.
Finally, choose the post type that you’re targeting for your import, i.e., the one that contains the JetEngine fields that you wish to populate. For this tutorial, we’ve selected Posts.
When you’ve finished all of the above, click Continue to Step 2.
Step 2: Check the Import Data
The Review Import File screen will appear next. This screen helps you confirm that the import file’s content is acceptable.

If something is fundamentally wrong, fix the file and try again. Don’t worry if the column layout isn’t ideal or the data contains minor formatting problems. WP All Import offers several ways to modify incoming data on the fly.
If everything checks out, click Continue to Step 3.
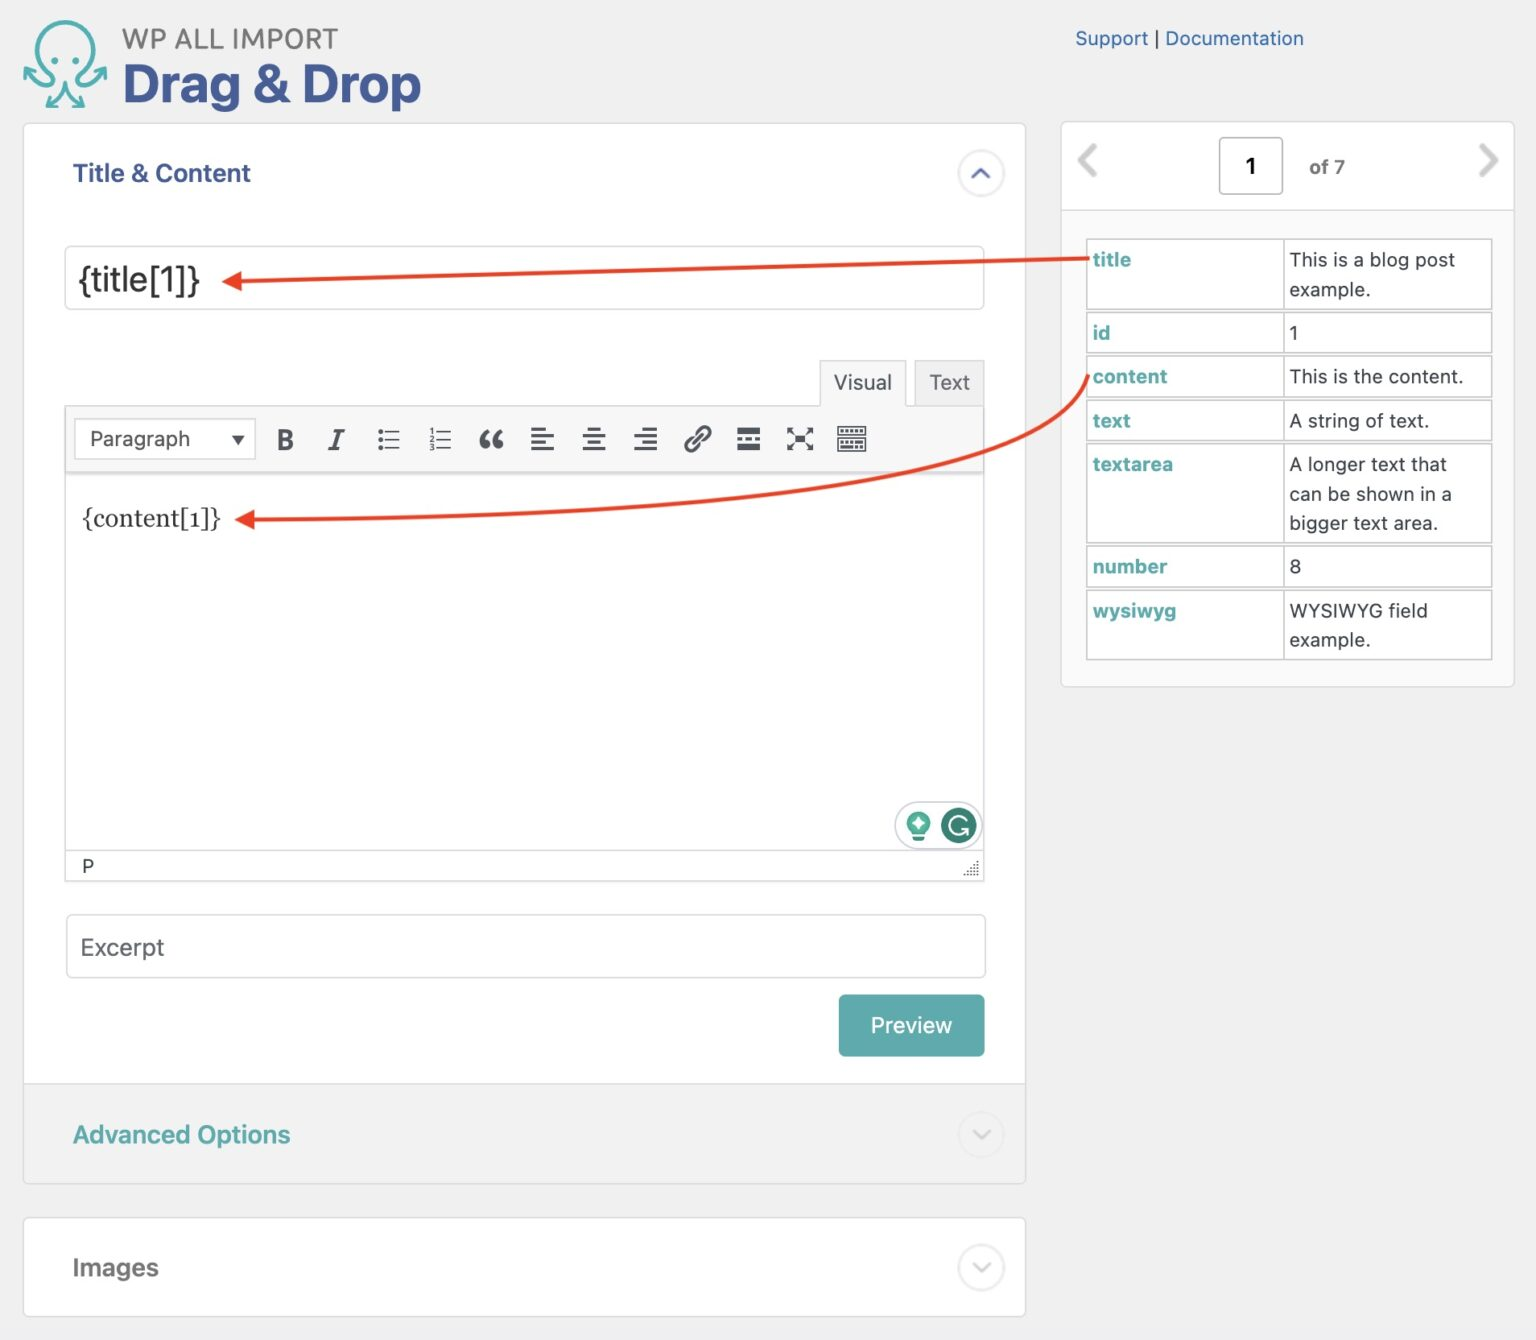
Step 3: Map the Incoming Data Elements to the JetEngine Fields
Next up is the Drag & Drop interface, which lets you drag and drop import data elements from the panel on the right to the WordPress fields on the left.
If you scroll down this screen, you’ll see the JetEngine Add-on section:
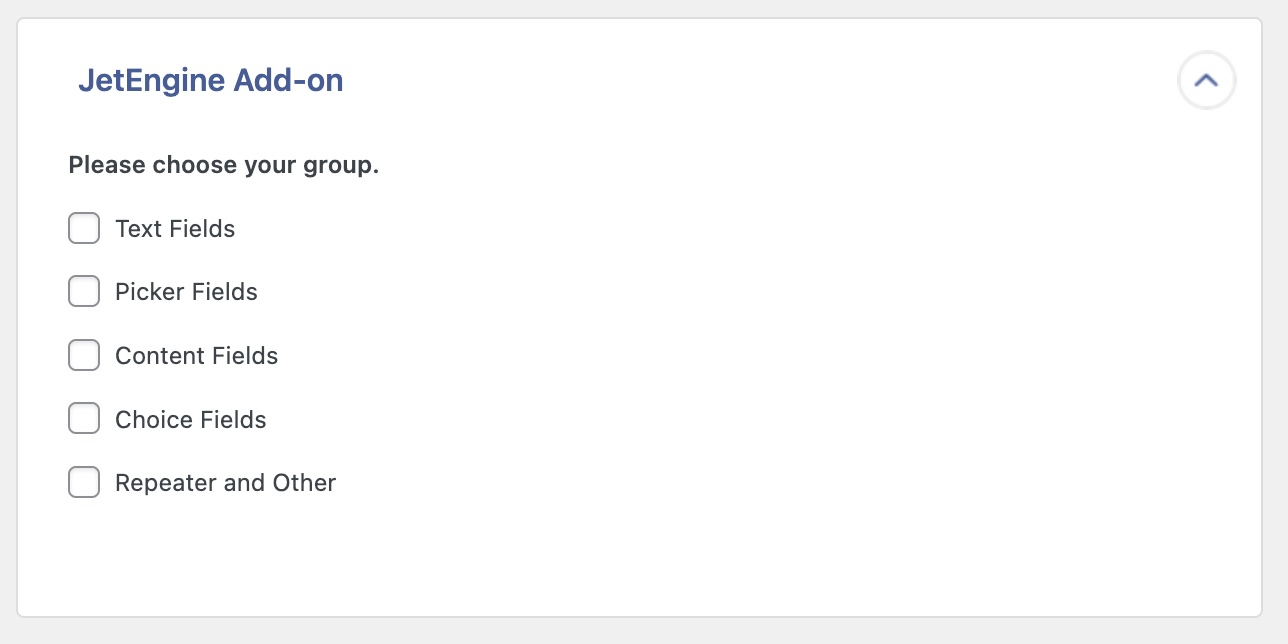
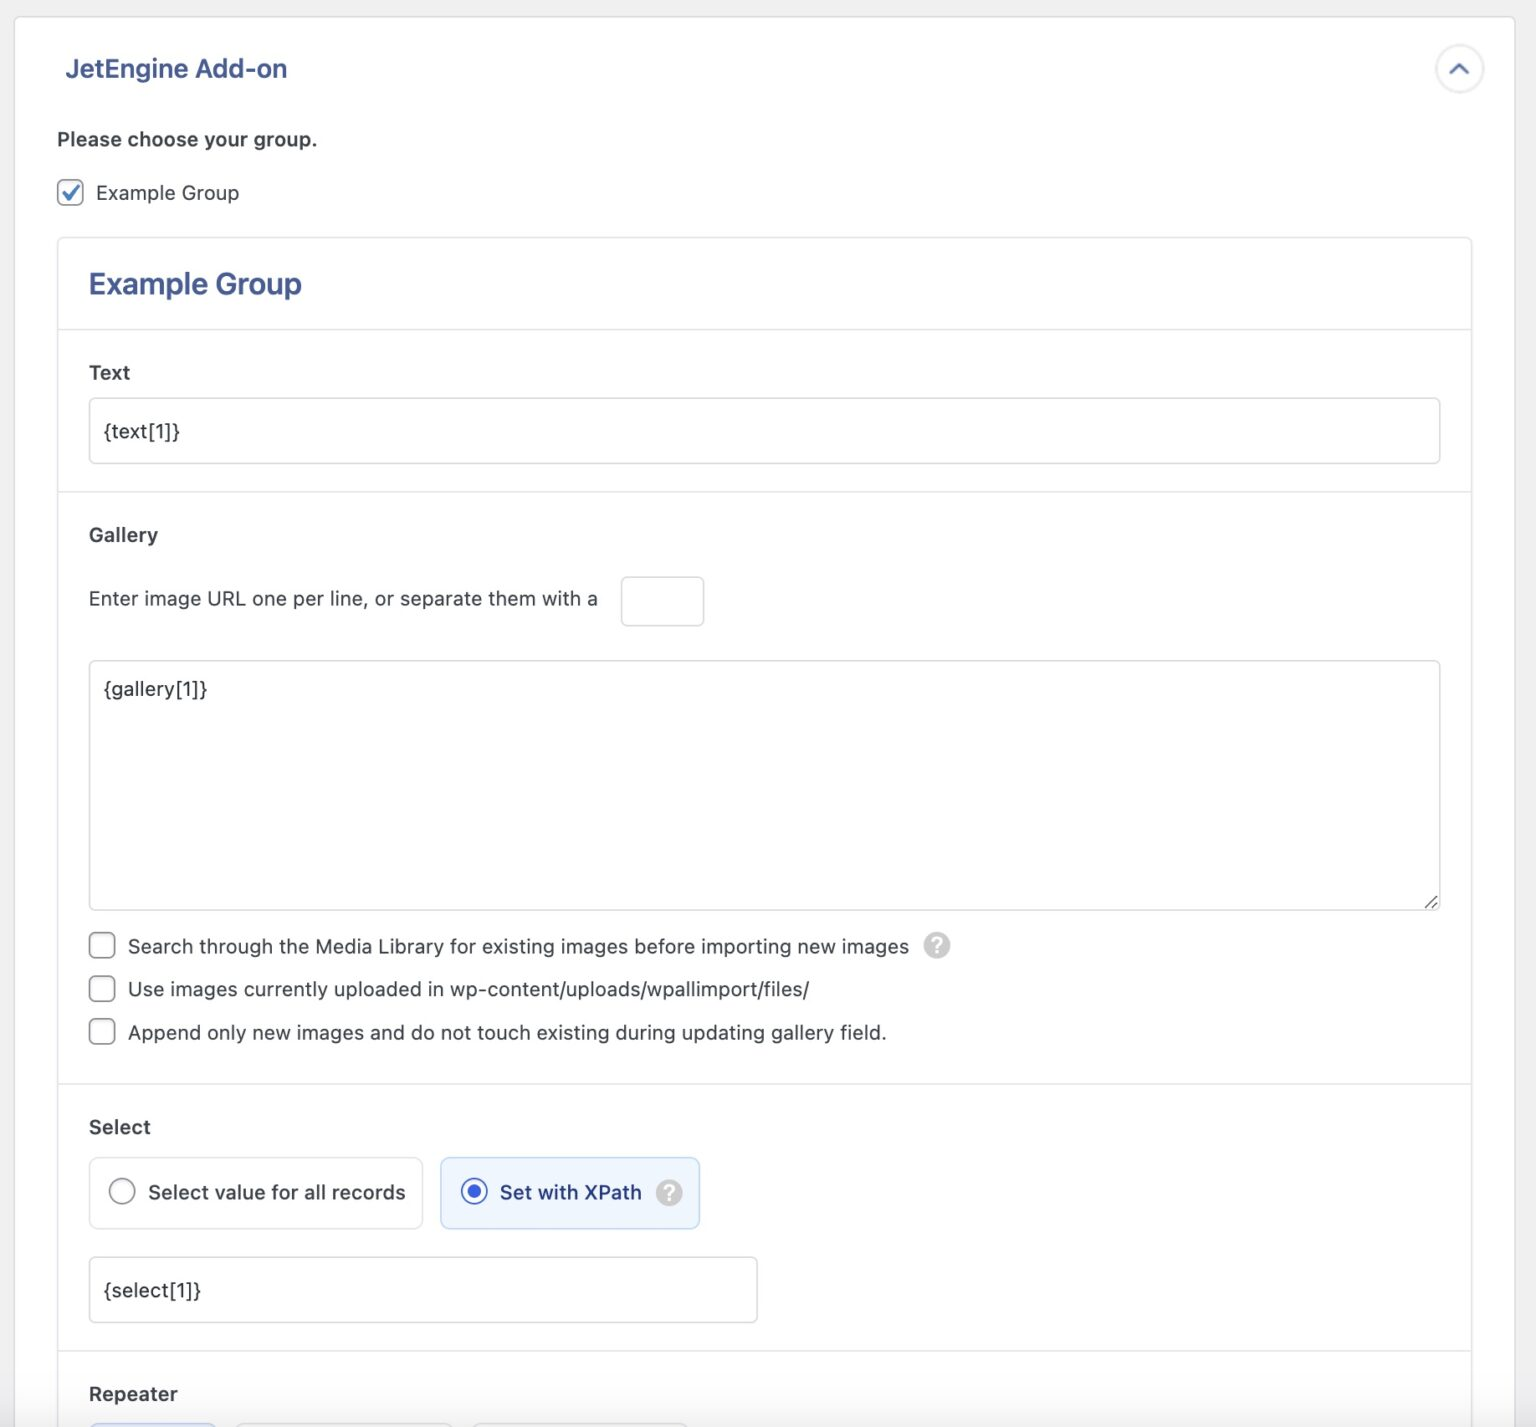
Select the field groups that contain the custom fields you wish to populate. When you do this, each group will expand to display its fields. You can then drag and drop import data elements into these fields the same way that you do for regular WordPress fields:
When you’ve mapped all your import data, click Continue to Step 4 (not shown).
Step 4: Configure the Import Settings
The next screen helps you configure key import settings, beginning with the Unique Identifier. WP All Import uses this identifier to update existing records and avoid the creation of duplicate records.
You can create the Unique Identifier yourself, or you can click the Auto-detect button to have WP All Import do it for you, which is the preferred option:
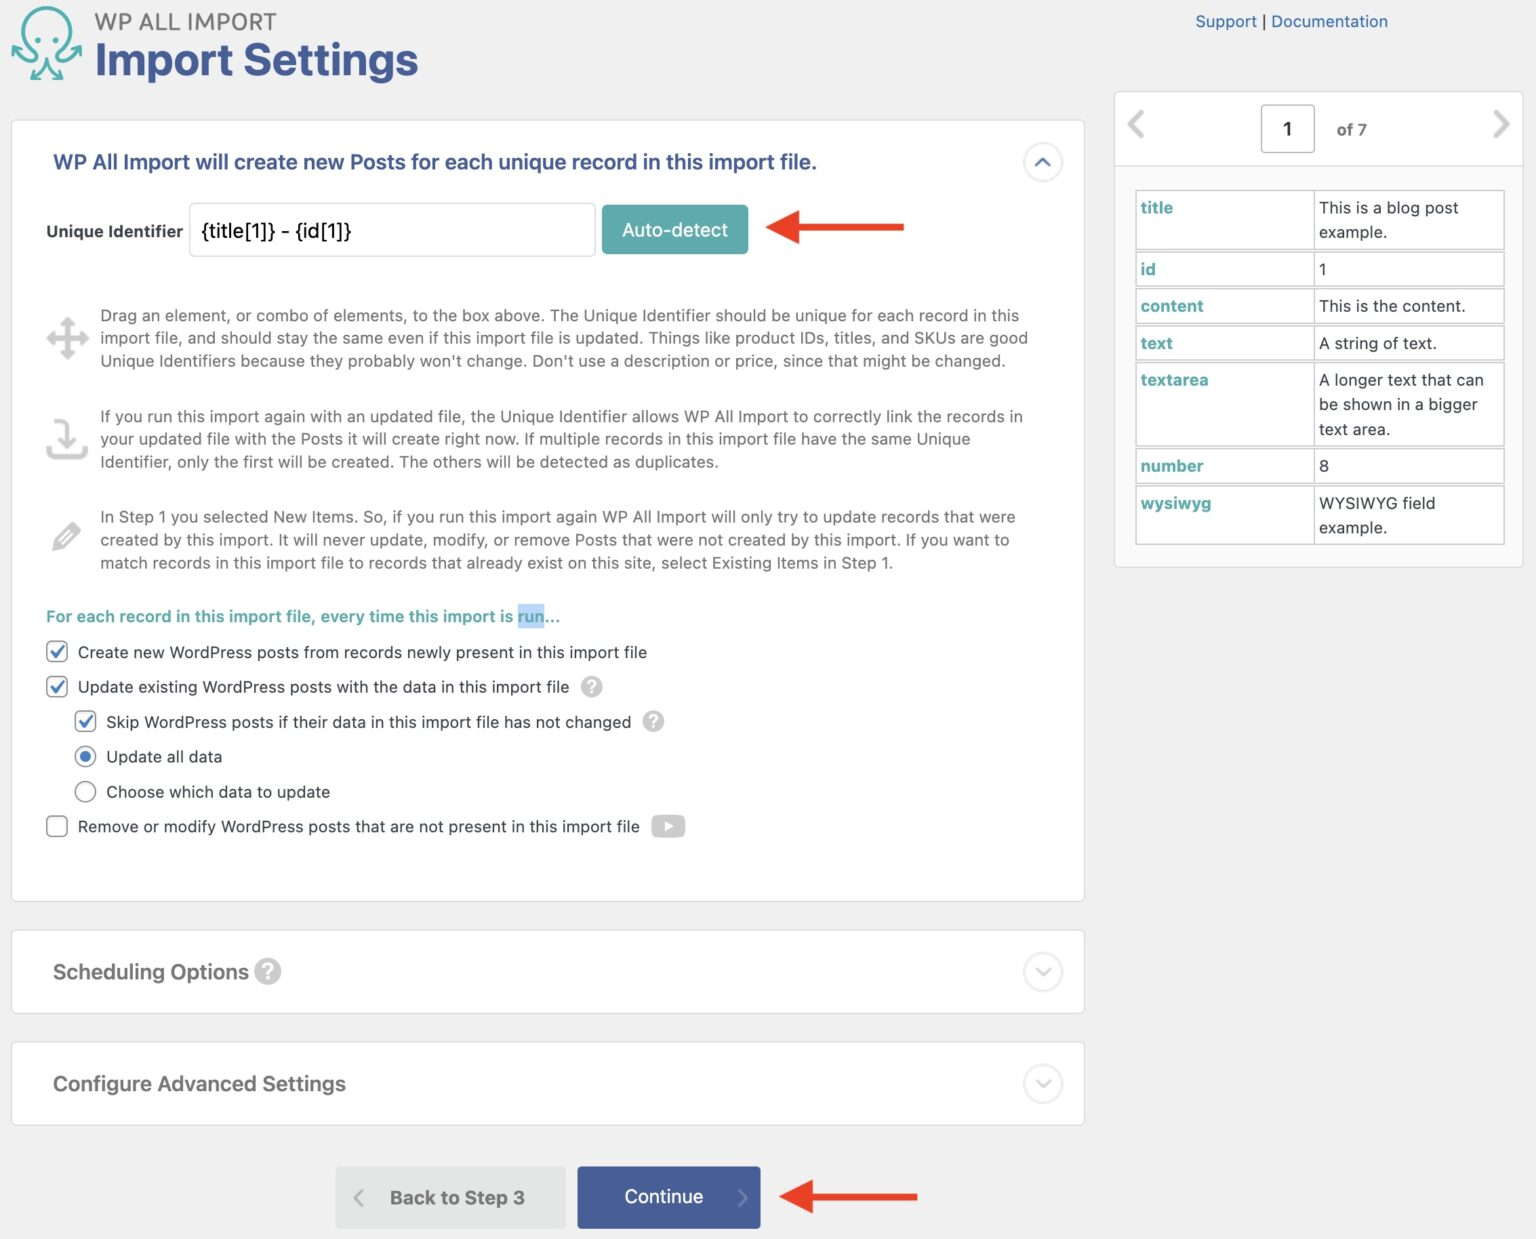
Midway down the screen, you’ll find several options that let you control whether the import should create, update, or remove existing records. If you decide to update existing records, you can control what happens to each field (not shown).
Near the bottom of the screen, the Scheduling Options section lets you schedule your import to run automatically.
Finally, the Configure Advanced Settings section lets you specify the batch processing size for the import, whether to split your import file into chunks, and other performance-related features.
Leave these settings alone for now and click the Continue button.
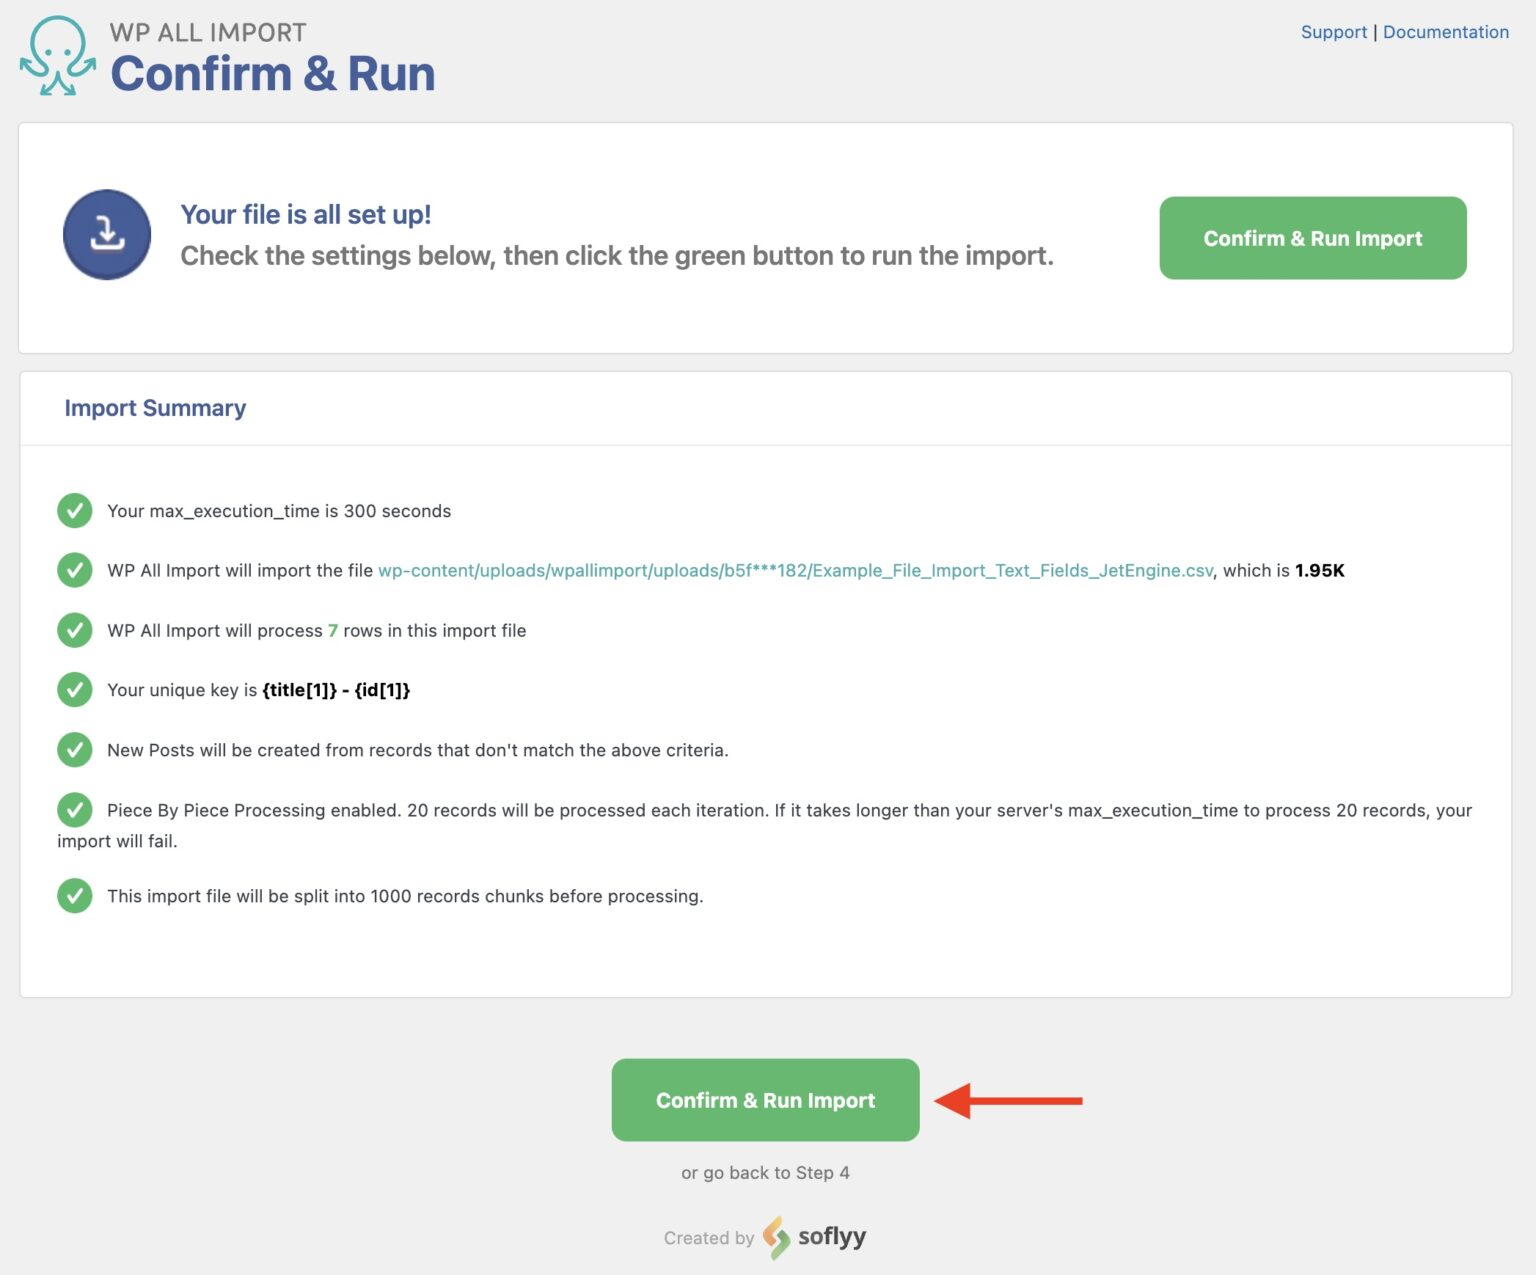
Step 5: Complete the Import and Check the Results
The Confirm & Run screen will appear next. This screen provides an Import Summary that describes the planned actions. If something looks wrong, click the or go back to Step 4 link at the bottom to make corrections. Otherwise, click the Confirm & Run Import button to launch the import:
Once the import finishes, WP All Import will update the screen:
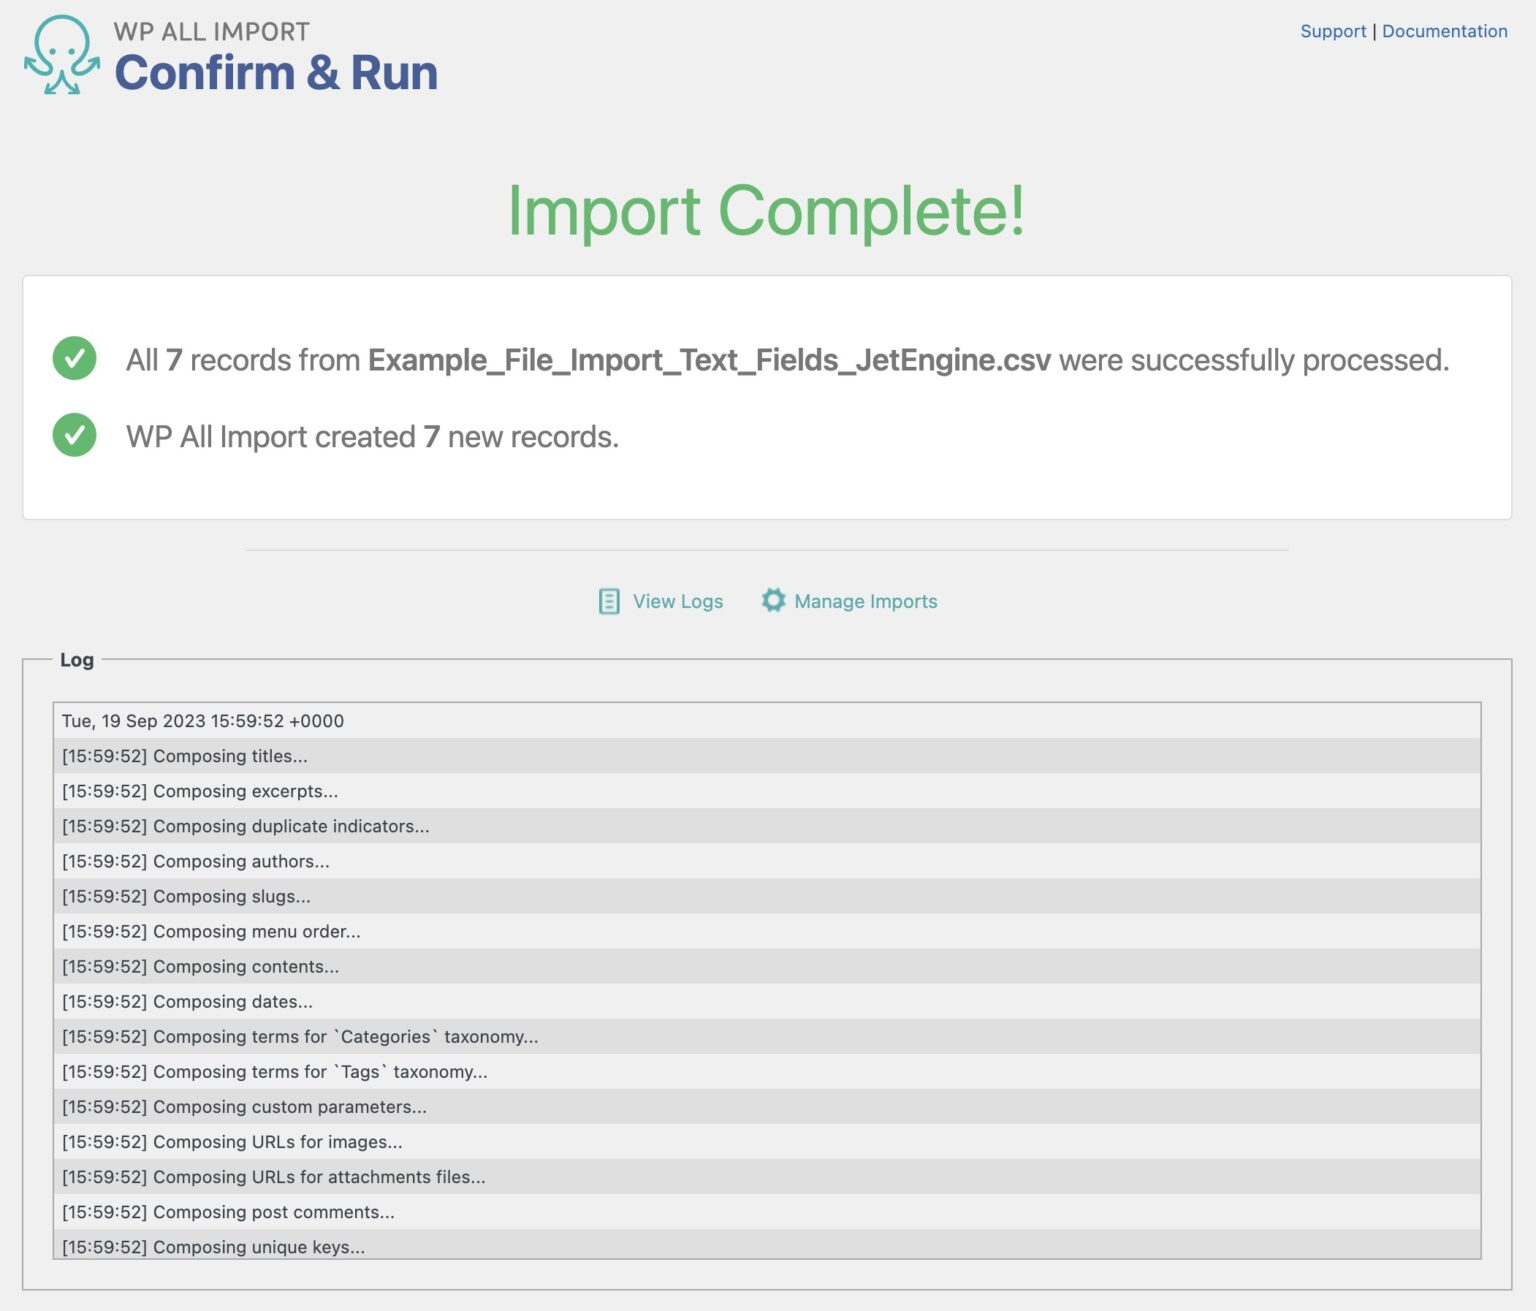
Even if the import is successful, you should check a few of your new or updated records through the WordPress interface to verify that everything went as expected.
That’s how you perform a basic import of data into JetEngine custom fields!
Understanding the Available JetEngine Custom Field Types
WP All Import supports the following JetEngine custom field types:
To learn more about importing data into each field type, click it.
If you want to see the import details for all the custom field types in one place, see Import Details for Each JetEngine Custom Field Type.
Does It Matter What File Format I Use for My Import Data?
Generally not. WP All Import can import data from CSV, XML, JSON, Excel, and many other file types. If you’re uncertain, just contact their support department.
What If the Incoming Data Doesn’t Exactly Match My Custom Field Requirements?
This is not a problem. WP All Import offers several methods of modifying data on the fly, i.e., during the import itself.
First, you can map multiple incoming data elements into the same JetEngine custom field and even inject literal values before, after, or between elements:
You can also apply standard PHP functions to incoming data elements. Here, we’re using the PHP function str_replace() to remove all commas from an import data element:
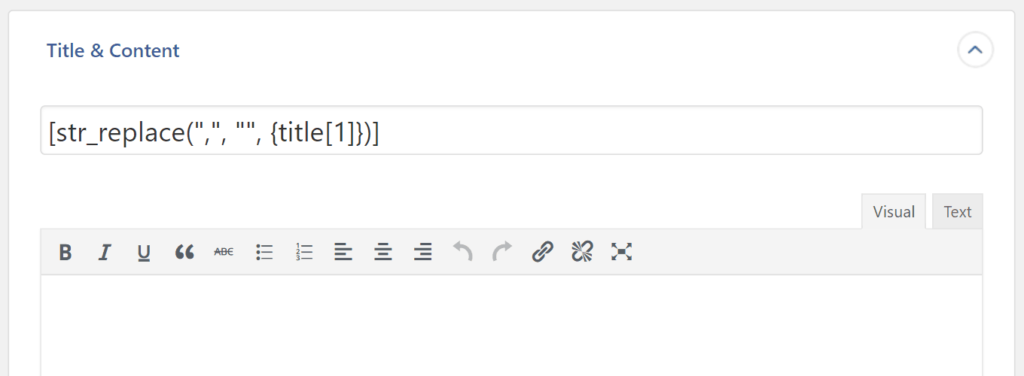
There are scores of standard PHP functions available to help you apply a broad array of modifications.
Not powerful enough? How about creating your own custom PHP function directly from the interface:

You can then use this custom function the same way that you use a standard PHP function.
With these capabilities, you should be able to handle most field formatting issues without having to modify the import file.
For more information, see Using PHP to Extend WP All Import’s Functionality.
Can I Filter My Imports?
Yes. Filtering occurs in the Add Filtering Options section of the Review Import File screen. Filters consist of one more filter rules, and every filter rule consists of three components:
- The incoming data Element that you wish to apply the filter to;
- The Rule;
- The filter Value, if applicable;
In this example, we’re filtering the import for only those records where the interestedin element equals “Sales Team”:

Note that filter rules can be applied to data elements belonging to the parent post type, a JetEngine custom field, or any combination of the two.
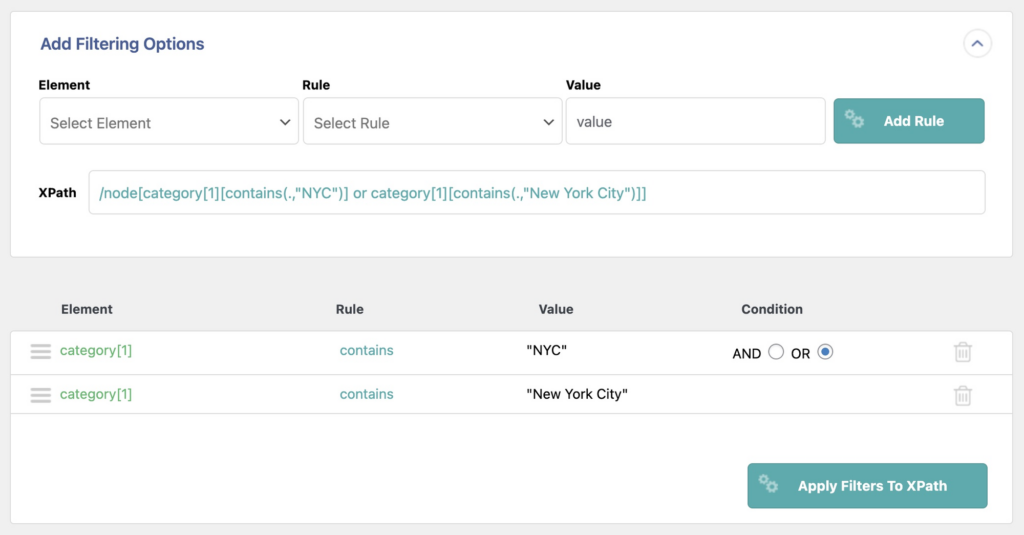
Speaking of combinations, you can combine two or more filter rules by separating them with either an AND or OR operator. Here, we’re telling WP All Import to filter the import data for any records where the category element contains either “NYC” OR “New York City”:
Need to build a more sophisticated filter? You can nest or group filters by indenting them. This is equivalent to using parentheses:
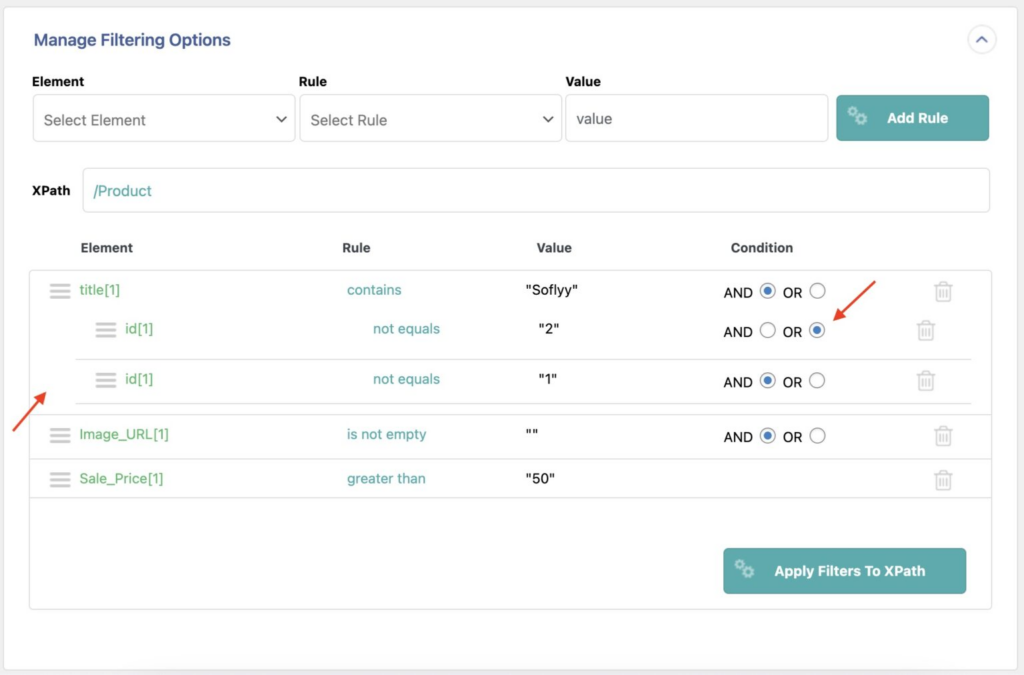
With these kinds of advanced filter options, you can build any filter that you need.
To learn more, see Filtering Import Data with XPath.
Can I Synchronize My Custom Field Data With an Updated Import File?
Yes. When you first create the import, specify that you are importing Existing Items:
In the lower half of your Import Settings screen, you’ll then see a section like the one below. There, you can tell WP All Import how to match the incoming data elements to your existing records:

Once you’ve done that, you just need to specify what you want to update:
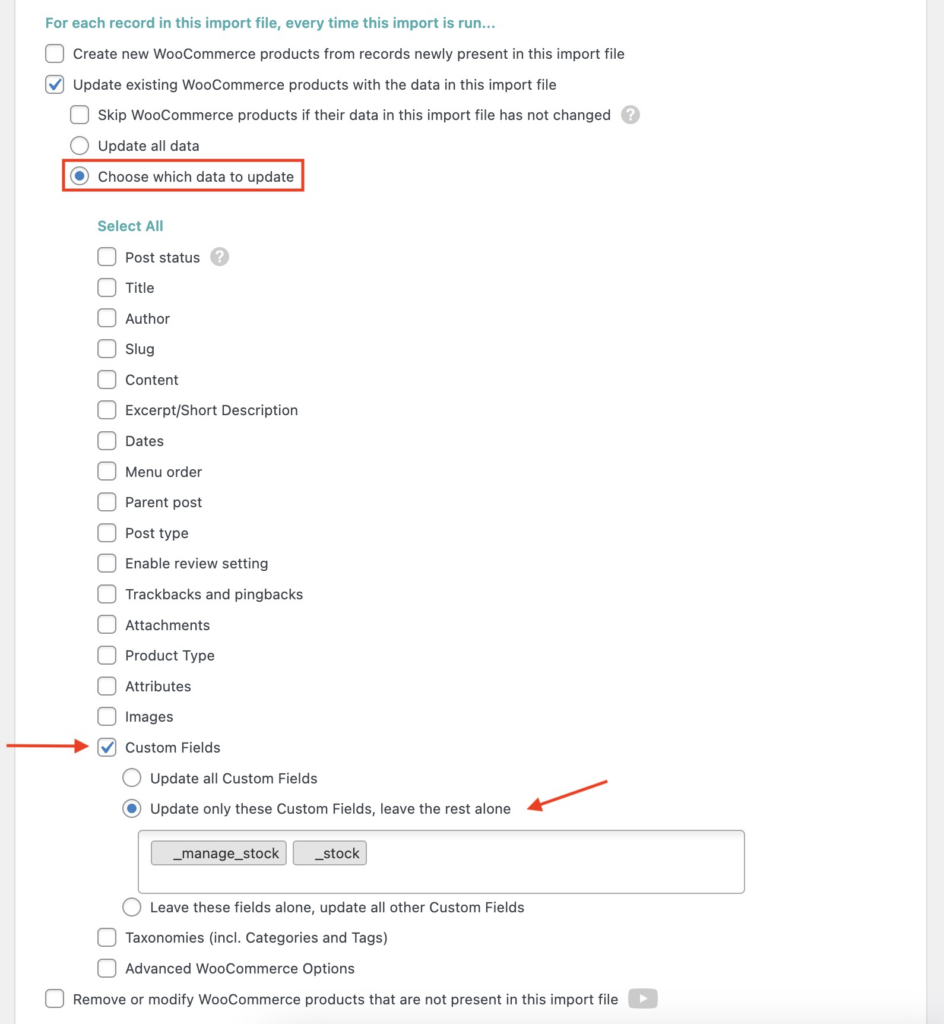
As with filters, you can use either JetEngine custom fields or the standard fields from the parent post type in this process.
For more information, see Recurring Imports Overview.
Can I Schedule Updates to Run Automatically?
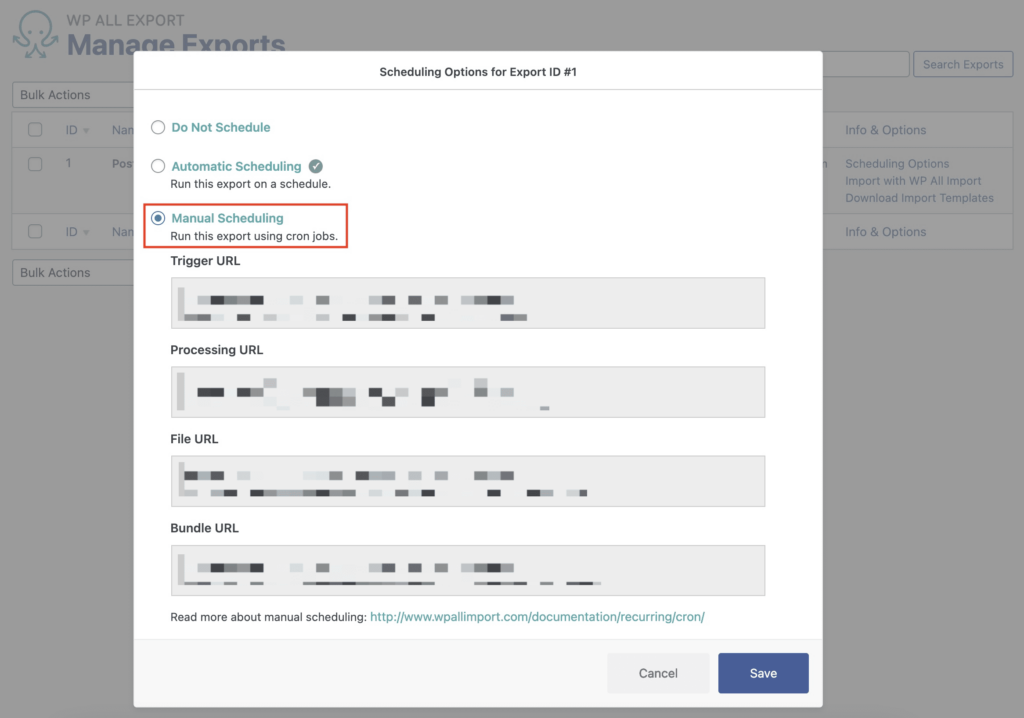
Absolutely. You have two options: automatic scheduling and manual scheduling.
Let’s start with automatic scheduling, which you can set up directly through the Scheduling Options section of the Import Settings screen:
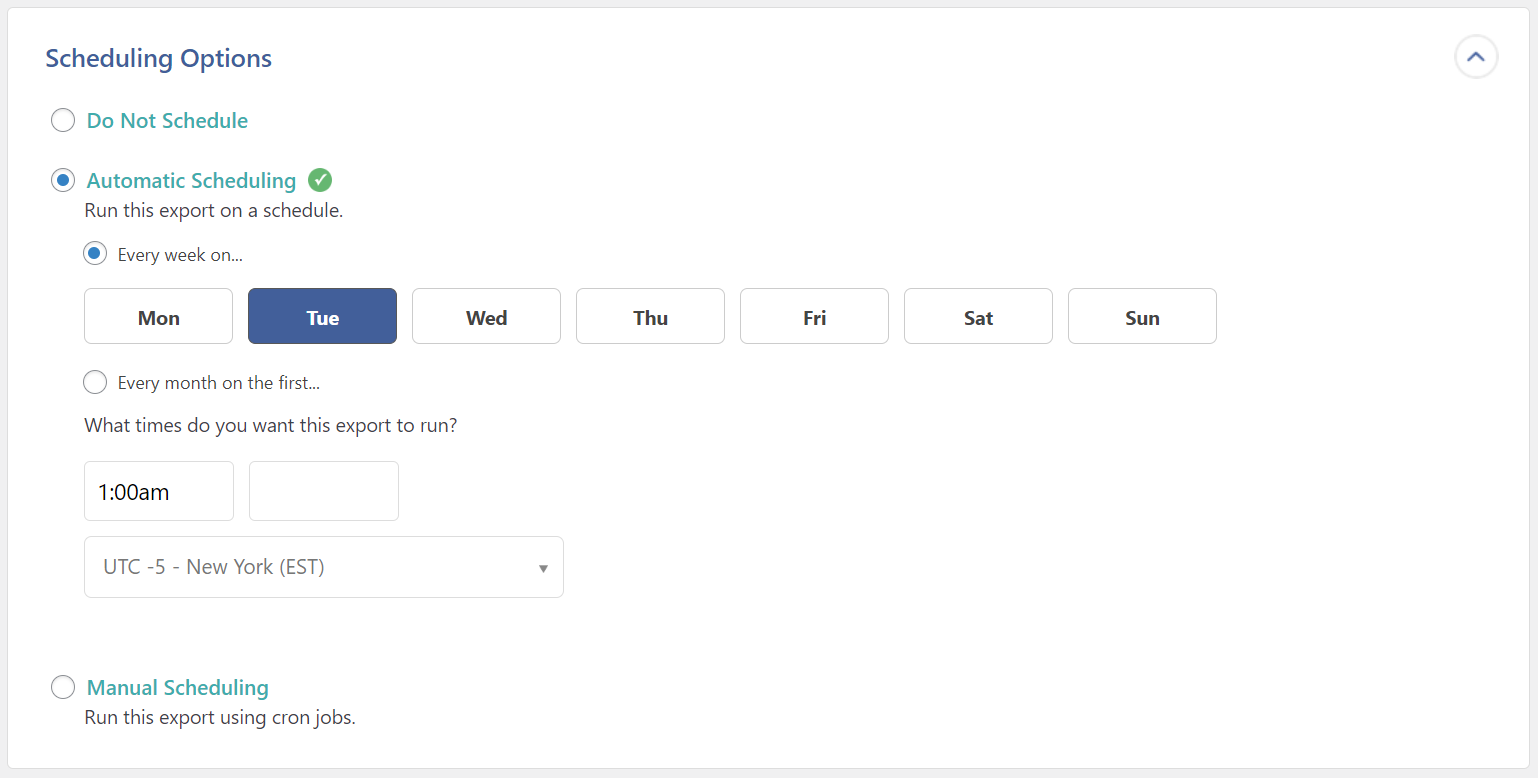
The interface is self-explanatory. In this example, we’ve set a schedule for Tuesday of every week at 1:00 a.m. New York City time. Note, this service costs $9 per month and has the added benefit of verifying that your import completes as scheduled.
Manual scheduling means manually setting up cron jobs on your server. This service is free but is less convenient and doesn’t offer a verification process:
Scheduling is typically used for recurring imports. For a better understanding of these, please see Recurring Imports Overview.
Does the JetEngine Import Add-On Support Multilingual Imports?
Yes. You can import multilingual content with ease using WPML. For more information, see Importing Multiple Languages with WP All Import and WPML.