How to Import WordPress Posts with Images
To import WordPress posts with their images, you can use the default WordPress import tool. However, this tool can only import posts from a WXR file, which is a WordPress XML file created by the built-in WordPress export tool.
Additionally, you cannot filter your imports with this tool, map incoming data to specific fields, or modify the data during the import. You can only make an exact copy of posts with their images from one WordPress site to another.
If you want more flexibility, you’ll have to install a more capable plugin like WP All Import.
We’ll examine both of these options in this article.
Table of Contents
- The Built-in WordPress Import Tool
- Importing WordPress Posts with Images Using WP All Import
- Advanced Topics
- Frequently Asked Questions
- Related Docs
- Related Videos
The Built-in WordPress Import Tool
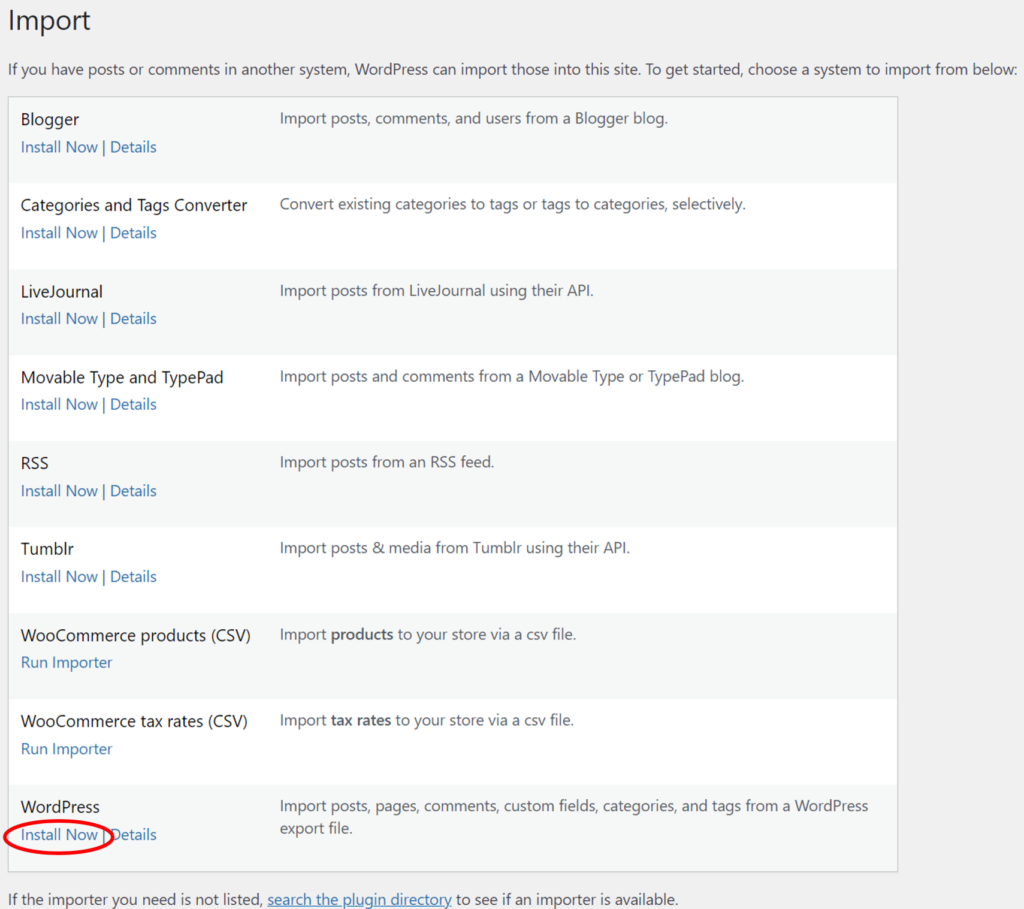
This tool is actually a free plugin called WordPress Importer. To install this plugin, navigate to Tools › Import in the main WordPress menu, then click Install Now under the WordPress heading:
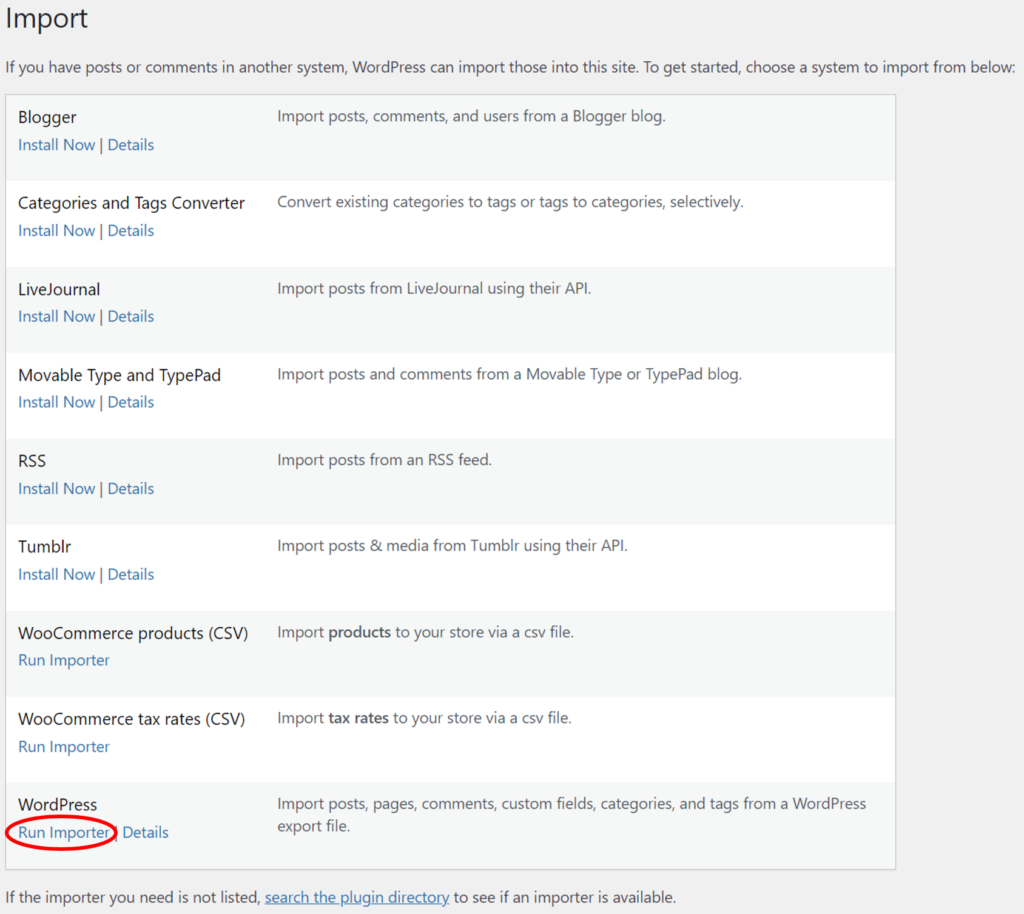
The plugin will install without any other actions. When it finishes, the link under the WordPress heading will change to Run Importer:
When you click Run Importer, this screen will appear:
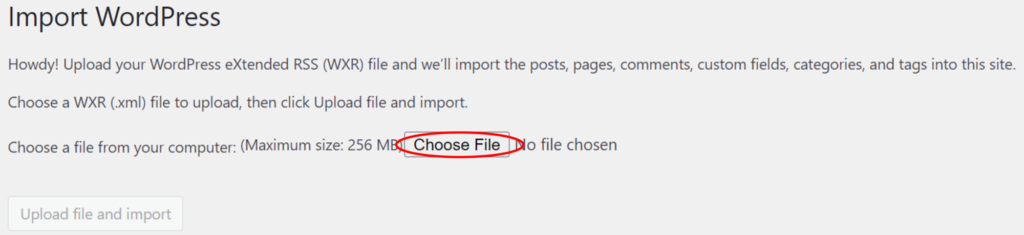
As mentioned, you can upload only a WXR file. To do so, click Choose File, select your file, and then click the Upload file and import button on the lower left.
You’ll then see this screen:
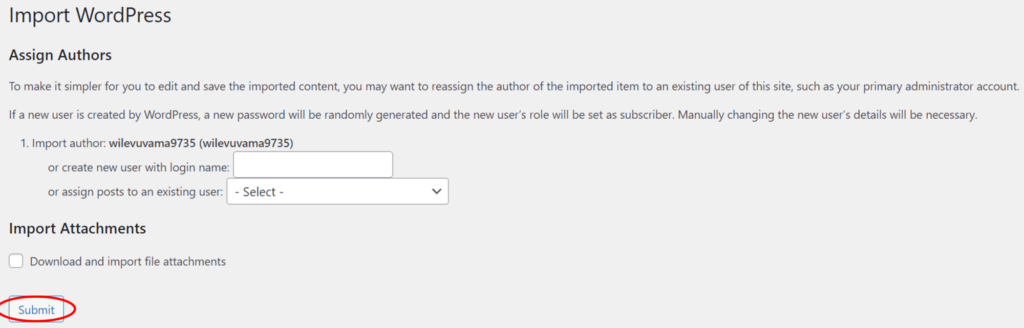
The Assign Authors section lets you assign posts to an existing user or create a new user and assign the posts to that person. Otherwise, the posts will be assigned to the current user.
The Import Attachments section lets you download and import file attachments, which you should always check if you’re importing posts with images.
Unfortunately, these are the only import options. Once you click the Submit button on the lower left, the import will run without giving you any additional control over the process.
What other types of control do you need? Let’s have a look at importing posts with images using WP All Import to understand what’s possible.
Importing WordPress Posts With Images Using WP All Import
WP All Import is a plugin that lets you import all types of WordPress and WooCommerce data. It has several advanced capabilities, which we’ll briefly describe, but a key feature for this article is the ability to import images regardless of where or how they are stored.
Let’s have a look.
If you want to follow along, use this online sandbox. Choose the ACF Fields option and click Create Sandbox.
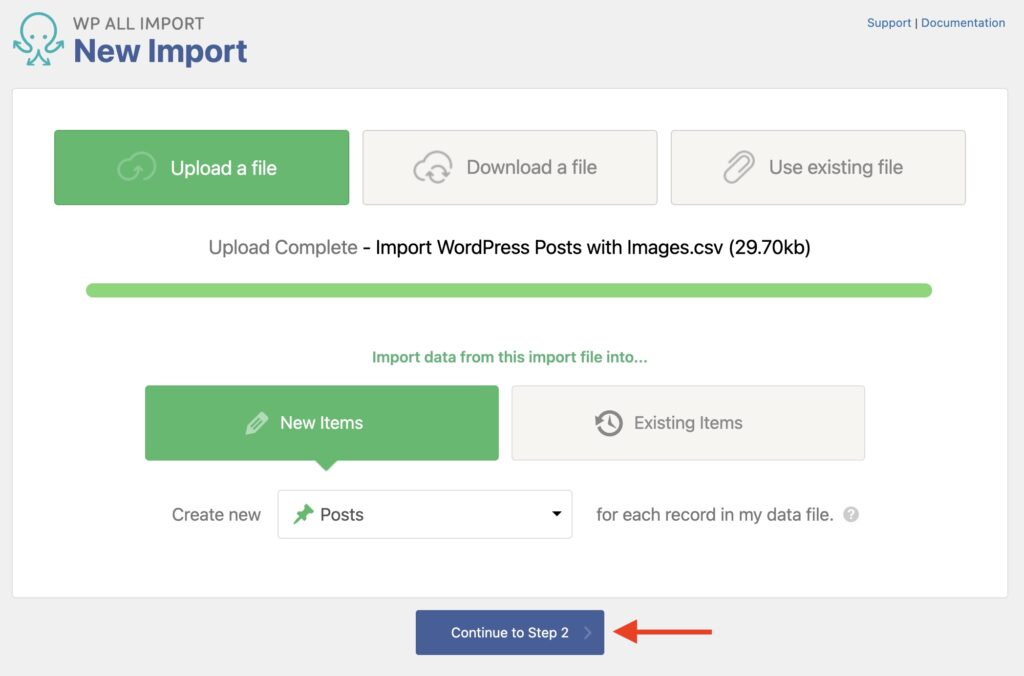
Step 1: Create a New WordPress Post Import
Navigate to All Import › New Import and upload your import file. Select Posts as your import post type, then click Continue to Step 2.
Step 2: Review the Import File
The Review Import File screen lets you review the contents of the import file. If you see a problem with this data, you can edit the file and try again.
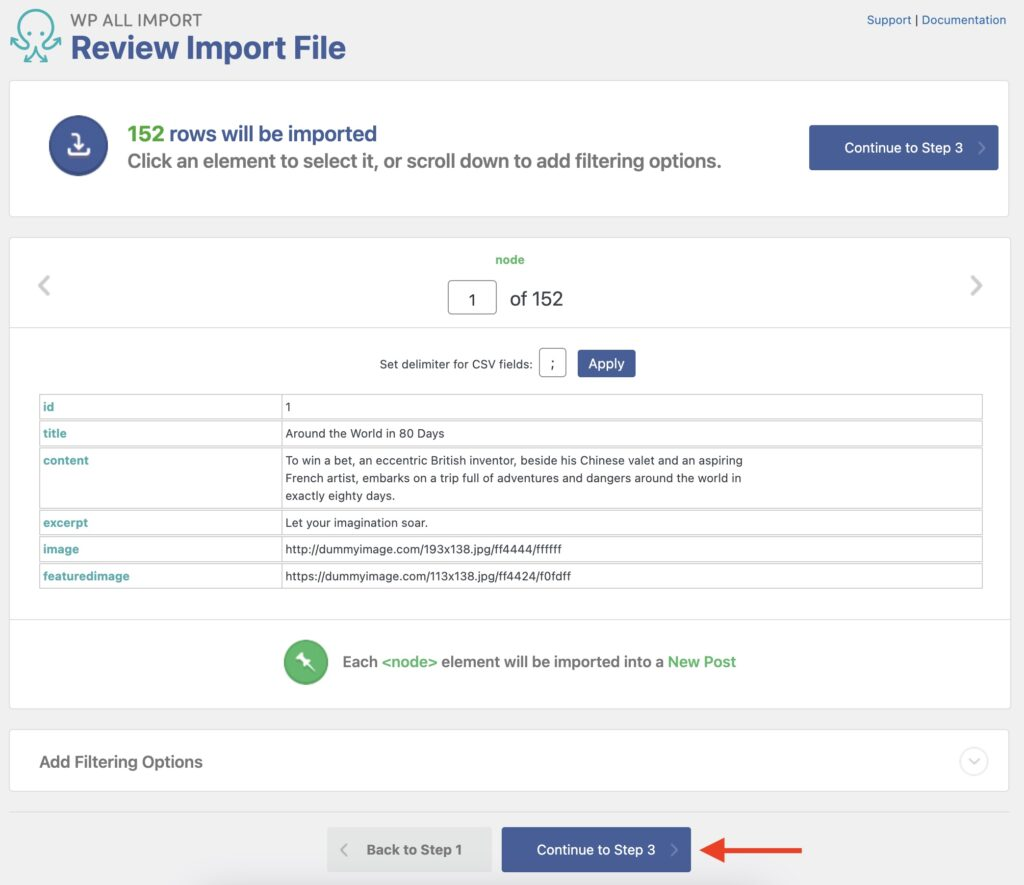
In the Add Filtering Options section at the bottom of the screen, you can create filters to import only the exact posts you want. For example, in this screenshot, we are limiting the import posts to those from New York City:

To learn more about filters, see Filtering Import Data with XPath.
When you are finished with the Review Import File screen, click Continue to Step 3.
Step 3: Map the Incoming Data Elements to the WordPress Post Fields
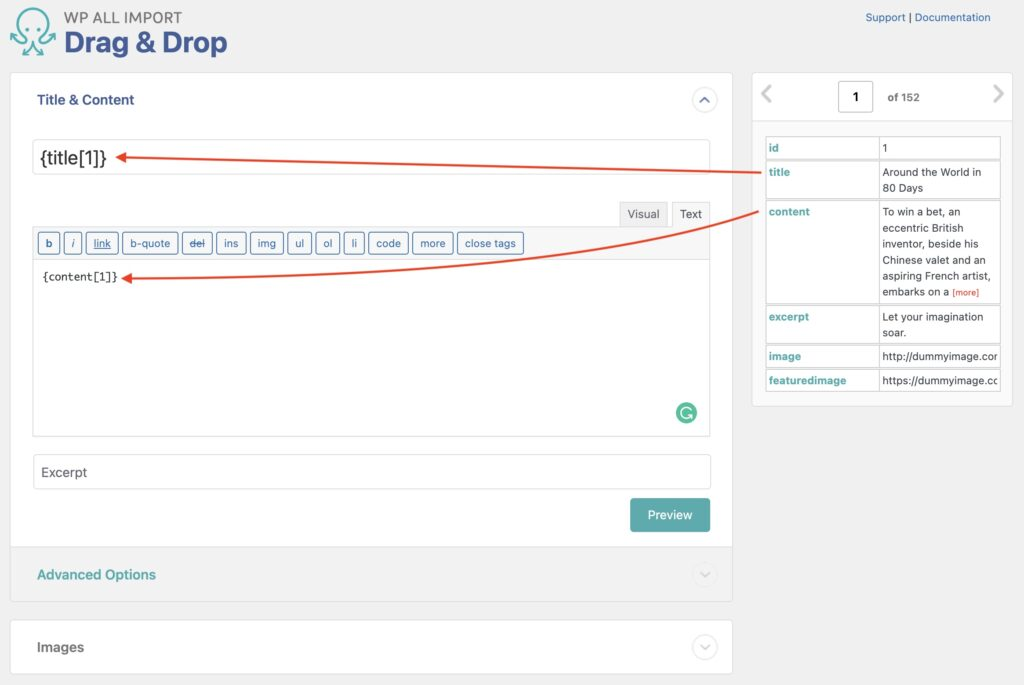
Next up is the Drag & Drop screen, where you map the incoming data elements to the WordPress post fields. To do this, drag the data and drop the elements from the panel on the right to the appropriate post fields on the left.
Title & Content
Map the title, content, and short description first:
Images
The Images section is next:
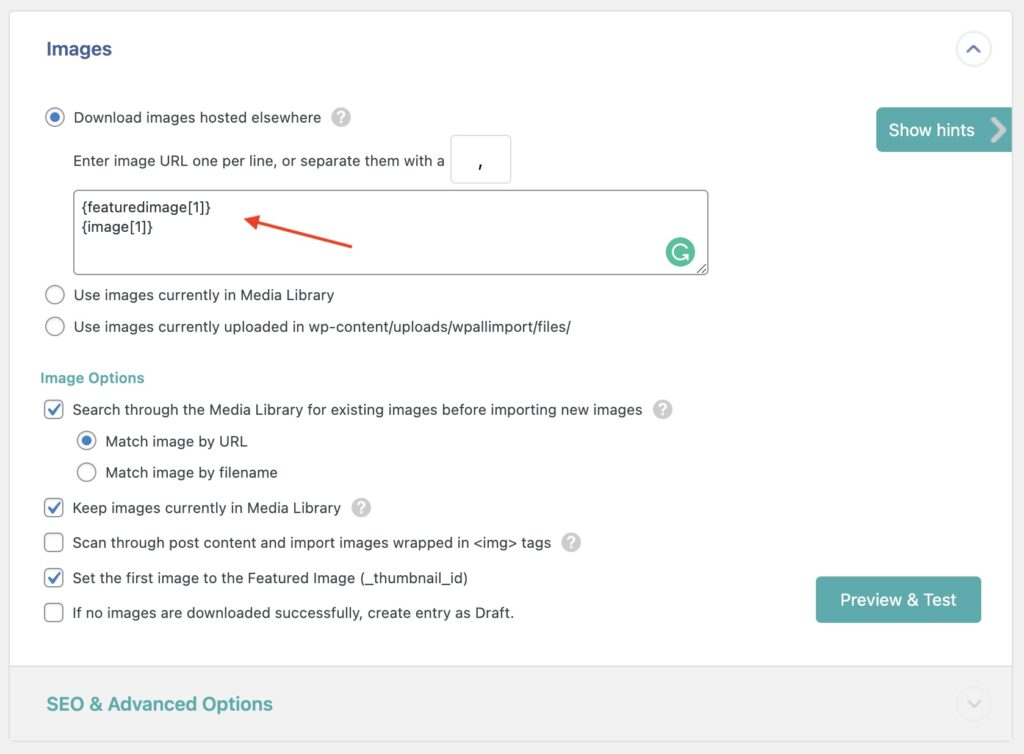
This section lets you import images from several different types of locations, which you can control with these three options at the top:
Download images hosted elsewhere
This option uses direct URLs to download the images, which is the default. The images are added to the Media Library as part of the import process.
Use images currently in the Media Library
If the images already exist in the Media Library, you can use this option, which lets you provide just the image file names instead of a URL. These file names are then matched against the file names in the Media Library to assign the corresponding images to the posts.
Use images currently uploaded in wp-content/uploads/wpallimport/files/
If you have the images on your computer, you can upload them to this folder on the server and use this option. The image file names that you provide are then matched against the file names in the folder. If a match is found, the files are added to the Media Library and assigned to the post.
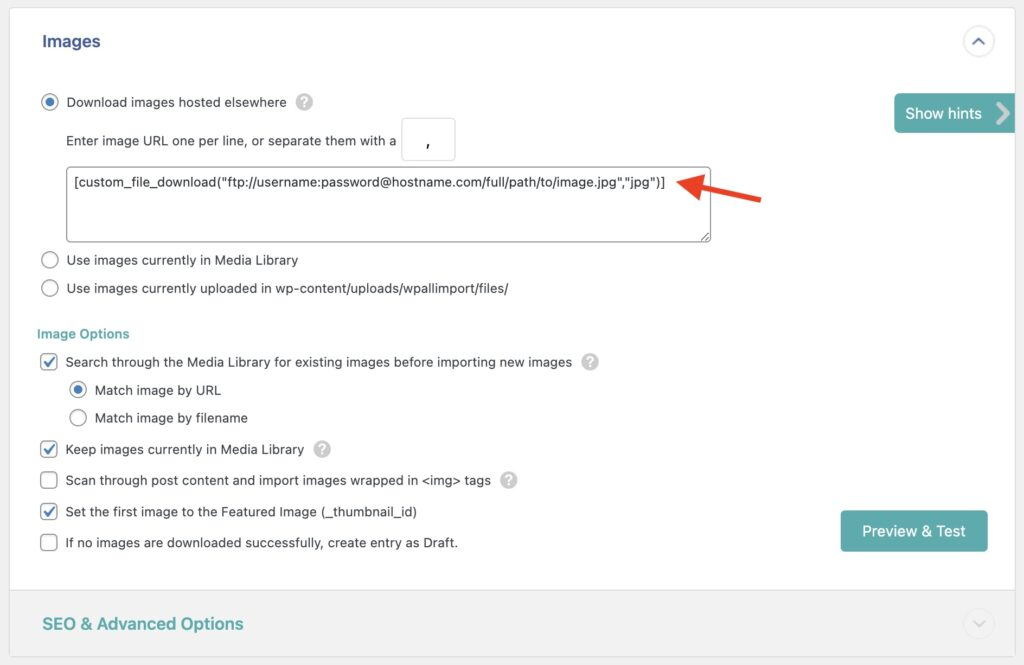
On the lower half of the Images section, you’ll find the Image Options subsection, which contains five additional options:
Search through the Media Library for existing images before importing new images
This is set by default. If an image with the same file name or remote URL is found in the Media Library, that image will be attached to the post instead of downloading a new image. Disabling this option downloads the new image regardless of what is in the Media Library.
Keep images currently in Media Library
This is also set by default. If disabled, any images attached to the imported post will be automatically deleted from the Media Library, causing the images to be imported again.
Scan through post content and import images wrapped in <img> tags
This option scans your post content for <img> tags. If found, the image between the tags is downloaded and added to your Media Library, and the old image URL in the content is replaced with the new Media Library URL. This ensures that you host the images.
Set the first image to the Featured Image (_thumbnail_id)
This is set by default and assigns the first image imported for a post as the Featured Image or _thumbnail_id for that post.
If no images are downloaded successfully, create entry as Draft.
When this option is set, any post that doesn’t contain a valid image will be created with a Draft status, even if you specify that all posts should be created as Published.
SEO & Advanced Options
If you expand this subsection, you can add titles, captions, alt text, and descriptions as metadata for the imported images. You can also change the image file names and extensions.
There are other sections below the Images section, but ignore these for now. Instead, click the Continue to Step 4 button at the bottom of the page (not shown).
Step 4: Configure the Import Settings
This brings up the Import Settings screen, where you configure any remaining settings for your WordPress post import.
Your first step should be to click the Auto-detect button to create a unique identifier for each post. This helps WP All Import identify posts so that it can accurately apply updates and avoid creating duplicates.
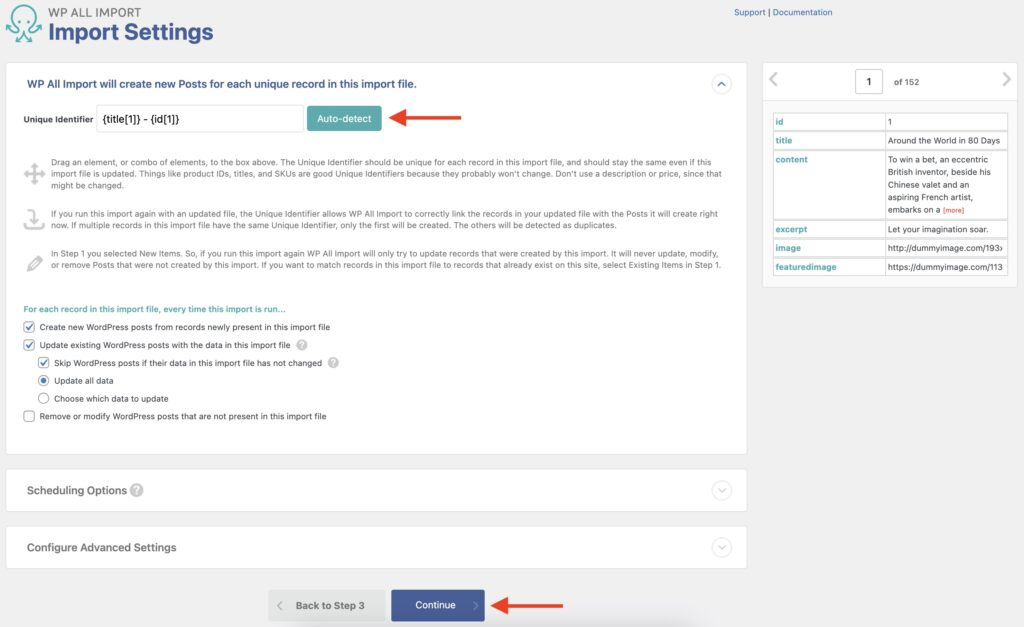
In the lower section of this screen, you can control how the import behaves should you run it again with an updated import file. For example, you can tell the import to update only specific fields or to delete posts missing from the import file.
The Scheduling Options section lets you schedule your WordPress post imports, which you typically do for recurring imports. To learn more about scheduling options, see Recurring Imports Overview.
Finally, the Configure Advanced Settings section lets you control the batch processing size for the import and other performance-related options. Ignore this for now and click the Continue button at the bottom of the screen.
Step 5: Complete the Import and Review Your Imported Posts and Images
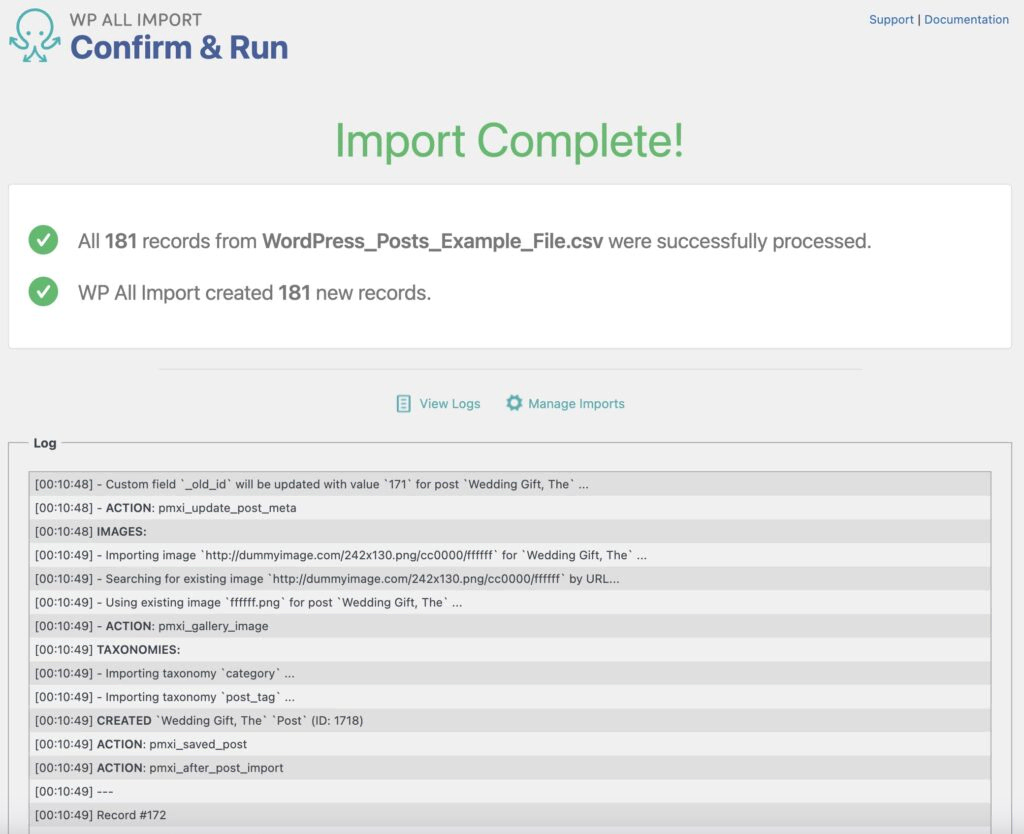
The Confirm & Run screen will appear next. This summarizes your intended import and gives you the opportunity to return to the previous steps should you wish to make any changes.
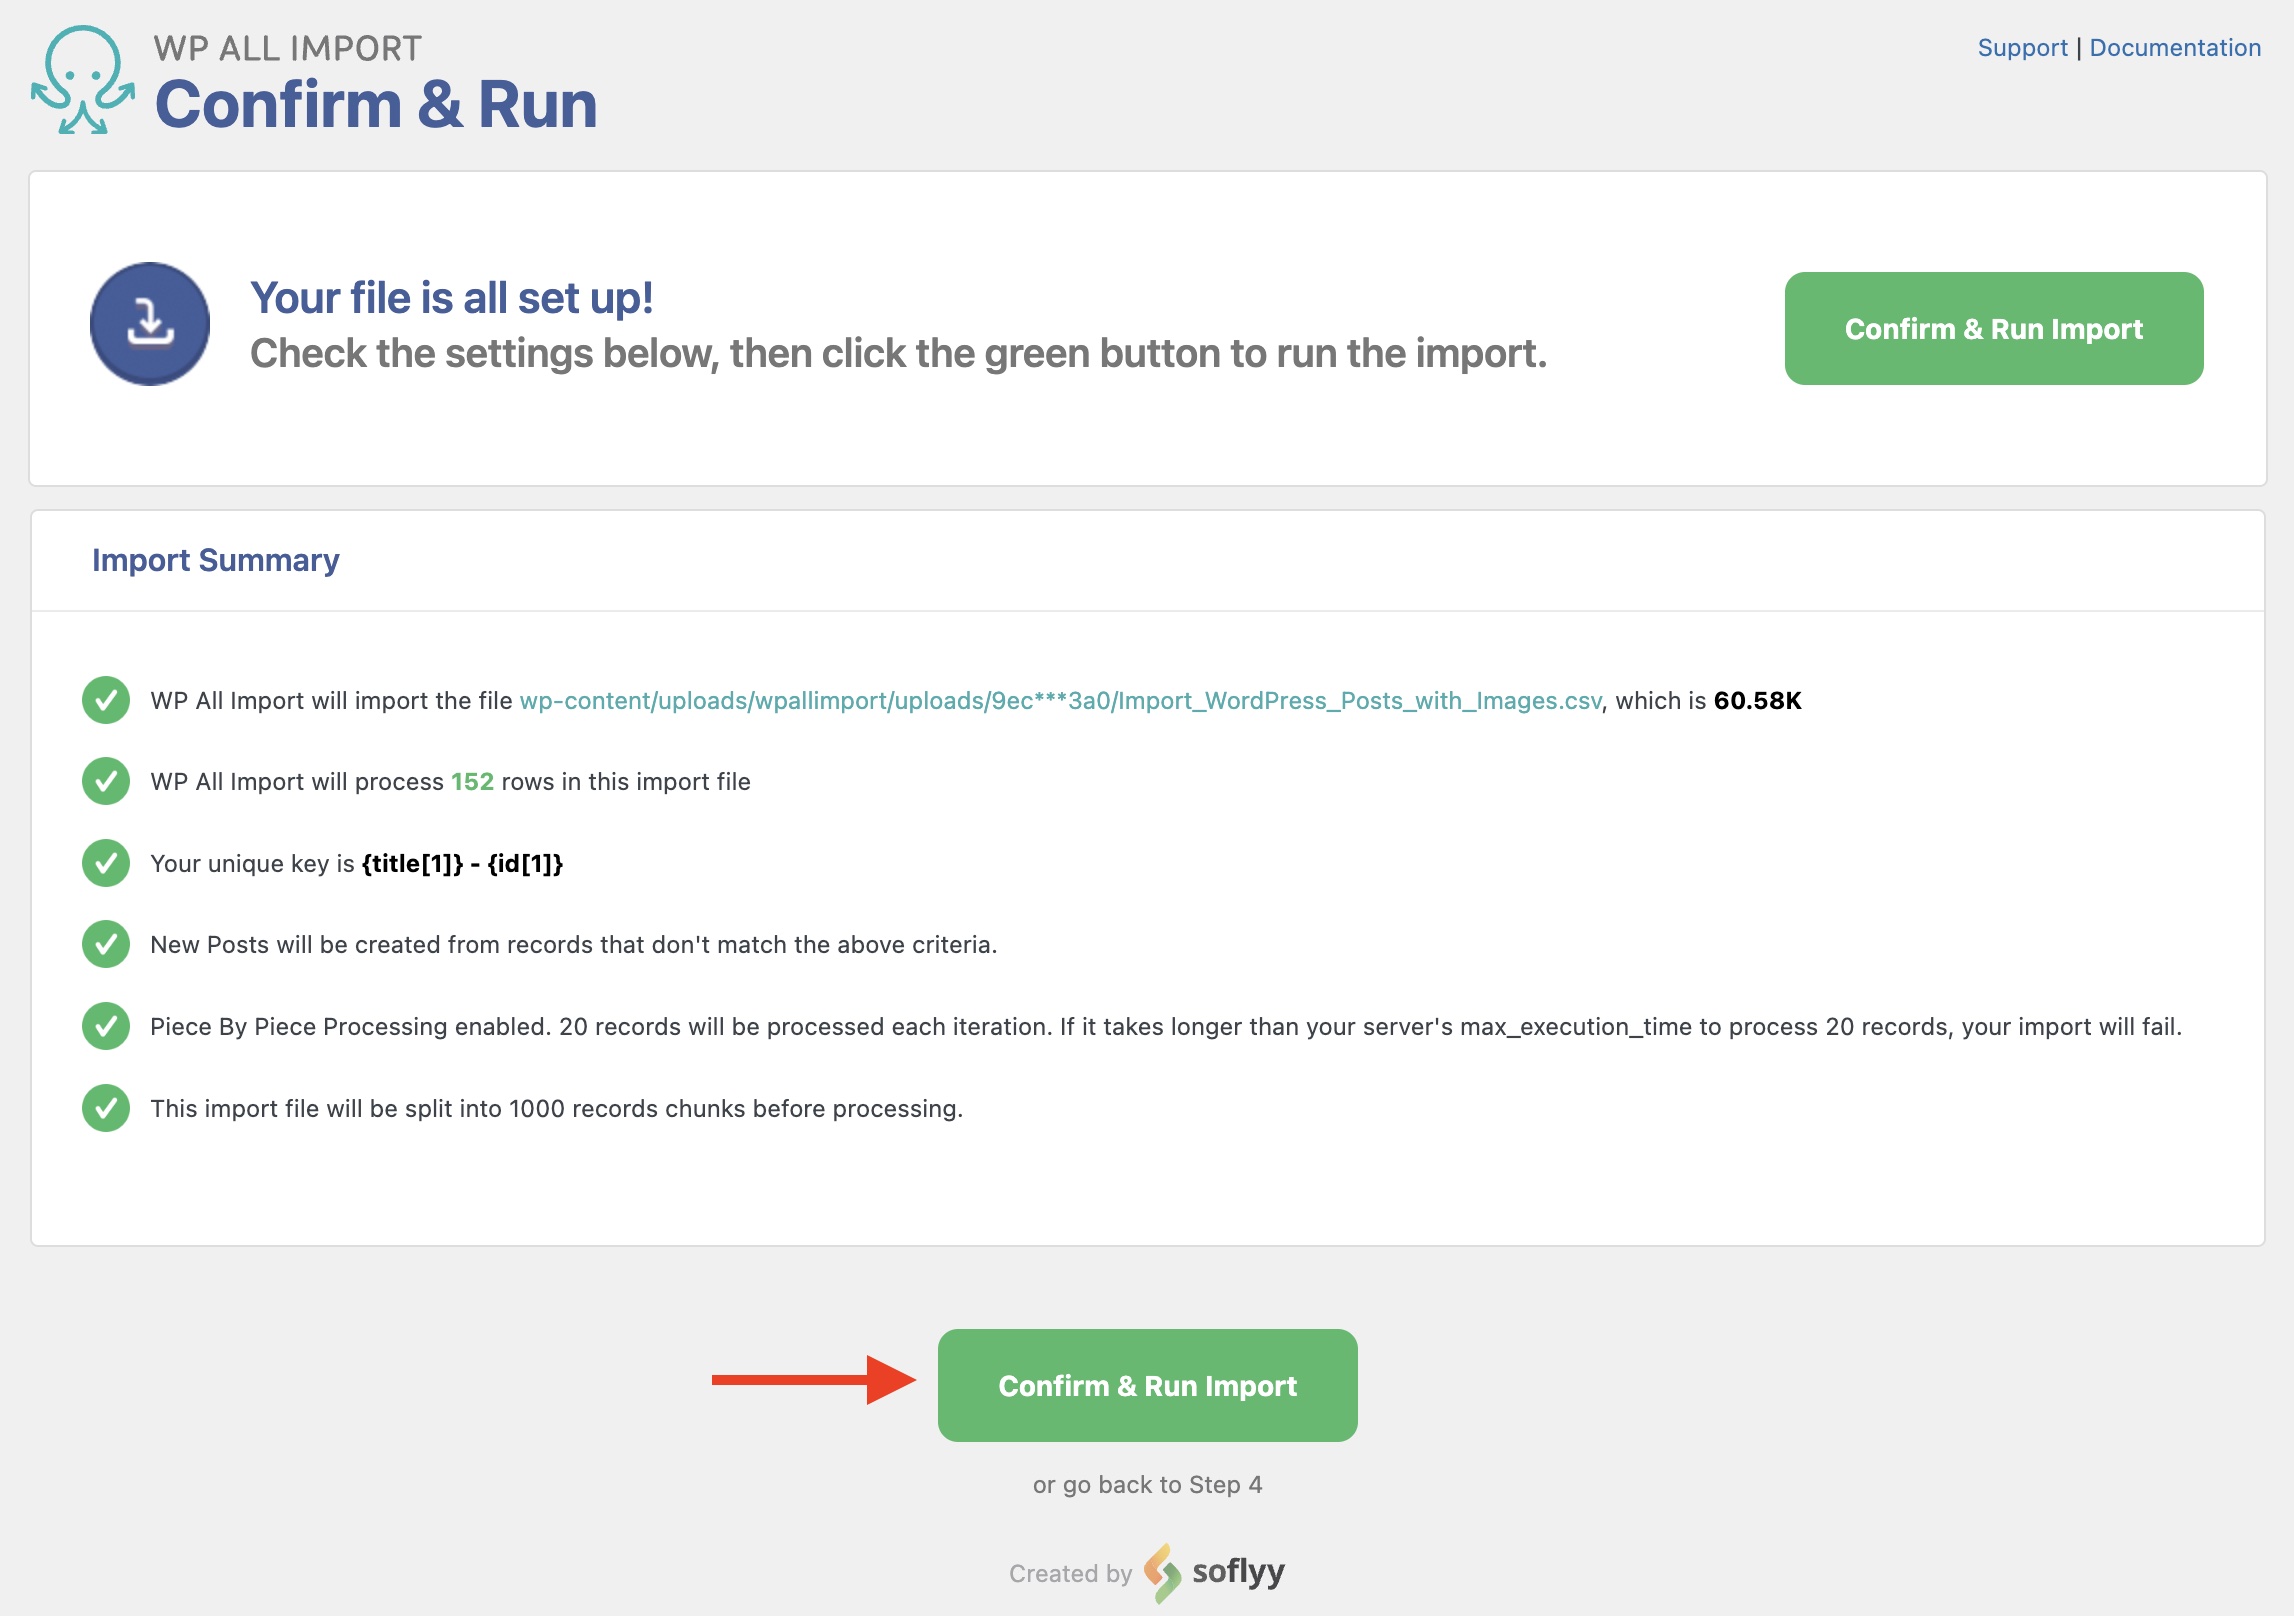
Assuming that everything is in order, click the Confirm & Run Import button to launch the import. Once it completes, the screen will update to show you the results:
As a precaution, you should then go to Posts › All Posts in the WordPress main menu to verify that all your posts and images were imported as expected.
Import WordPress Posts with Images — Advanced Topics
How to Import Images From an FTP Source
To import images from an FTP source, use the Download images hosted elsewhere option along with a custom PHP script that downloads your image from the FTP source. See Workaround for Importing from FTP for more information.
How to Import Images From an External Source
You can import images from most external sources by using the default option Download images hosted elsewhere and providing the URLs for the images.
If you don’t have direct URLs for the images, as happens with file storage solutions like Google Drive, you’ll need to generate them.
If the images are protected by HTTP auth, follow the instructions in Password Protected Files.
How to Import a Variable Number of Images Per Post
Many posts contain multiple images. Naturally, the number of images per post can vary. Here are the most common methods of representing this data in an import file and how you handle each method:
Option A: Image URLs Stored in a Single Column or Element and Separated By a Character
In this scenario, map the image data element to this option and specify a separator, as shown here:

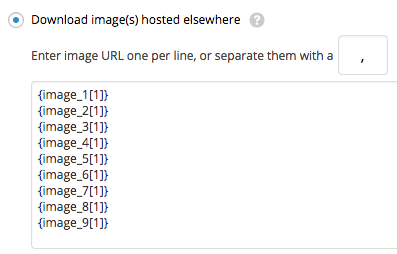
Option B: Image URLs Stored In Different CSV Columns or XML Elements
If the import images are stored in multiple columns, choose this option and map all the data elements that might contain images. If some of the data elements are empty for some posts, they will simply be ignored:
Option C: Use an XPath Query or a FOREACH Loop
With XML files, there may be multiple child elements with the exact same name, as shown in this example:

To handle this situation, you can use an XPath query to output a comma-delimited list of the image names from the XML:
{images/image/@src}
Alternatively, you can use a FOREACH loop to iterate through each child element, allowing you to return additional data:
[FOREACH({images/image})]
http://www.example.com/my-folder/{@src},
[ENDFOREACH]
Import WordPress Posts with Images — Frequently Asked Questions
How Do I Import a Featured Image in WordPress?
- Create an import via WP All Import.
- In the Images section of the Drag & Drop screen, add your images import element.
- Enable the Set the first image to the Featured Image (_thumbnail_id) option.
- Complete the import.
- Verify that the imported image(s) are correct.
How Do I Export a WordPress Post with Pictures?
- Navigate to All Export › New Export.
- Select Posts as the export type.
- Include the image columns in your export layout.
- Complete the export and download the export file.
- Confirm that the exported data is correct.
For more information, see Exporting WordPress Posts with Images.
How Do I Migrate WordPress Posts and Their Images?
- On the export site, navigate to All Export › New Export.
- Select Posts and then Migrate Posts.
- Download the export bundle file.
- On the destination site, upload the bundle file.
- WP All Import will automatically configure itself based on the bundle file’s contents.
- Run the import to finish the migration.
To learn more, see the Migrate Quickstart guide.
Import WordPress Posts with Images — Related Docs
Importing Images From the Media Library
Importing Images From Your Server
Import a Variable Number of Images Per Post
The 4 Best WordPress Import Plugins
Import WordPress Posts with Images — Related Videos