How To Import Attributes for WooCommerce Variable Products
Do you want to import WooCommerce products with attributes?
If you sell variable products on your WooCommerce store, you already know how crucial attributes are for your products. Without them, customers have limited options, which ultimately drives them to shop with your competitors, who have a wider range of selections. This means lost business for you and lower profit margins.
However, when you need to add hundreds or thousands of variable products with attributes to your WooCommerce store, it can be challenging to do it manually. It’s time-consuming and inefficient. This is why it is important to know how to import variable WooCommerce products with attributes to your store easily.
In this article, we break down how to import attributes for WooCommerce variable products with the leading WooCommerce product import plugin – WP All Import.
What Are Product Attributes and Why Do They Matter for Variable Products?
Product attributes define specific features and characteristics of your WooCommerce products to describe them better to customers. These could include features such as color, size, material, etc. This gives customers a broader range of selections and makes filtering through the product catalog easy.
Attributes are important for variable products as they are used to create variations. For example, if you sell mobile devices in your store, a device can have attributes such as storage space (16GB, 64GB, 128GB, etc.), color (black, space gray, white, etc.), and brand (Apple, Samsung, Huawei, etc.).

These attributes can then inform variable pricing. For example, a 64GB device will not cost the same as a 128GB device. It also makes it easy for customers shopping on your site to filter by brand, color, and storage space to find exactly what they need.
Now that we have explained WooCommerce product attributes and their usage in variable products, we will discuss how you can import them in the next section.
How To Import Attributes for WooCommerce Variable Products
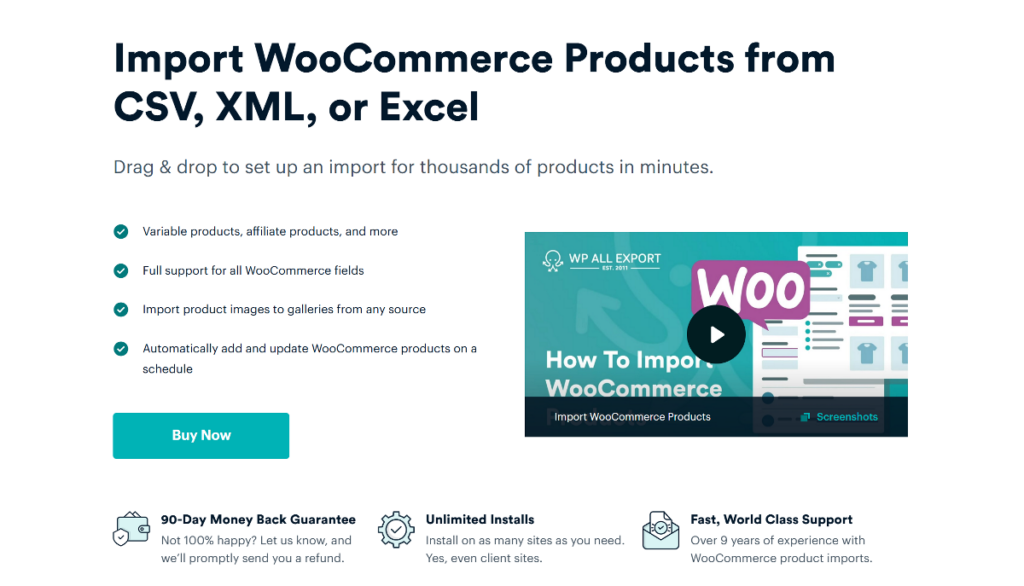
While WooCommerce provides a native importer tool, it is not recommended for importing variable products as it has limited support for complex product types. You need a third-party plugin to import WooCommerce products with attributes. In this article, we will use the WP All Import plugin.
The WP All Import plugin is the best WooCommerce product import plugin. It offers a user-friendly drag-and-drop interface, a straightforward 5-step import wizard, and a robust set of import features that make the import process a breeze.
Some of its exciting features include:
- Support for importing products with attributes from multiple file sources including CSV, XML, Google Sheets, and Excel.
- Support for importing all WooCommerce product types, including variable products.
- Powerful filtering tool to import a specified subset of your products to your store.
- On-the-fly manipulation of import data with PHP functions for granular data control.
- Support for importing other WooCommerce data types, including orders, customers, etc.
- Support for importing other WordPress post types such as users, pages, etc.
- Scheduling tool to run recurring imports automatically on pre-defined days and times.
- Support for importing products with custom fields, and more.
To import WooCommerce products with attributes to your site with WP All Import, first, you must purchase and install the plugin and its WooCommerce Import Add-On. The WooCommerce Import Add-On is necessary for importing all WooCommerce product types and data.
After purchasing and downloading them on your PC, go to your WordPress dashboard and navigate to Plugin › Add New Plugin. Start by installing the WP All Import plugin. Click Upload Plugin › Choose File › Install Now › Activate Plugin.
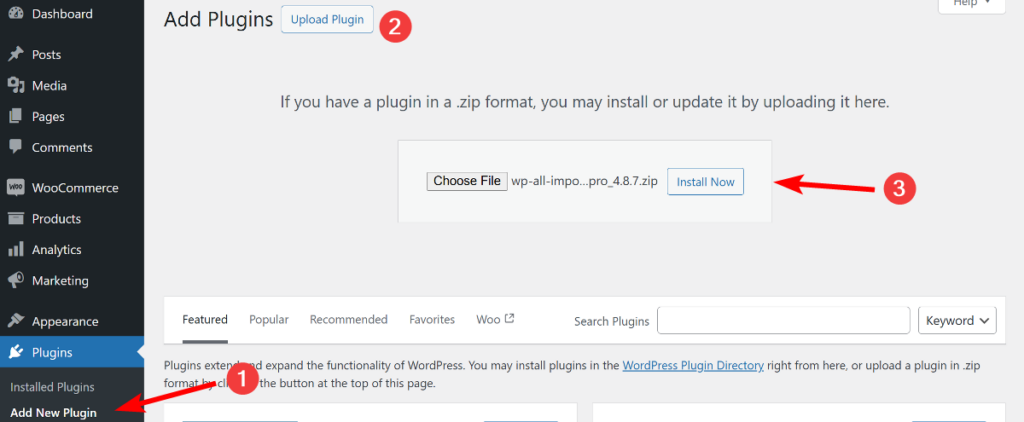
Follow the same steps to install and activate the WooCommerce Import Add-On.
Once both have been installed and activated, you can now create a new import of WooCommerce products with attributes.
1. Create a New WooCommerce Attribute Import
To create a new WooCommerce product attributes import, go to All Import › New Import from your WordPress admin menu.
The New Import screen will appear. On this screen, you can load the import file of your WooCommerce products with attributes. WP All Import provides three options for this. You can Upload a file (from your PC), Download a file (from a URL or FTP/SFTP), or Use existing file (if you have previously uploaded the import file).

Once you have loaded your import file, under New Items, select WooCommerce Products as the import type and click Continue to Step 2.
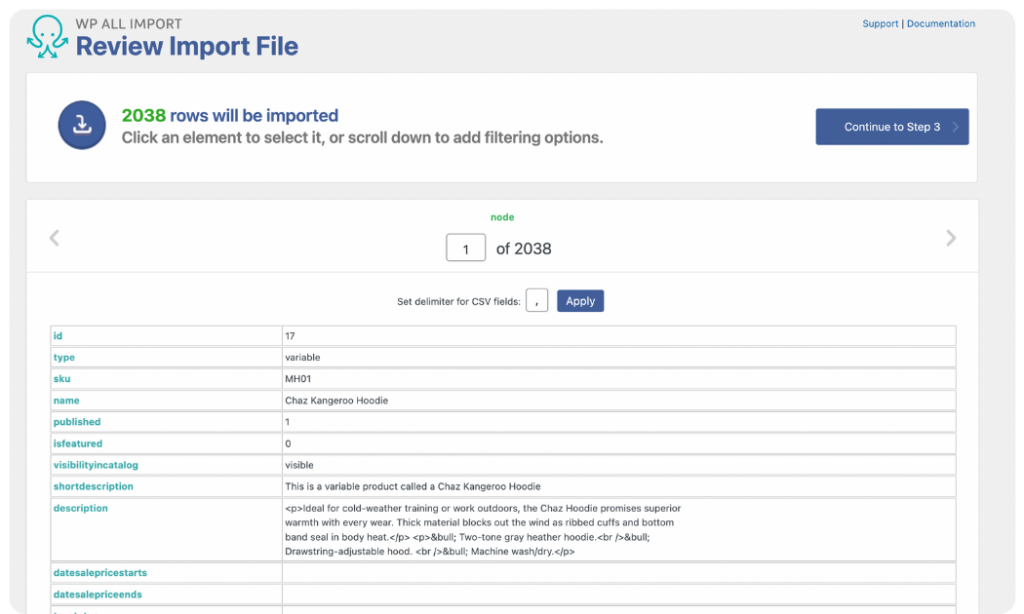
2. Review Loaded WooCommerce Product Data
On the Review Import File screen, you can review your import file data closely to ensure WP All Import correctly detects all the fields. To do this, use the gray arrows on the left and right of the screen.
To access WP All Import’s powerful filtering tool, scroll down the screen to the Manage Filtering Options panel. Within this panel, you can create multiple filter rules, for various elements in your import file. This lets you control which products will be imported to your WooCommerce store.
For example, if your import file contains a mix of simple and variable products, you can create a filter to import only products with variations. To do this, select the product type as the Element for your filter, set the Rule as equals, and input variation (or whatever name you have in your import file for variable product types) as the Value. Next, click Add Rule › Apply Filter to XPath, and the filter will be created.

Click Continue to Step 3 to move to the next step.
3. Map Incoming Product Data to WooCommerce Fields
The most important step of the product import process happens on the Drag & Drop screen. Your incoming product data is listed in a table on the right, while the product fields are in panels on the left.
WP All Import provides an easy-to-use drag-and-drop interface that makes the data mapping process easy for beginner and advanced WordPress users.
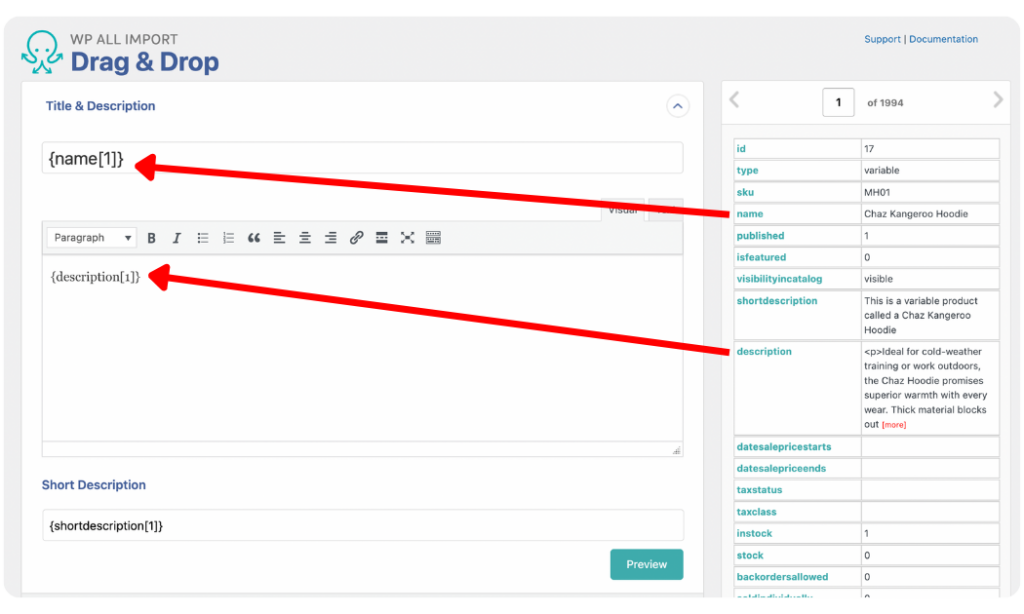
Title & Description
You can start by mapping the title and description of your products from the Title & Description panel. Just drag and drop the title and description elements from your incoming data file into the provided fields.
WooCommerce Add-On
From the WooCommerce Add-On panel, you can map the WooCommerce standard field elements.
First, set the Product Type to Variable product. This will update the available WooCommerce product tabs on the left.
Next, map the SKU, Regular Price, and Sale Price fields with their corresponding data from your import file.
Follow the same process to map fields in the Inventory and Shipping tabs.

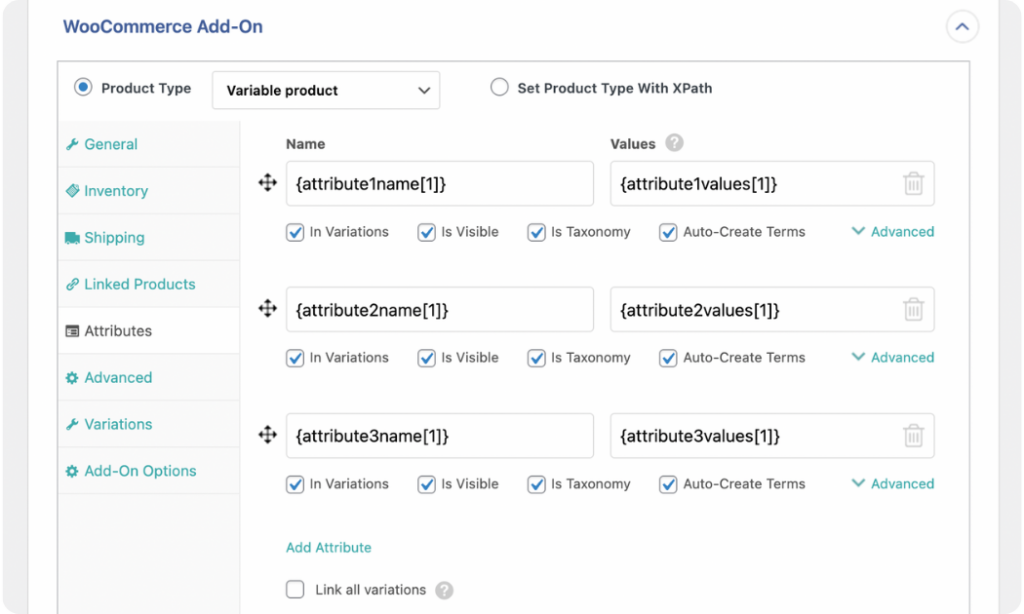
Import WooCommerce Product Attributes
Open the Attributes tab to map the attributes for your variable products. To do this, enter a Name for the attribute, and drag and drop the Value from your incoming product data elements. You can also drag and drop an element for the Name field if it exists in your import file.
If you are importing data into an attribute that already exists on your site, ensure that the name you input exactly matches the existing attribute.
You can create as many attributes as needed by clicking the Add Attribute link.
Under each attribute, you can click Advanced to open up a section with additional options to define how WP All Import should handle your product attribute import.
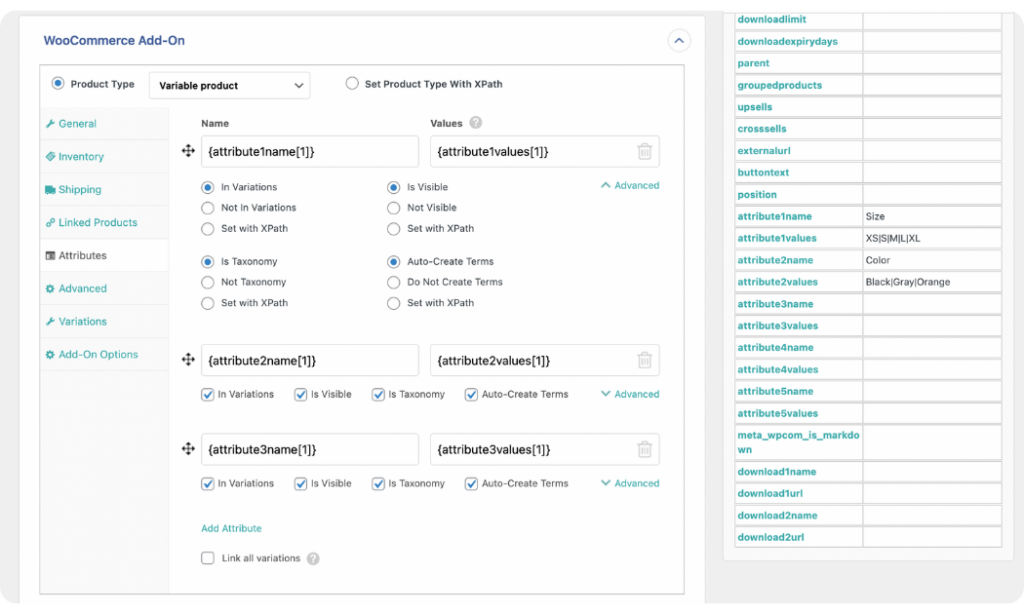
The options are:
- Variations: This lets you enable or disable the use of an attribute in variations. Choose In Variations if you want the attribute to be used in variations (enabled by default), otherwise choose Not in Variations. You can also dynamically define the option by selecting Set with XPath and inputting “yes” or “no” in the provided field.
- Visibility: This option allows you to set whether the attribute Is Visible (enabled by default) or Not Visible on the product page.
- Taxonomy: With this option, you can choose whether to import your product attribute as a taxonomy (global attribute) or not (custom attribute). If Is Taxonomy is selected by default, but you can change it to Not Taxonomy or Set with XPath if that’s more relevant to your import.
- Auto-Create: You can use this option to choose if you want to create, or not create, new attribute terms during an import. Select Auto-Create Terms (enabled by default) to automatically create newly found attribute terms during an import. Otherwise, enable Do Not Create Terms to only import attributes to a product if the term already exists.
Import WooCommerce Variable Products
From the Variations tab, you can set how your variable products should be imported.
WP All Import provides six options for grouping product variations into a single variable product based on your import file structure. You can import files that contain both the parent product and child variations, or only the product variations with no parent products.
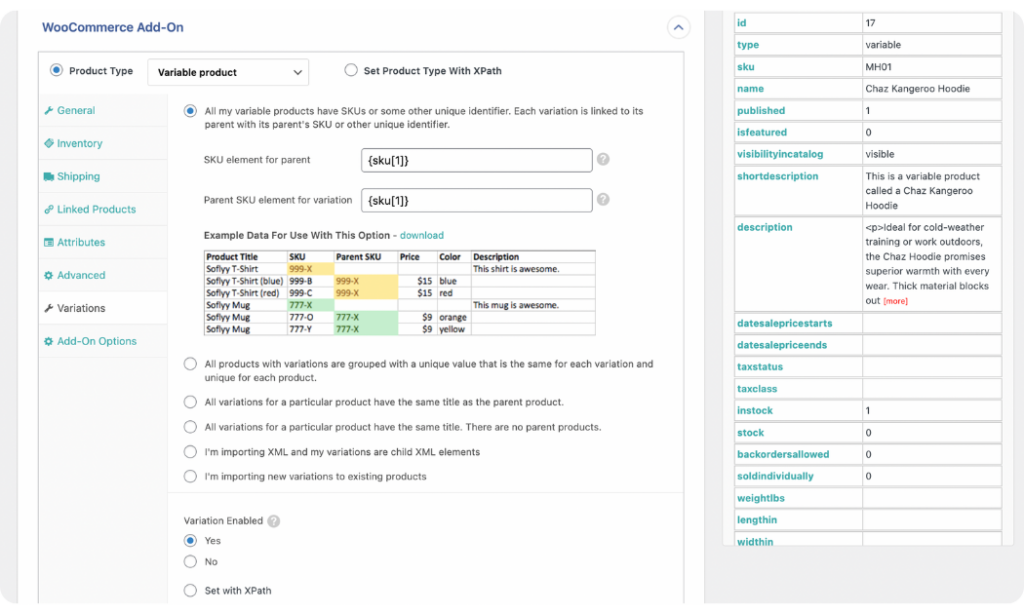
For each option, you will see a visual example of the file structure so you can choose the one that most closely matches your import file. Once you select an option, map the required fields with elements from your incoming data file. After you have done this, WP All Import will handle the rest and ensure your variable products are imported correctly.
You can learn more about the six variation grouping options in the documentation for How to Import Variable Products into WooCommerce.
Import Variable Product Images
From the Images panel, you can map the product image element (s) to the appropriate field. WP All Import allows you to import your product images from any source and provides options to optimize the speed of your image imports.
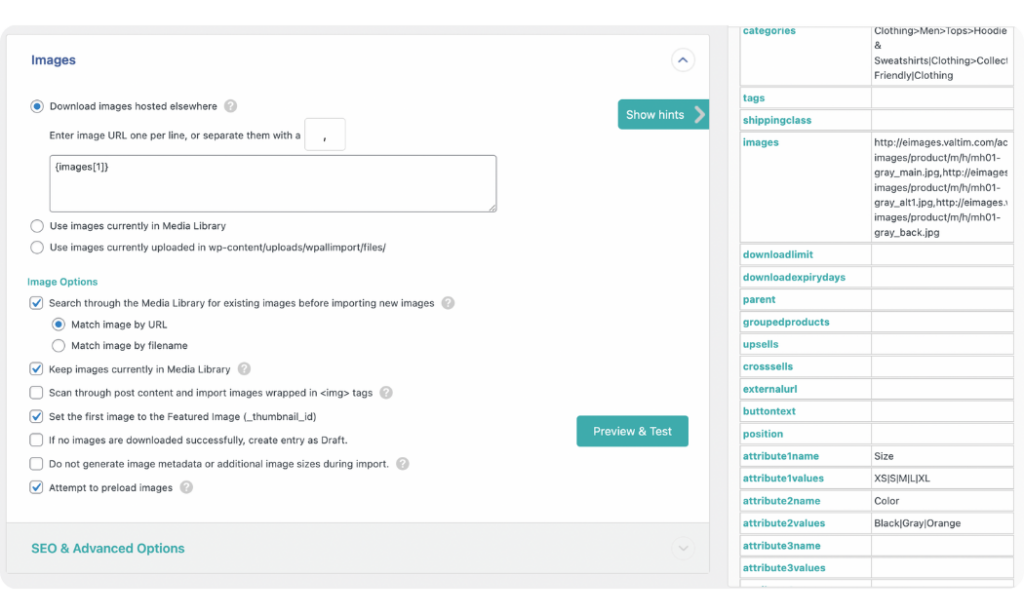
To learn more about mapping the data in the Images panel, read the article on Importing WooCommerce Product with Images.
Import Product Custom Fields
If your products have custom data, you can import them from the Custom Fields panel. WP All Import can auto-detect custom field panels of previously published products to make it easy to map them. You can also create custom fields during the import by adding the Name and mapping the Value element from your incoming data file.
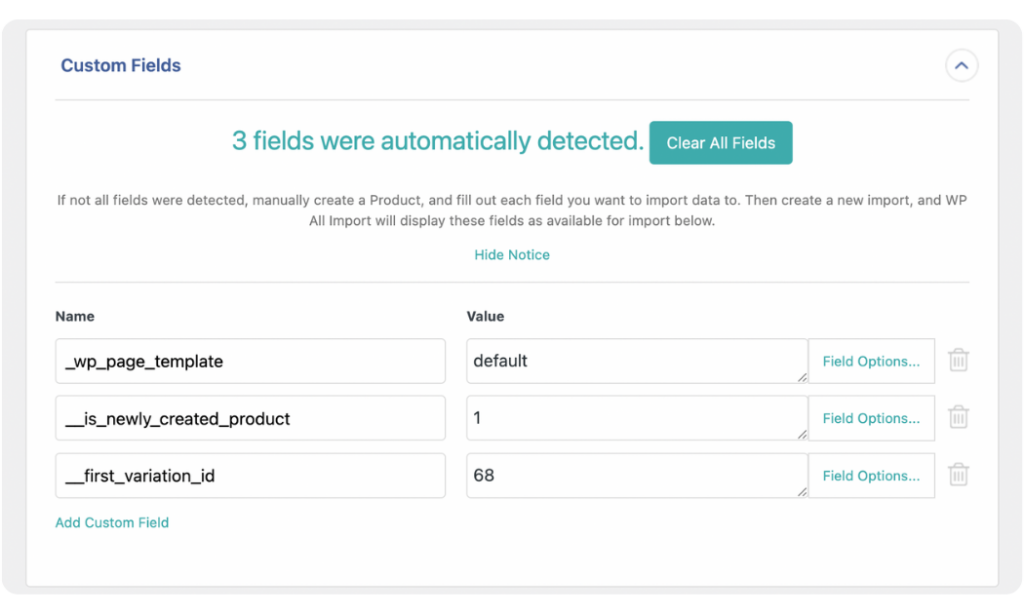
To learn more, read the article on How to Import Custom Field Data to WooCommerce.
Import Product Taxonomies, Categories, and Tags
The Taxonomies, Categories, Tags panel contains settings to map your product categories and tags. WP All Import provides multiple options for mapping both, including mapping to already existing product categories and tags on your site.
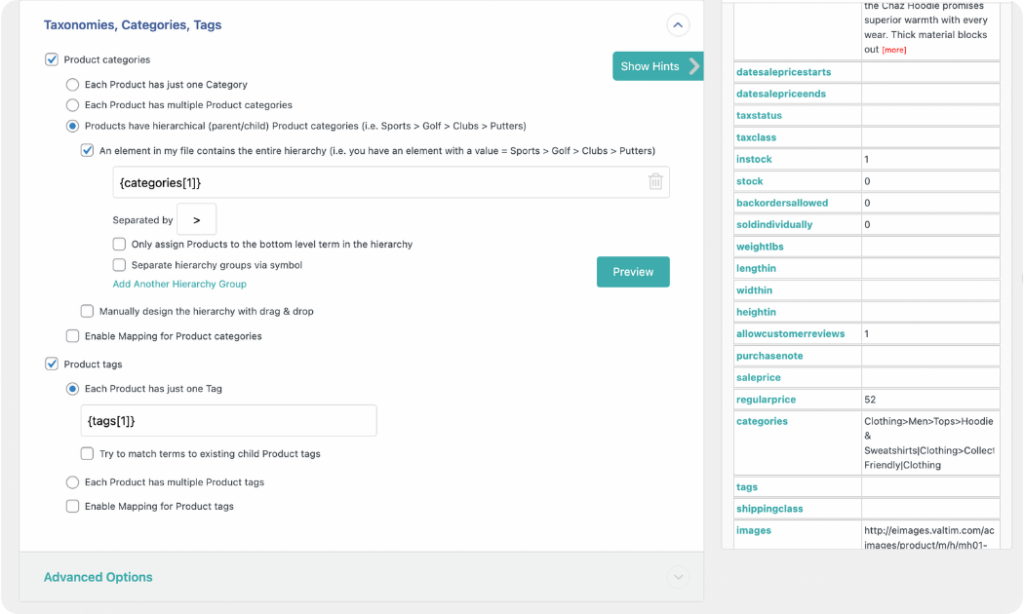
This article on how to import WooCommerce product categories provides more details on this panel.
Once you have mapped incoming data elements to all the relevant product fields for your import, scroll to the bottom of the screen and click Continue to Step 4.
4. Apply Additional WooCommerce Product Import Settings
The Import Settings screen provides additional settings for optimizing your product import process.
The first option is Unique Identifier, which you can set by clicking the Auto-detect button. The Unique Identifier helps ensure that WP All Import correctly links records in your current import file to those in an updated file if you re-run the import. This prevents product duplicates.
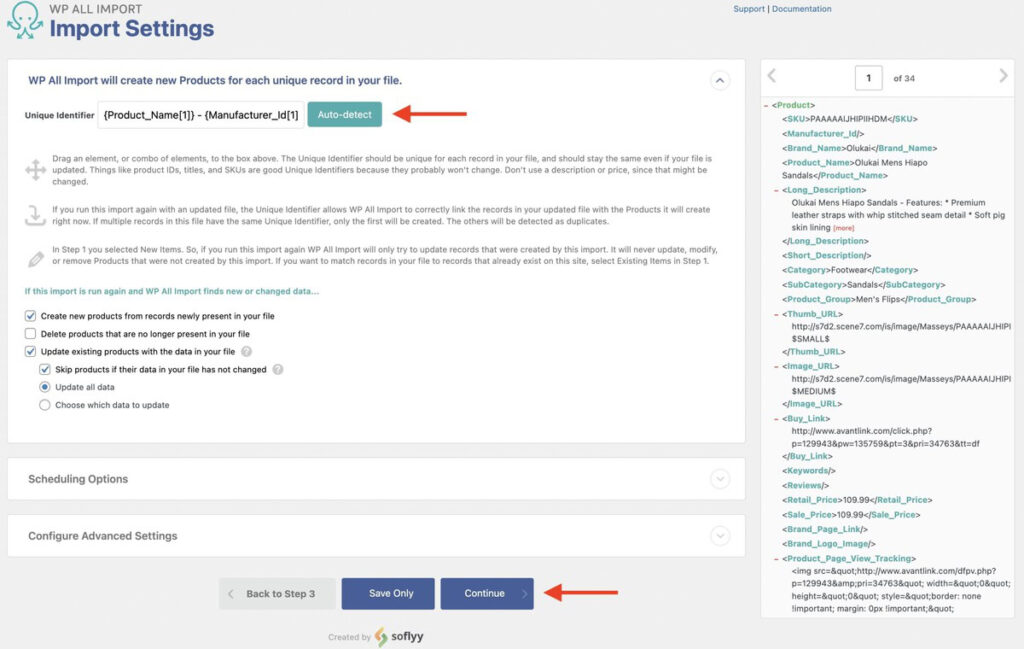
Keep the default settings for the additional options provided within the panel, as they work well for most imports.
Below, you will see the Scheduling Options and Configure Advanced Settings panels.
The Scheduling Options panel contains settings for WP All Import’s powerful scheduling tool. It is not relevant to this import, so we will not go into detail. However, you can read the Run WordPress Import on a Schedule documentation to learn more.
From the panel to Configure Advanced Settings, you can access options to optimize the speed of your import. WP All Import selects the most ideal options by default, so you can keep the settings as is. However, if you run into any issues during the import process, you can always tweak them.
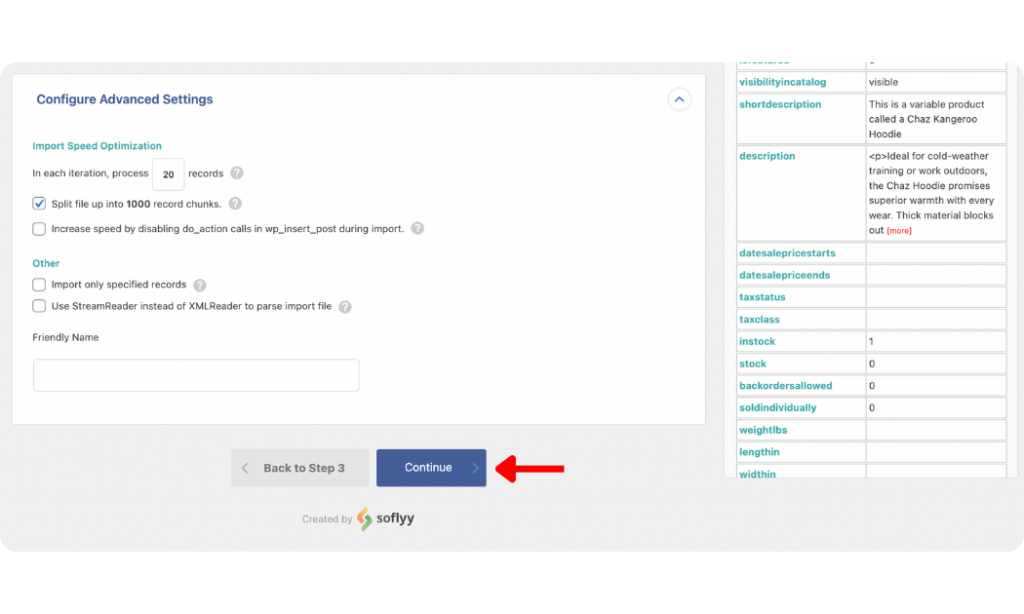
Click Continue to proceed.
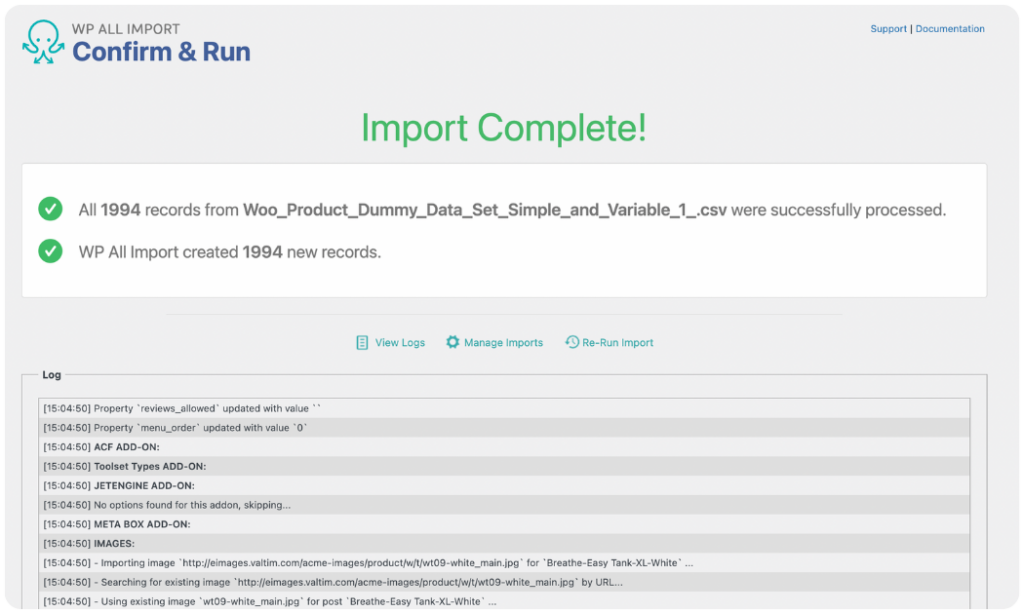
5. Verify and Run WooCommerce Product Attribute Import
The Confirm & Run screen is the last step of the process of importing WooCommerce products with attributes using the WP All Import plugin.
On this screen, WP All Import provides a summary of all the settings you have applied for your import. Review them to be sure your import will run without issues. If you notice any errors, go back and fix them before proceeding.

If there are no issues, click the Confirm & Run Import button to start the import process.
Once the import is completed, you will see an Import Complete notification.
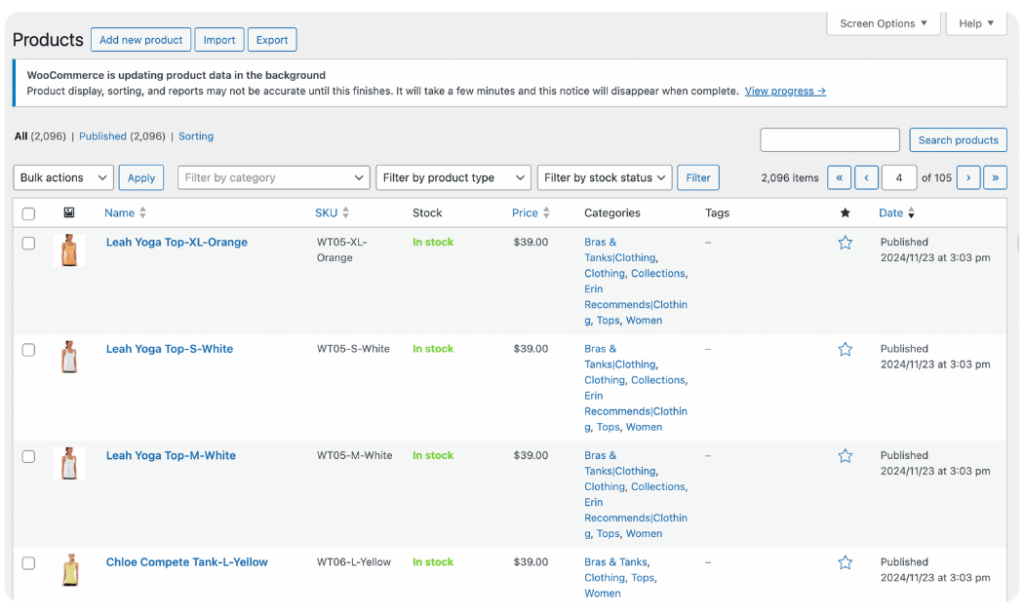
Verify your imported products by navigating to Products › All Products. Open the product tab for a few products to double-check that all the data was imported successfully.
Import WooCommerce Products With Attributes – FAQs
How Do I Import Products With Custom Fields in WooCommerce?
To import products with custom fields in WooCommerce, download and install the WP All Import plugin and its WooCommerce Import Add-On and follow the steps below:
- Navigate to All Import › New Import.
- Upload the import file of your products with custom fields.
- Choose WooCommerce Products as the import type.
- On the Drag & Drop screen, open the Custom Fields panel and map the custom field elements from your incoming product data. Also, map the other WooCommerce product fields available on the screen.
- Run the import and verify the imported products with custom fields from the All Products page.
How Do I Import Variable Products Into WooCommerce?
You can import variable products into WooCommerce with the WP All Import plugin and its WooCommerce Import Add-On. After installing and activating them on your site:
- Go to All Import › New Import and upload your product import file.
- Select WooCommerce Products as the import type.
- On the drag and drop page, set the product type as Variable Product and map the incoming data elements to the WooCommerce product fields.
- Run the import and the variable products will be imported to your store.
How Do I Import Bulk Products Into WooCommerce?
To import bulk products into WooCommerce, you need an import plugin like WP All Import. Install the plugin and its WooCommerce Import Add-On on your site, and then create a new bulk products import by following the steps below:
- Navigate to All Import › New Import.
- Upload the import file.
- Select WooCommerce Products as the import type.
- Map the incoming data elements to the WooCommerce product fields.
- Run the import and your products will be bulk-added to your WooCommerce site.
How Do I Export and Import Products in WooCommerce?
You can export and import products in WooCommerce with the WP All Export and WP All Import plugins, respectively. First, install and activate respective plugins on the source and destination sites. To export and import your WooCommerce products, follow the steps below:
- Use WP All Export on the source site to export your product data as a Bundle file.
- On the destination site, navigate to All Import › New Import, upload the Bundle file and choose WooCommerce Products as the import type.
- The Bundle file will automatically map the product data and you can run the import to complete the process on the destination site.