
How to Create a WooCommerce Product Import Template
Creating a WooCommerce product import template means specifying the following:
- The filter, if any, that should be applied to the import records. This allows you to dictate which products are imported or excluded.
- How to map the import data elements to the WooCommerce product fields. This represents most of the work involved in creating an import template.
The purpose of this article is to walk you through the details of these tasks.
To follow along, use this online sandbox and choose the WooCommerce Store option. We’re going to assume that you’ve done this, as we’ll be using one of the sandbox’s prebuilt product imports as our starting point.
Table of Contents
- Editing the Template for an Existing Product Import
- Adding a Filter to the Import Template
- Mapping Incoming Data Elements to WooCommerce Product Fields
- Using a Built-In PHP Function in the Template
- Creating and Using Your Own Custom PHP Functions
- Importing Product Data into Custom Fields
- Related Info
- Related Videos
Editing the Template for an Existing Product Import
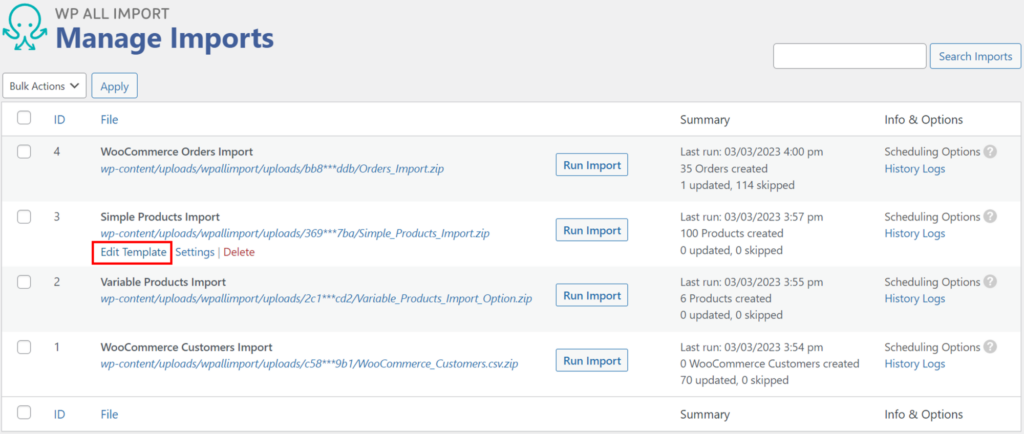
To access the template for an existing product import, go to All Import › Manage Imports in the main WordPress menu and click Edit Template:
This will bring you directly to the Drag & Drop screen:
Adding a Filter to the Import Template
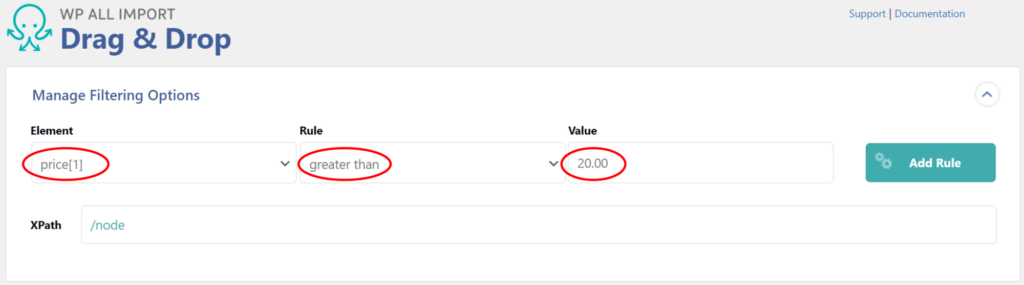
Expand the Managing Filter Options section at the top and do the following:
- Select price[1] as the Element
- Choose greater than as the Rule
- Enter “20.00” as the Value
Your screen should look like this:
Click the Add Rule button. This expands the filter section and temporarily stores your rule in the expanded part:

You can add as many rules as you like. In this next example, we’ve created a second rule to restrict the incoming products to only those that are of color “Red”:
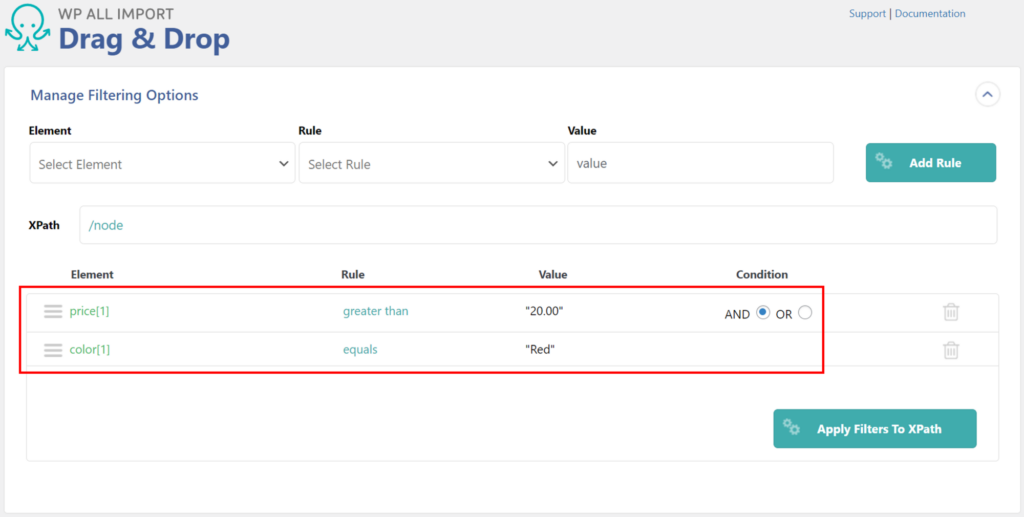
Note the Condition column on the right, which specifies how to combine the rules. In this case, we have selected the AND condition, which means that any incoming products must be both red and have a price greater than $20.00. If we switched the condition to OR, products that met either condition would be imported.
You can even nest filter rules by indenting them. In this example, we’re saying, “import products that either have a price greater than $20.00 AND have a color of “Red” OR (have a price greater than $40 AND have a color of “Green”). In other words, nesting filter conditions is the same as adding parentheses:
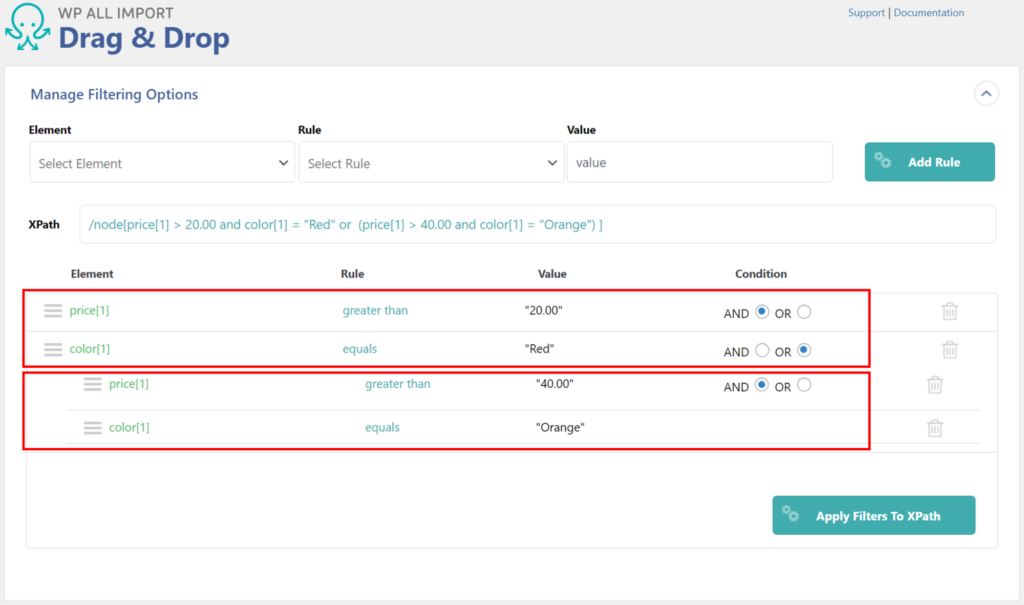
These features give WP All Import the most powerful filter capabilities of any plugin that can be used to import WooCommerce products.
Remember, though, that these rules are only in a temporary storage area at this point. To apply them to the import, click the Apply Filters to XPath button, which translates your filter conditions to the XML Path Language or XPath for short:
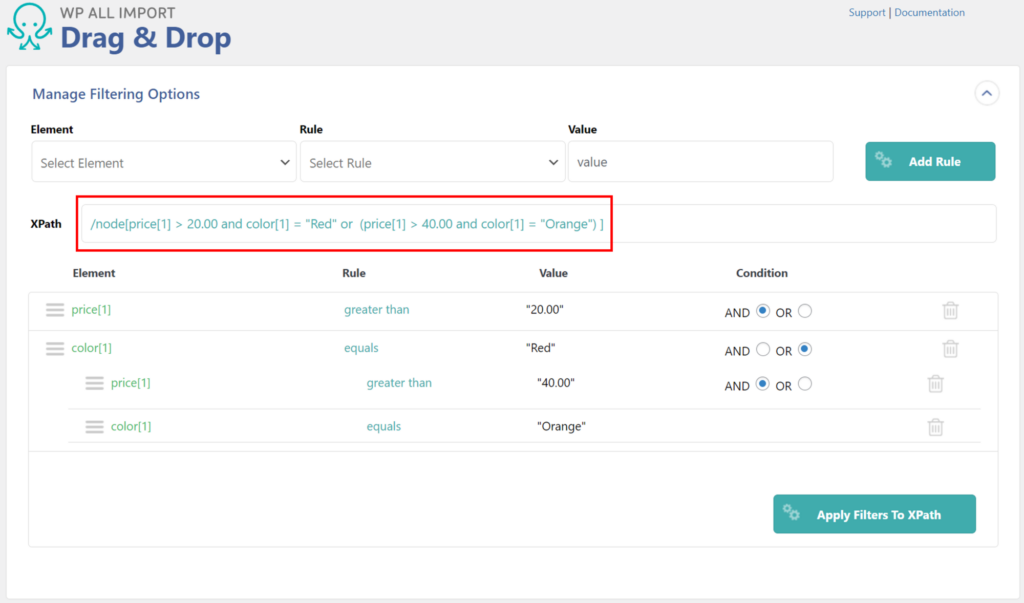
XPath is the language that actually applies the filter(s) to your import, but you don’t have to understand it. The entire filter interface acts as your translator.
Close the Managing Filter Options section.
Mapping Incoming Data Elements to WooCommerce Product Fields
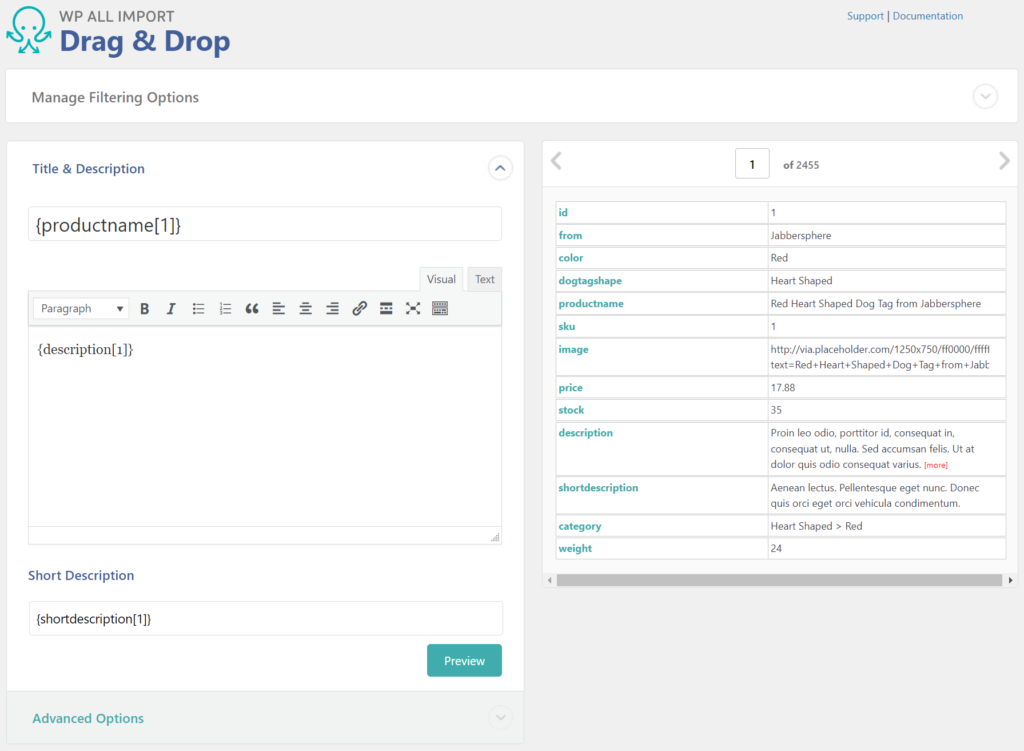
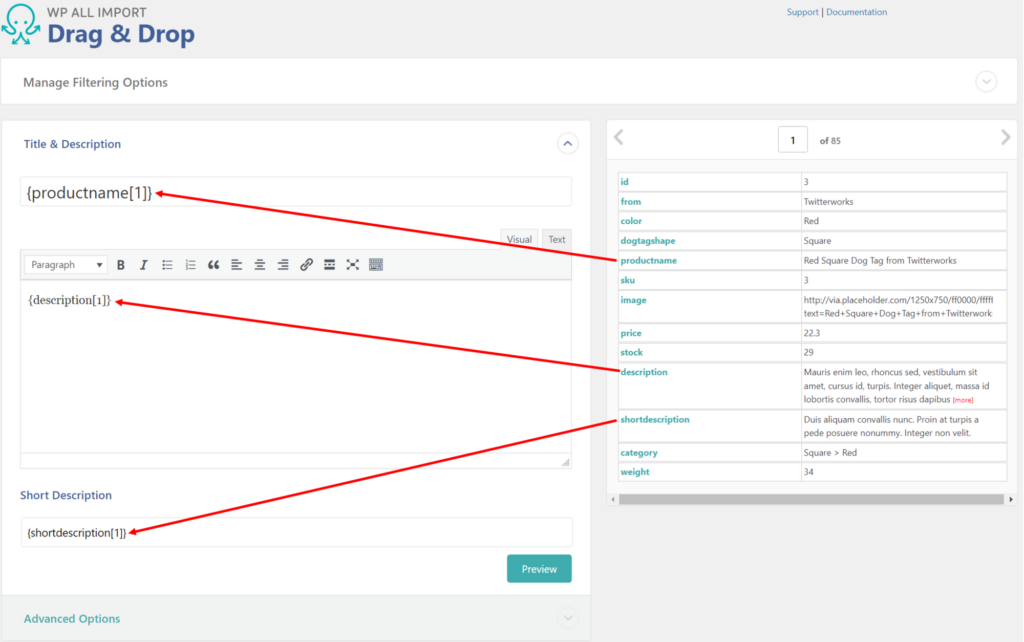
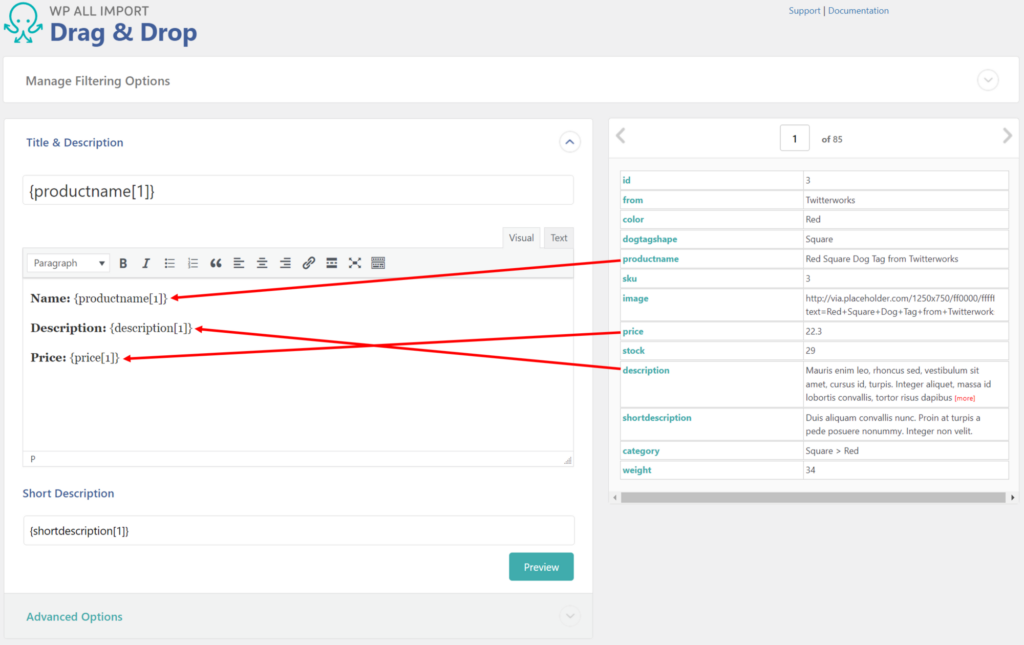
Next up is the Drag & Drop screen, where you map the incoming data to the corresponding WooCommerce fields. This can be done at the basic level simply by dragging the data elements from the panel on the right into the relevant fields on the left.
In some cases, there may also be settings or options that apply to an incoming data element that you’ve mapped through drag & drop:

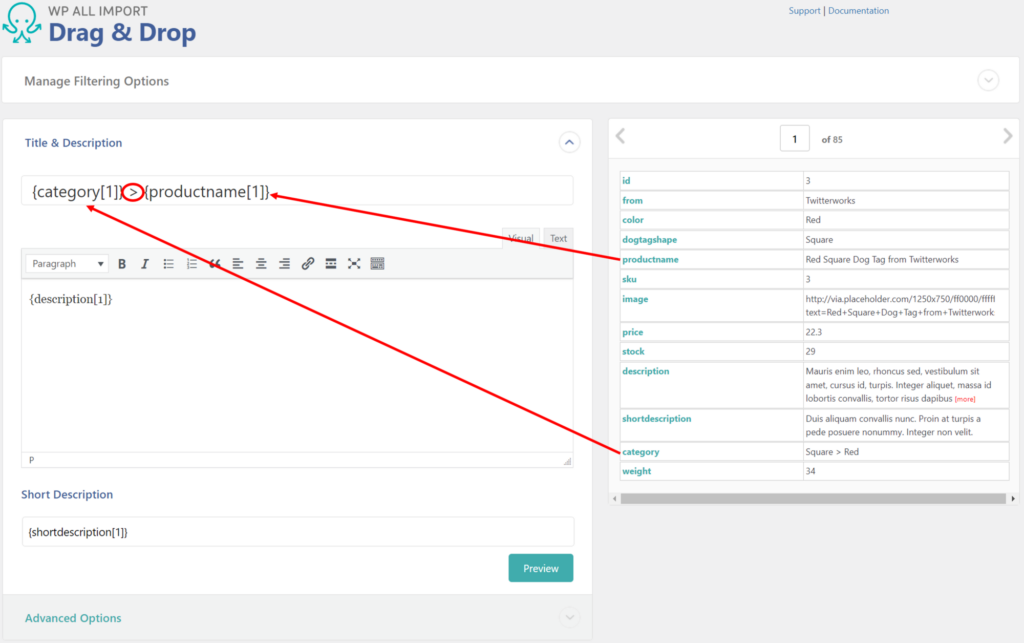
You can combine multiple incoming elements in a single field, as we’ve done here with category and productname in the Title field (we also inserted a chevron between them):
Or, take it a step further and freely combine text and multiple data elements in a single field, as we’ve done here in the product description field:
Using a Built-in PHP Function in the Template
What do you do if some of the incoming data is not in the format you require? You can use standard PHP functions inline to change the format. For example, you can use the strtouupper() function to convert the incoming productname value to uppercase.
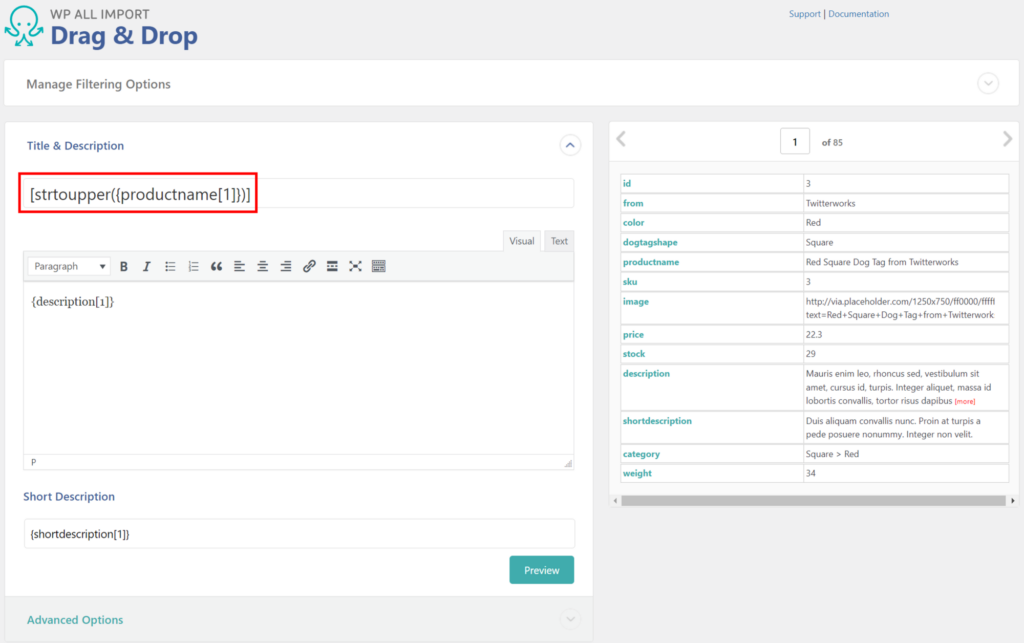
There are scores of these functions available for all different data types.
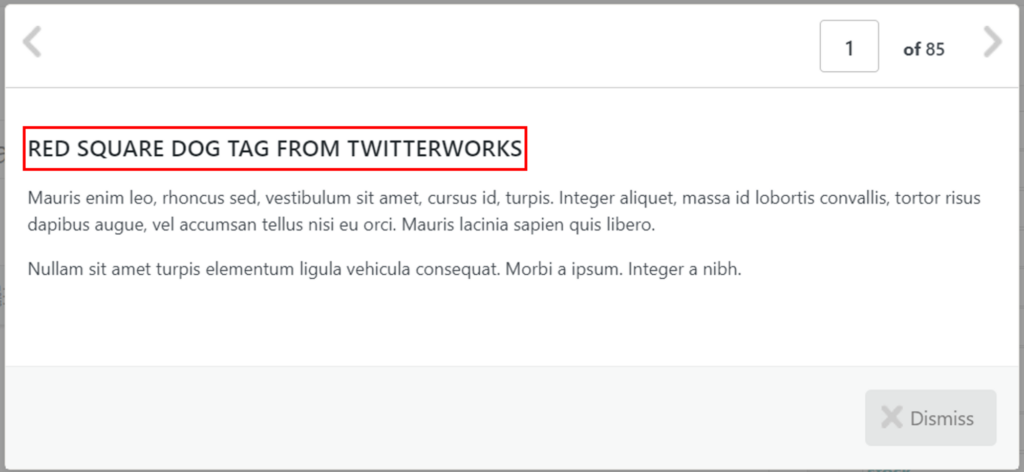
If you’re not sure if you’ve used the correct syntax for a function, just click the green Preview button for a preliminary look at your results:
Creating and Using Your Own Custom PHP Functions
Need something more sophisticated than the built-in PHP functions? You can create your own PHP functions by scrolling down to the Function Editor at the bottom of the Drag & Drop screen and entering your PHP code there:
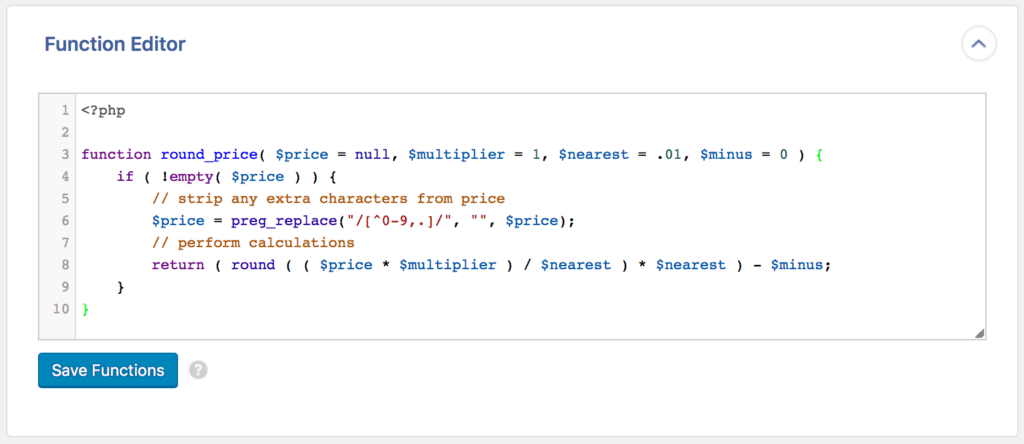
This function rounds a price value based on the parameters you give it.
Once you’ve saved your function, you can then use it just like a standard PHP function, as we do here to round our prices to the nearest 10 cents:

The ability to incorporate your own PHP functions into your product import template, complete with loops and conditional logic, means you can do practically anything you want with incoming values.
Importing Product Data into Custom Fields
If you’ve installed addons/extensions/plugins into your WooCommerce system, it is likely that they created custom fields. If some of those fields are related to products, you need a way to import data into them.
Enter the Custom Fields section of the Drag & Drop interface:

As you can see from this screenshot, WP All Import will detect whether you have product-related custom fields and notify you of this.
To work with these fields, click the See Detected Fields button, which will present them like this:
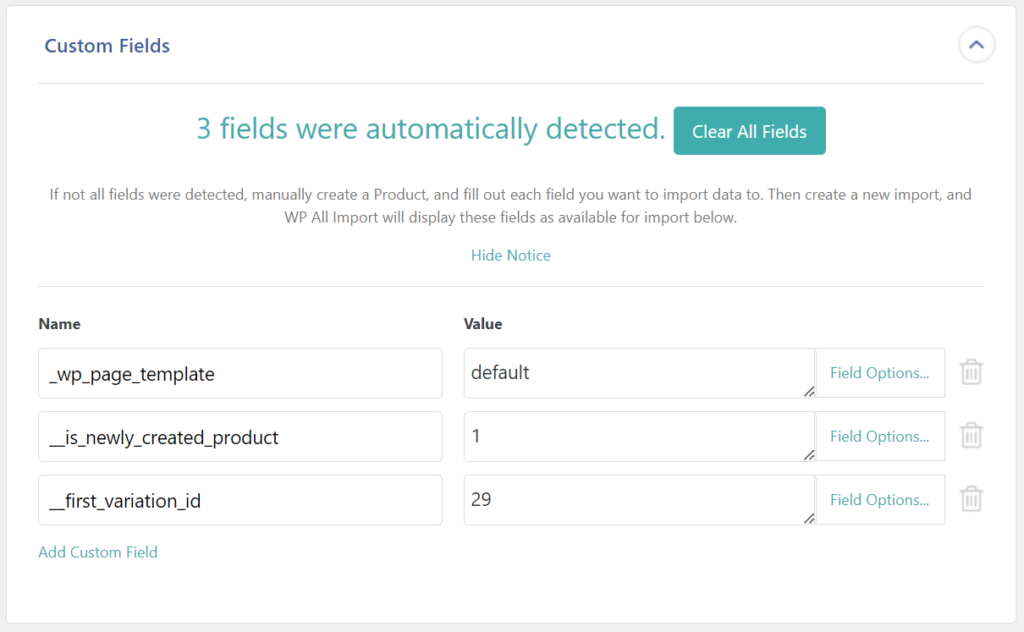
At this point, depending on the type of field, you can select values for them from a list or drag and drop incoming data elements into them.
For more information, see Custom Fields Overview.
Create a WooCommece Product Import Template – Related Info
- How to Map Custom Fields
- How to Handle Serialized Custom Fields
- How to Import WooCommerce Products
- The 5 Best WooCommerce Product Import Plugins
Create a WooCommece Product Import Template – Related Videos