WooCommerce Auto Import Products on a Schedule
There are many reasons to automatically import WooCommerce products on a schedule. The most common of these occurs when suppliers send you regular product updates.
In this article, we show you how to auto-import your products on a schedule using WP All Import.
Table of Contents
- Prerequisites for Scheduling WooCommerce Product Imports
- How to Set Up and Test a WooCommerce Product Import
- Step 1: Check Your Current Product Prices
- Step 2: Create a New Import for WooCommerce Products
- Step 3: Review the Product Import File
- Step 4: Map the New Price Data to the Regular Price Field
- Step 5: Match Existing Products and Update Only the Regular Price Field
- Step 6: Complete the Import
- Step 7: Check the Updated Product Prices
- Product Import Scheduling
- Related Info
- Related Videos
Prerequisites for Scheduling WooCommerce Product Imports
Successful Manual Update Tests
The first prerequisite for scheduling any process is to successfully run it manually for the first two updates. This is especially important when updating the products in your WooCommerce store because the new information could be displayed to customers within minutes of the import’s completion, and no one wants to publish, say, the wrong prices on a live site.
Why should you test the first two updates?

The first test is to see if you can successfully interpret the data from a supplier file and apply that data to your site. This may involve multiple runs/adjustments and should be done on a test site.
The second test is really a test of your supplier to see if they’re sending you consistent update files (some may change the file’s structure or content format without telling you).
You should only schedule your import to run automatically after you successfully complete both tests.
Accessible File Locations
The other general requirement is that the update files should be placed in a consistent location that is accessible to your import program. When running an import automatically, accessing the import file cannot be dependent on manual actions.
For WP All Import, this means one of the following locations:
- A URL. The URL should point directly to the file you’re trying to import. If you click this URL in a browser, it should immediately prompt you to download/save the file.
- An FTP/SFTP site for which you have the necessary credentials. WP All Import lets you record these credentials for subsequent updates.
- The /wp-content/uploads/wpallimport/files/ folder on your server. This means that you must have some method of loading files into that folder.
How to Set Up and Test a WooCommerce Product Import
Imagine that a supplier has sent you the URL for a new import file that contains updated product prices. In this section, we show you how to import this file and then verify the results.
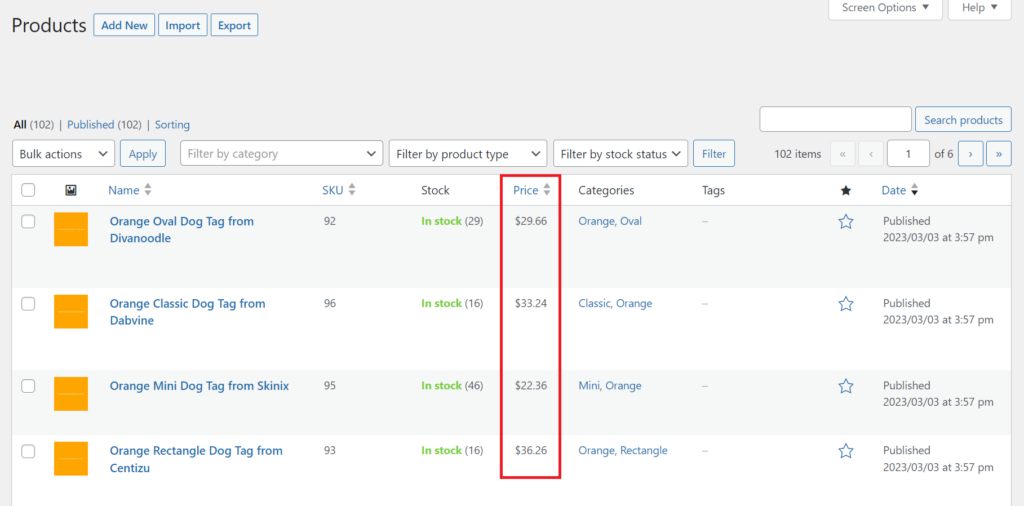
Step 1: Check Your Current Product Prices
Go to Products › All Products in the main WordPress menu and take note of some of the product prices at the top of the list:
Step 2: Create a New Product Import
Navigate to All Import › New Import and initiate a new product import using the Download a file option:

Step 3: Review the Product Import File
In this step, check to make sure that WP All Import has correctly interpreted the import file. As you can see from the image below, our sample file is very simple, containing only a few product identifier fields along with updated regular price data.

Step 4: Map the New Price Data to the Product Price Field
On the General tab of the WooCommerce Add-On section of the Drag & Drop screen, map the incoming regularprice data element to the Regular Price ($) field:

If the supplier has sent you sale price data instead, you can map the saleprice data element to the Sale Price ($) field.
To continue, click the blue Continue to Step 4 button (not shown).
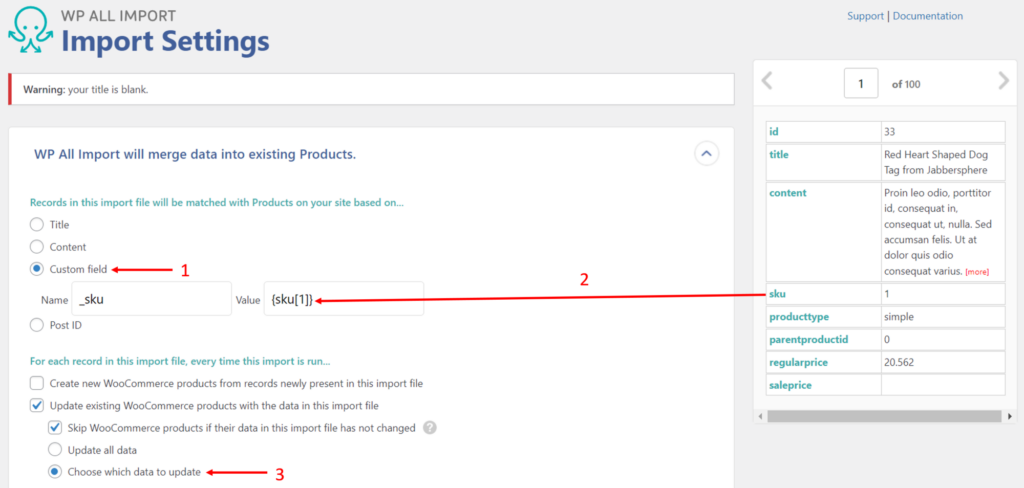
Step 5: Match Existing Products and Update Only the Regular Price Field
The Import Settings screen appears next. Here, you can tell WP All Import how to match the incoming products to the products in your store, which you do in actions 1 and 2 below:
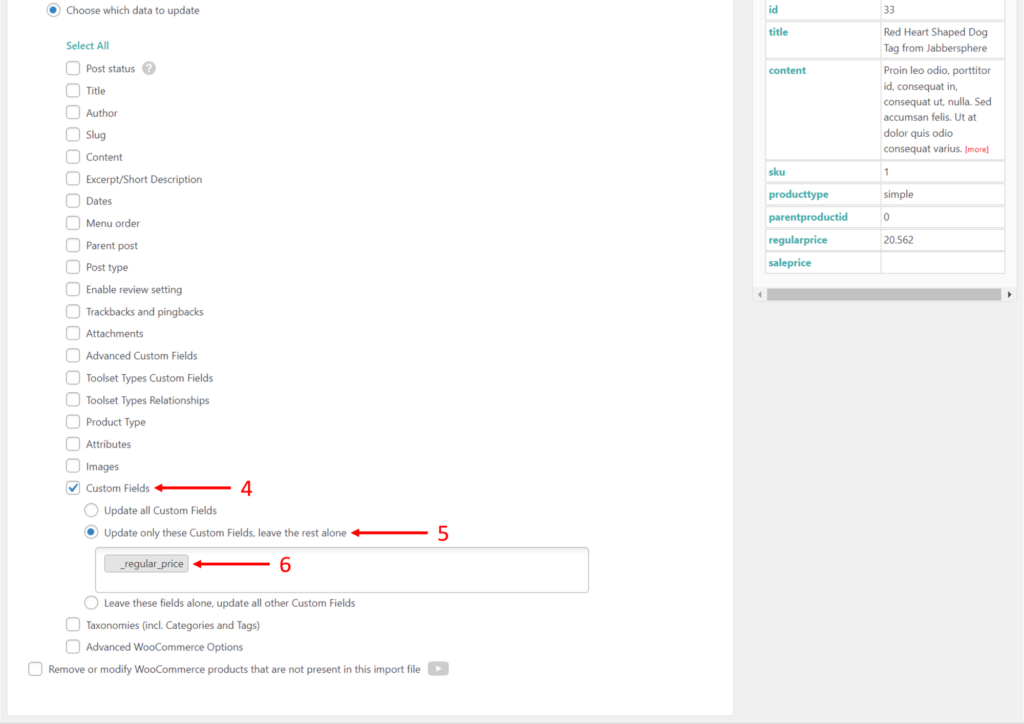
Action 3 lets you specify the fields to update, which you do further down the screen:
Click the blue Continue button (again, not shown).
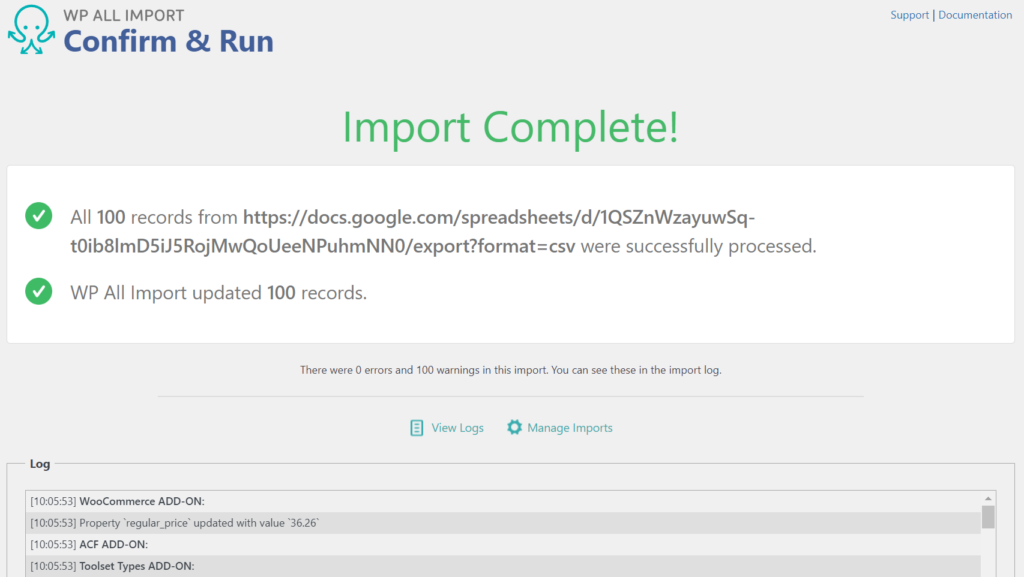
Step 6: Complete the Import
On the next screen, click the Confirm & Run Import button. When the import is complete, you should see a screen like this:
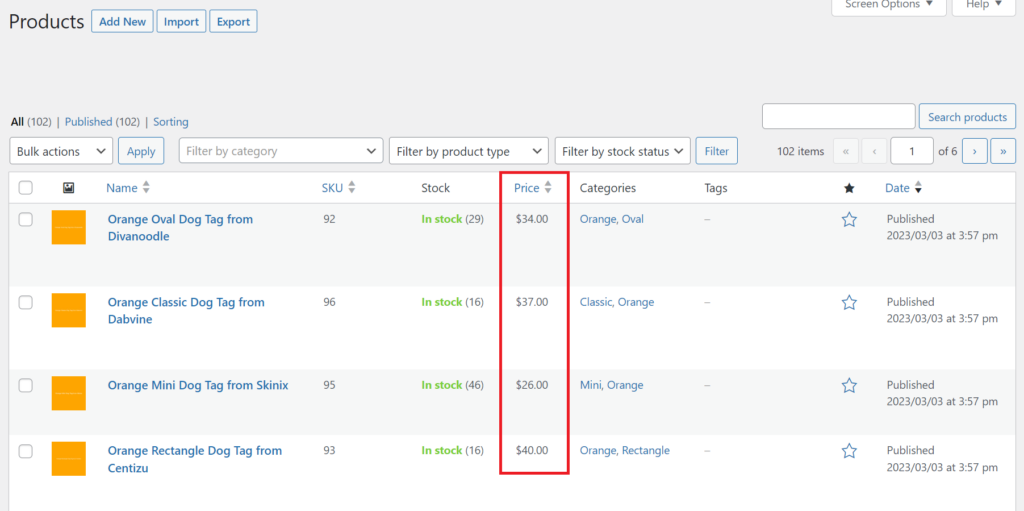
Step 7: Check the Updated Product Prices
Go back to Products › All Products and confirm that the prices have changed:
At this point, you have successfully set up and tested your initial import/update. Now, it’s time to configure and test the scheduling process.
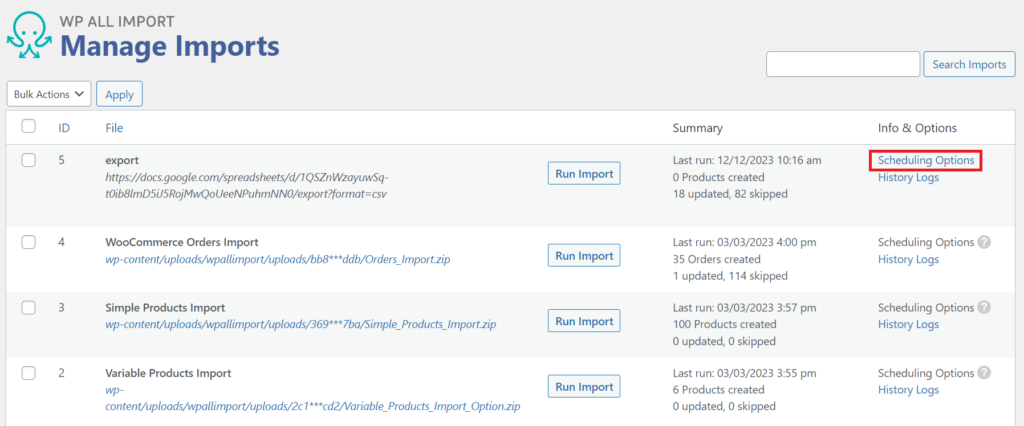
Product Import Scheduling
To schedule your import, go to All Import › Manage Imports, locate your recent import, and click the Scheduling Options link on the right-hand side:
This will bring up the Scheduling Options form:
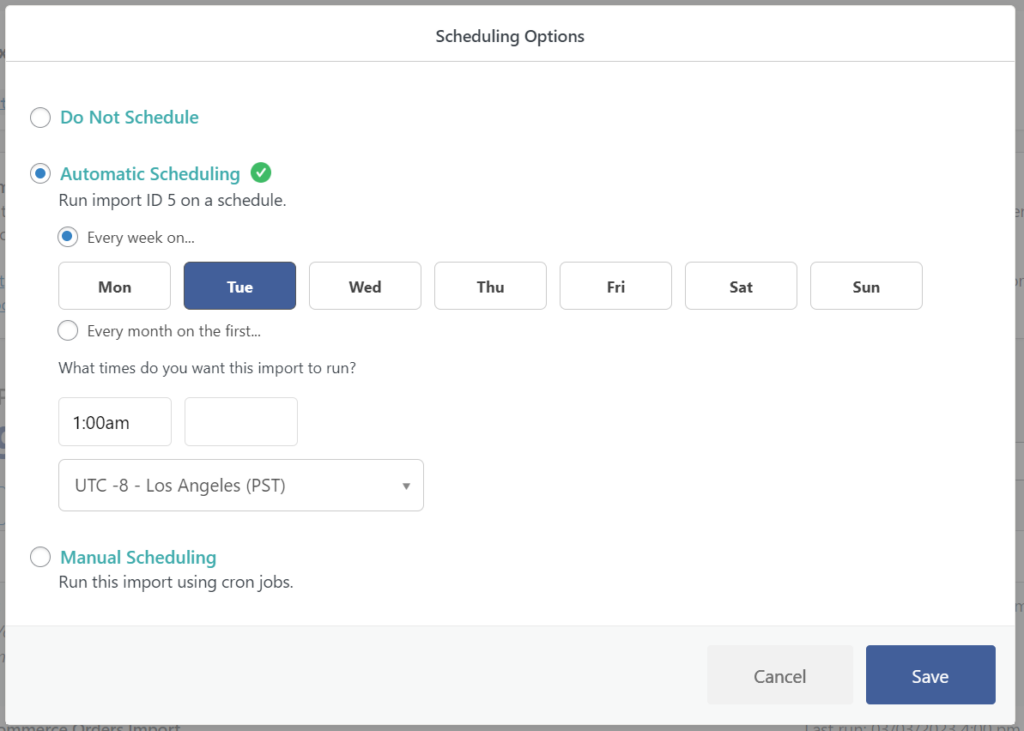
WP All Import offers two methods of scheduling: the Automatic Scheduling Service and cron jobs. In this example, we have selected Automatic Scheduling. The interface is self-explanatory and requires only a few seconds to complete. Once you click the Save button, that’s it — your import will run automatically on the schedule you have specified.
The price for this convenience is $9 per month. For more information on this option, see Run WordPress Import on a Schedule.
You can also schedule your product imports using cron jobs on your server:
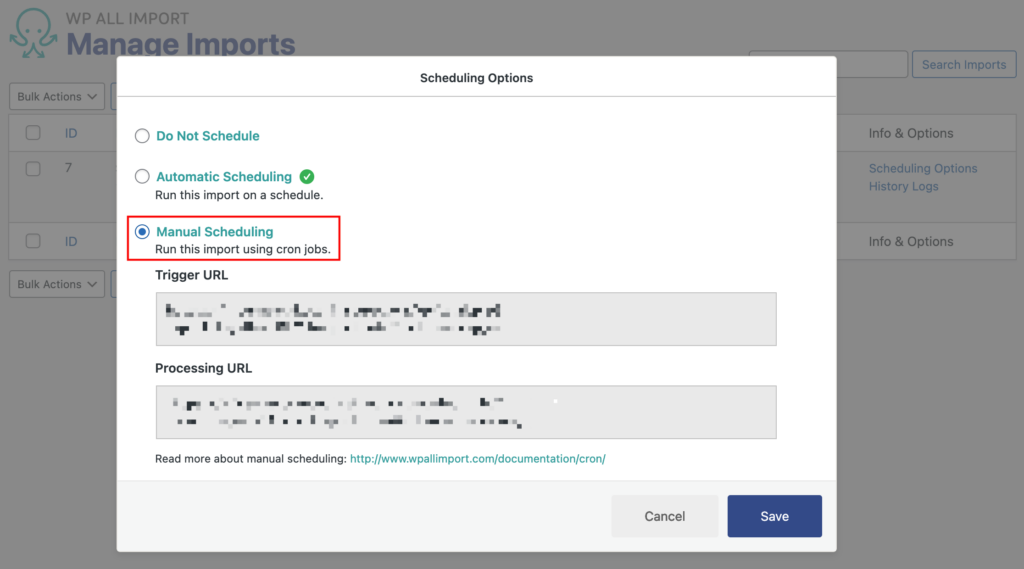
This option is free but significantly less convenient. For more information, see Scheduling Imports Using Cron Jobs.
Once you’ve set up your schedule, just upload a test file (again, on your test site) and wait for the automatic import to take place. When this occurs, check your products and verify that everything went smoothly. If it did, you’re ready to put the whole process into production!
WooCommerce Auto Import Products on a Schedule — Related Info
- Official Documentation: Recurring Imports Overview
- Official Documentation: Updating Prices to Existing Products
- Official Documentation: How to Import WooCommerce Products from CSV and XML
- The 5 Best WooCommerce Product Import Plugins
WooCommerce Auto Import Products on a Schedule — Related Videos