How to Import WordPress Posts
If you want to import posts that you exported via the built-in WordPress export tool (Tools › Export), you can use the free WordPress Importer plugin. However, this plugin is quite limited and lacks the ability to apply filters, modify data on the fly, and many other options.
If you need a more capable solution, you’ll have to install a 3rd-party plugin like WP All Import.
We’ll examine both these options in this article.
Table of Contents
- Using the WordPress Importer Plugin
- Importing WordPress Posts Using WP All Import
- Advanced Topics
- Frequently Asked Questions
- Related Docs
- Related Videos
Using the WordPress Importer Plugin
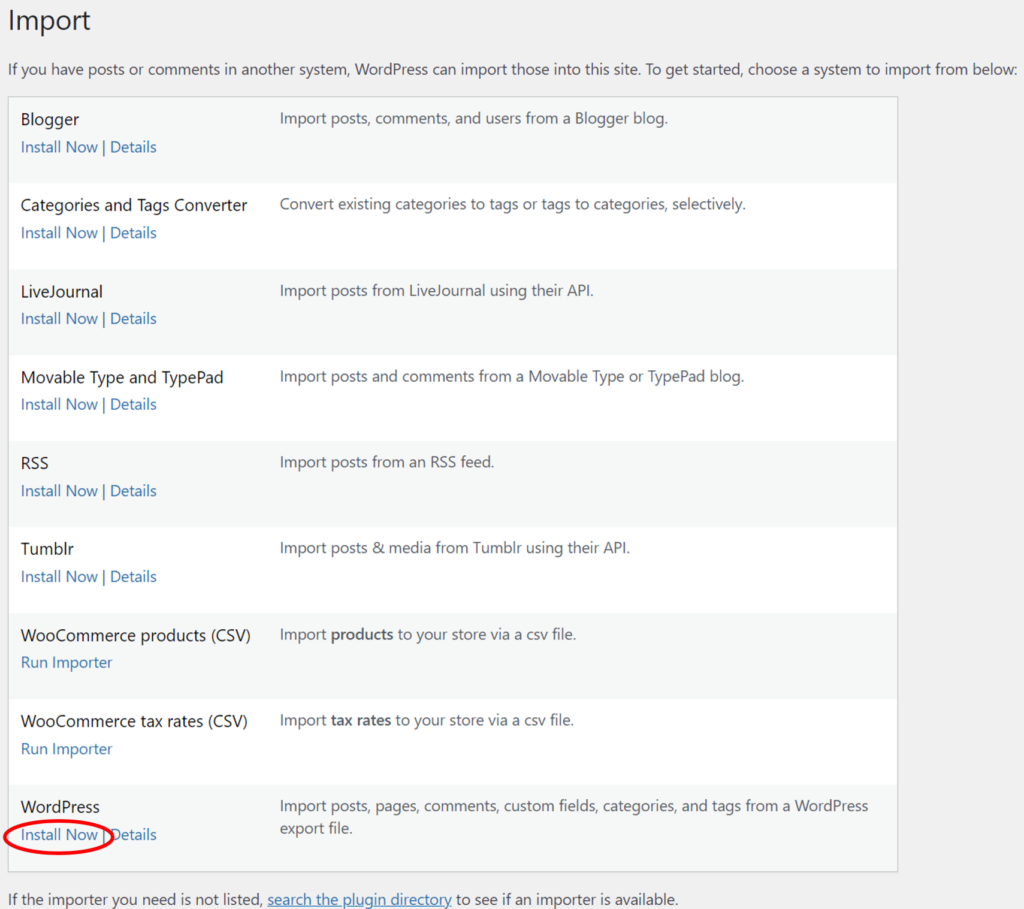
First, you must install this plugin, which you can do by going to Tools › Import in the main WordPress menu, then clicking Install Now under the WordPress heading:
The plugin will automatically install, at which point the link below the WordPress heading will change to Run Importer:
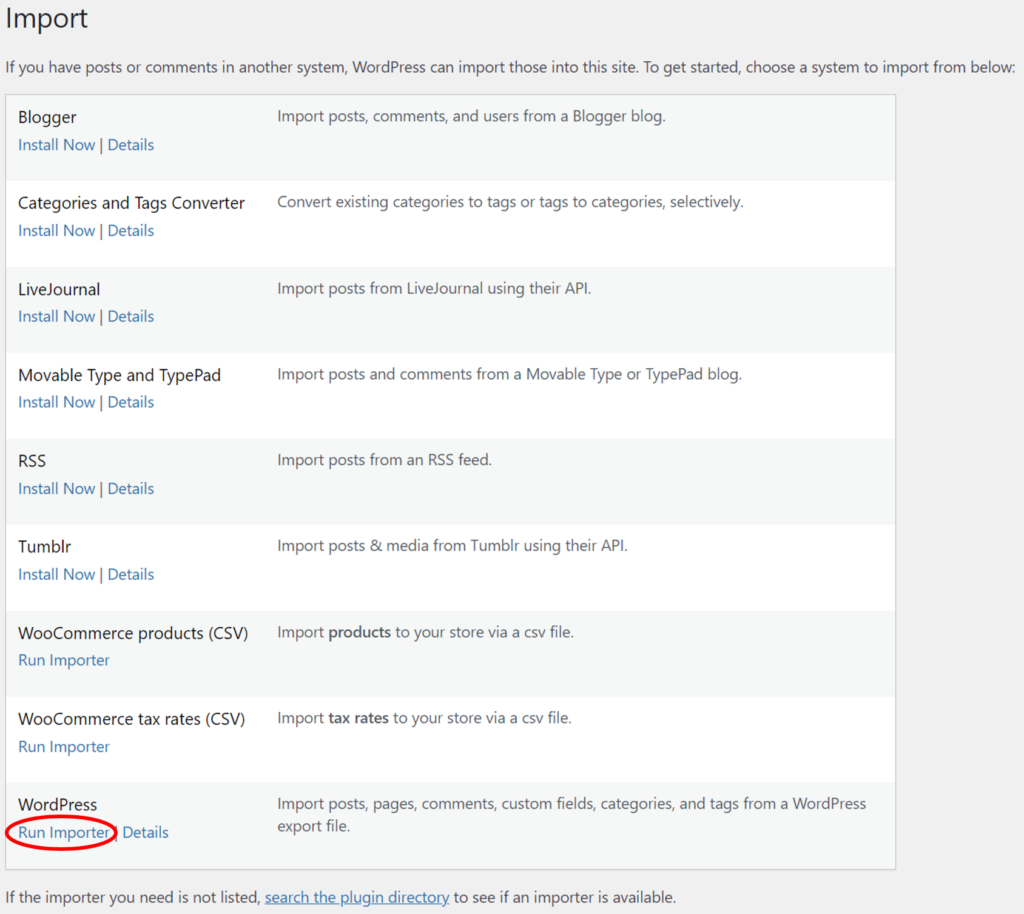
If you click Run Importer, this screen will appear:
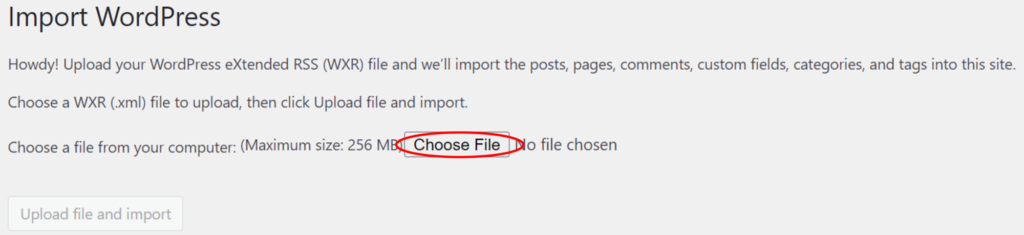
As the instructions indicate, you can only upload posts from a WXR file, which is a WordPress XML file created by the built-in WordPress export tool.
If you have such a file, click Choose File, select your file, and then click the Upload file and import button on the lower left (it will become active after you select a file).
Next, you’ll see this screen, which provides two types of import settings:
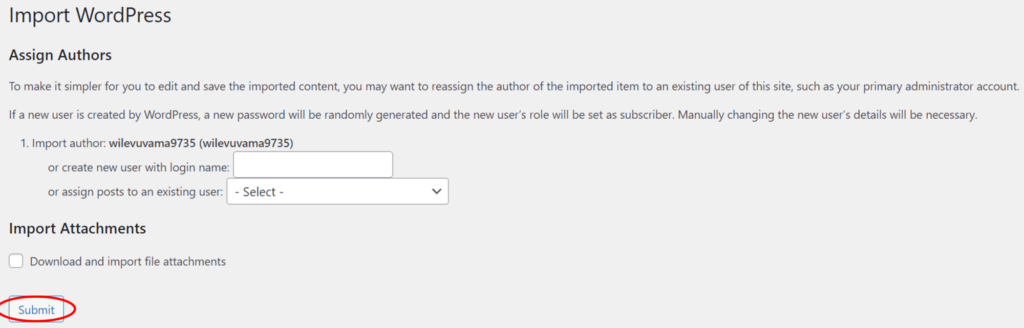
The first setting (Assign Authors) lets you assign posts to an existing user or create a new user and assign the posts to that person. If you do nothing here, the posts will be assigned to the user running the import.
The second setting (Import Attachments) does exactly what it says and lets you download and import any post attachments.
Unfortunately, that’s it — these are your only import settings. The moment you click the Submit button in the lower left, your import will run.
The best way to understand what is missing from this plugin is to have a look at WP All Import.
Importing WordPress Posts Using WP All Import
WP All Import is a plugin designed to import all types of WordPress and WooCommerce data. It lets you filter your import data, map any incoming data element to any WordPress or WooCommerce field, and modify data on the fly, just to mention a few of its features.
In this section, we’ll do a quick walkthrough using this plugin to import WordPress posts. If you want to follow along, use this online sandbox. Choose the ACF Fields option and click Create Sandbox.
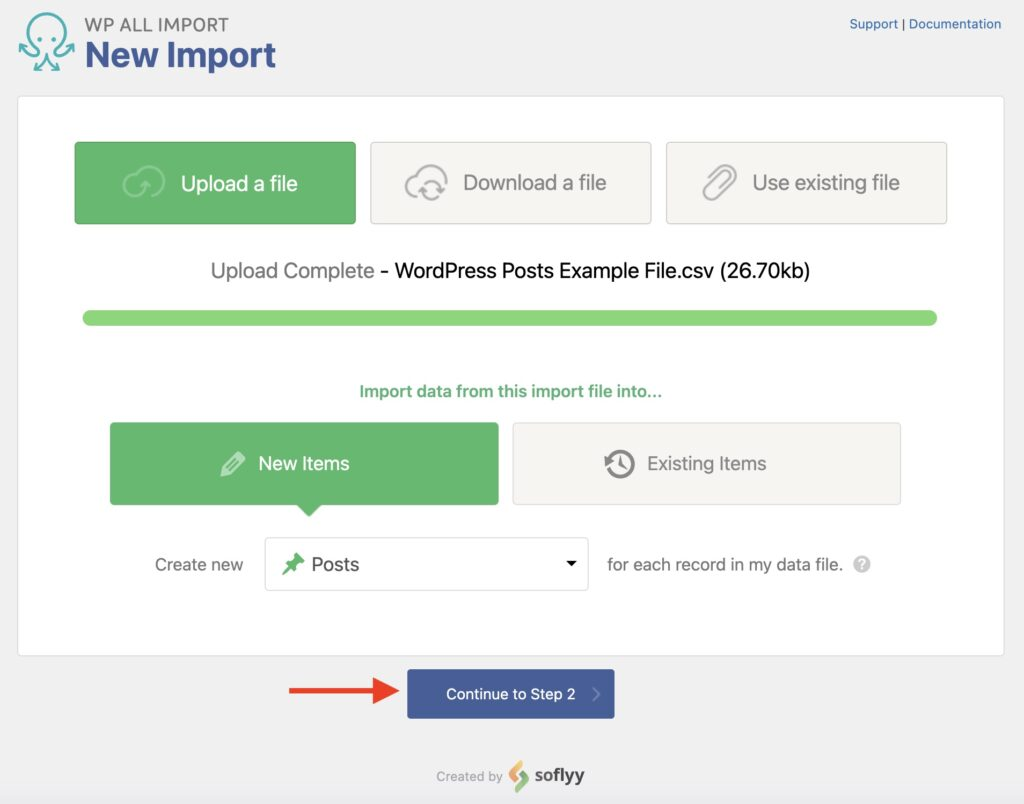
Step 1: Create a New Import for WordPress Posts
Go to All Import › New Import and select your import file. Choose Posts as your import post type, then click Continue to Step 2.
Step 2: Verify the Import File
The Review Import File screen will appear next. This screen allows you to verify that WP All Import has correctly interpreted your import file. If you see a problem, you can either edit the file and try again or attempt to fix the data “on the fly” later in the import process.
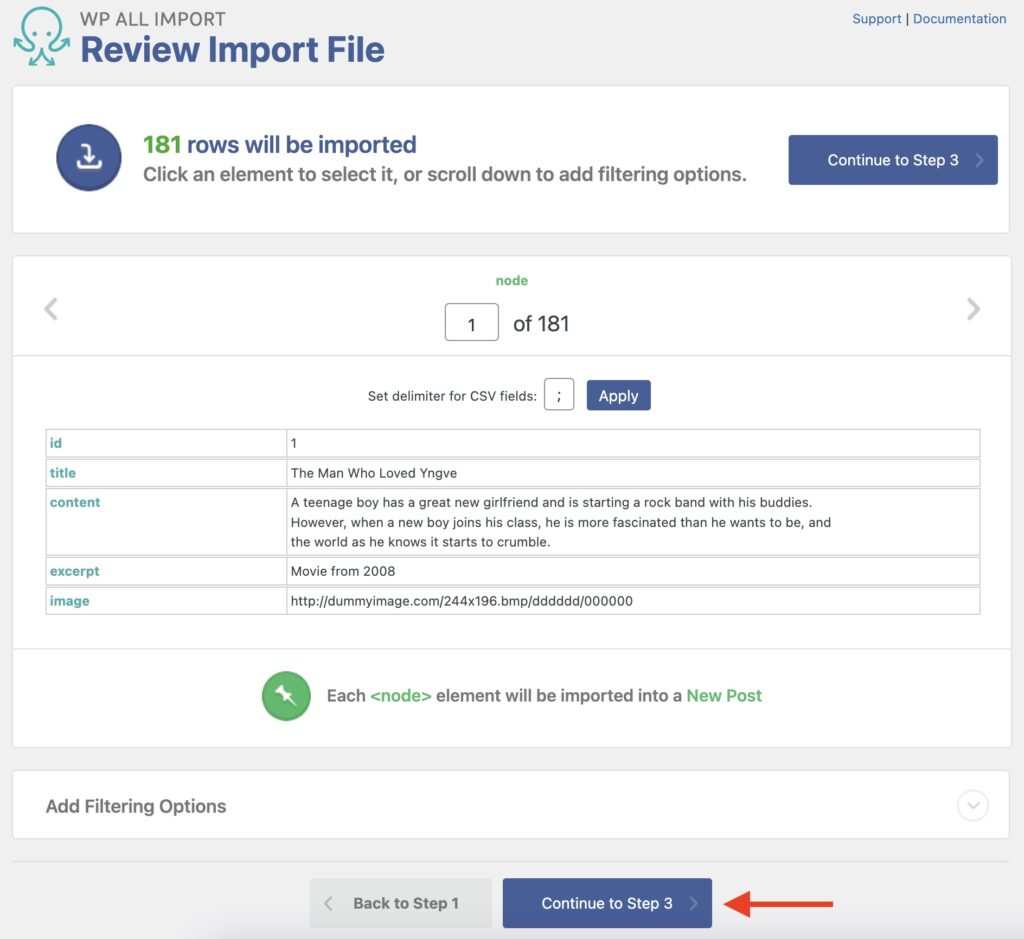
You can also filter your import data via the Add Filtering Options section near the bottom. We’ll elaborate on this feature later in this article.
For now, click Continue to Step 3.
Step 3: Map the Import Data to the WordPress Post Fields
Next up is the Drag & Drop screen, where you can map incoming data elements from the panel on the right to the relevant target fields on the left using drag and drop. Let’s walk through each of the sections on this screen:
Title & Content
First, map the post title and its content:
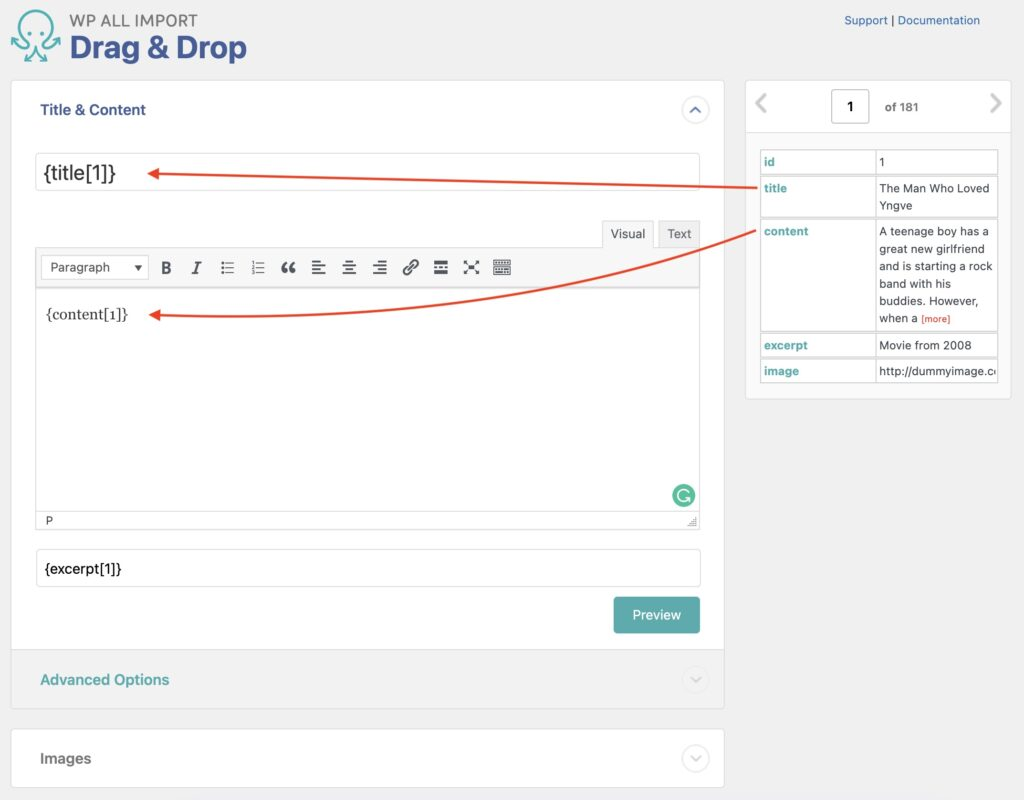
You can also map the excerpt or short description.
WordPress Post Images
In this section, you can map the images associated with the post, including the featured image:
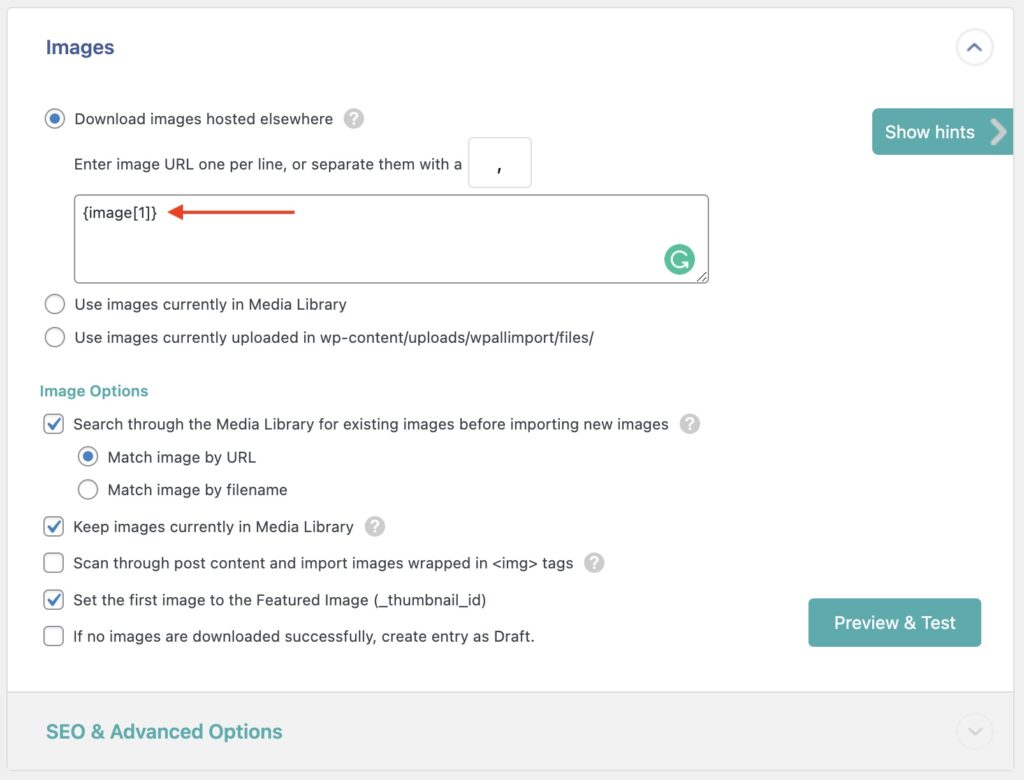
As you can see from all the options on this page, WP All Import can handle pretty much every image scenario. For more information, see How to Import Images into WordPress.
WordPress Post Custom Fields
In the Custom Fields section, you can import data into any custom fields that are attached to your posts:
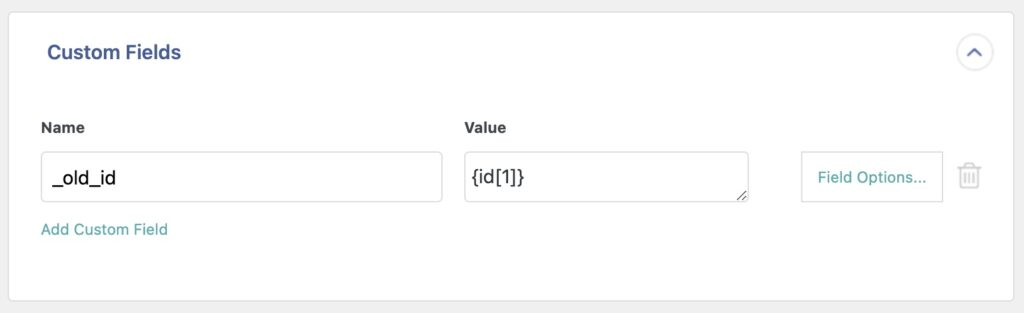
To learn more about custom fields, see Custom Fields Overview.
Other Post Options
This section lets you map other post data, such as post status, dates, slug, author, attachments, menu order, etc.
Once you’ve finished mapping incoming data elements to your WordPress post fields, click the Continue to Step 4 button at the bottom (not shown).
Step 4: Configure the Import Settings
The next screen is the Import Settings screen, which lets you configure key import settings. You can start by clicking the Auto-detect button to generate a unique identifier. This helps WP All Import recognize individual posts so it can manage updates and avoid creating duplicates.
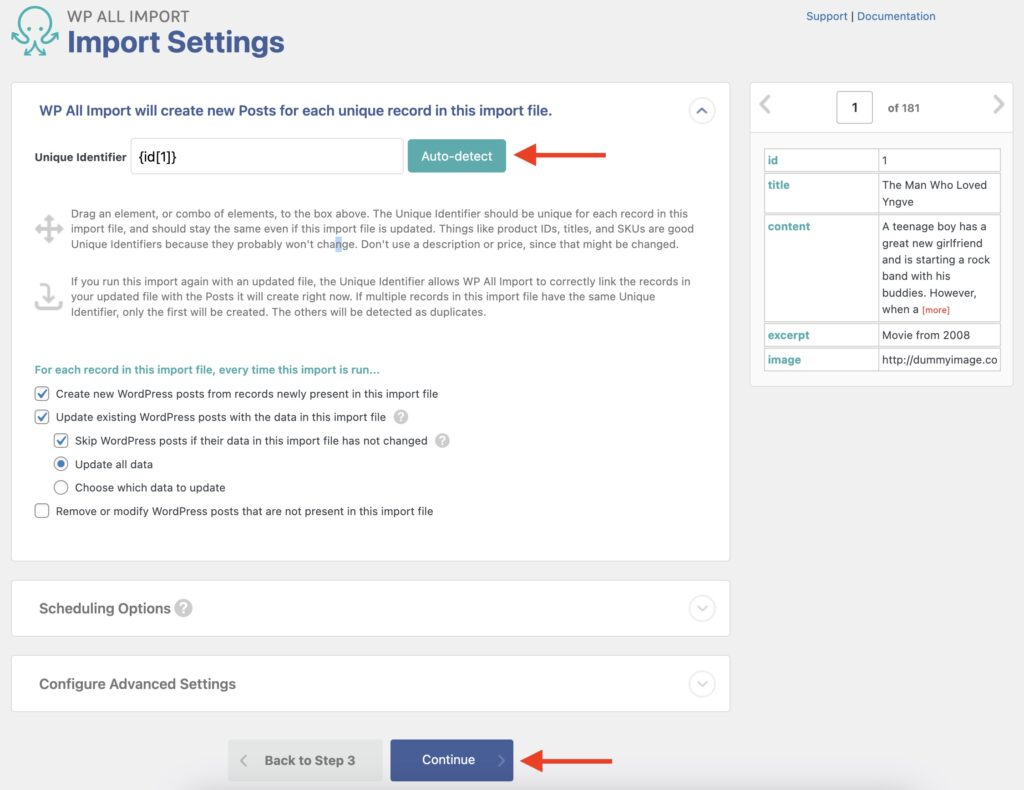
This screen also lets you define how an import should behave if it is run again. For example, you can instruct WP All Import to remove posts if they’re no longer in the import file.
Below this, the Scheduling Options section lets you schedule your import (we’ll elaborate on this shortly), while the Configure Advanced Settings lets you control the import batch processing size, among other things.
For now, click Continue.
Step 5: Complete the Import and Check Your Imported Posts
Next up is the Confirm & Run screen, which provides a summary of your intended import:
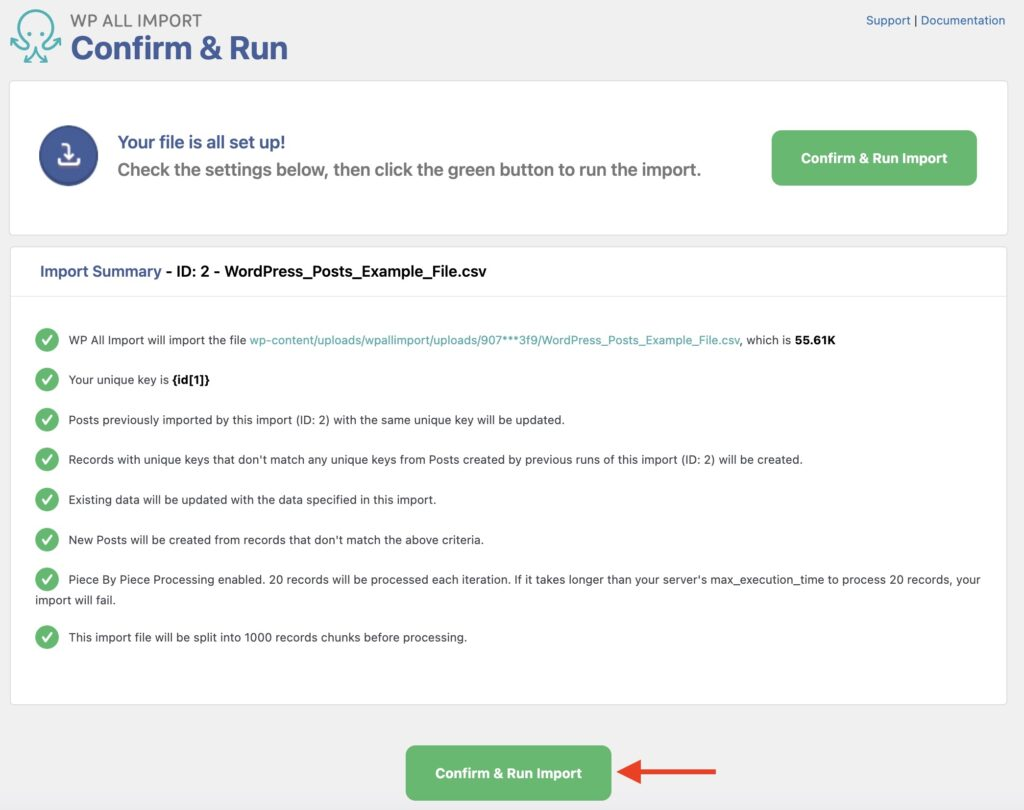
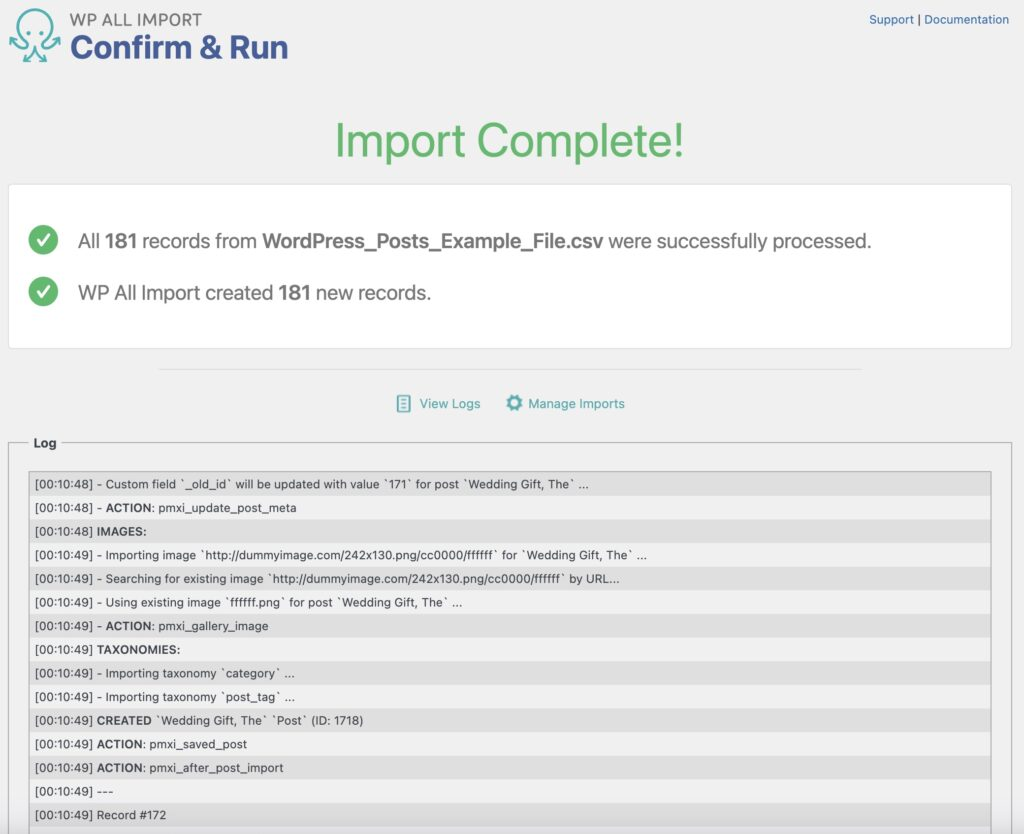
If everything looks correct, click the Confirm & Run Import button, which launches the import. When the import is complete, the screen should update like this:
As a standard precaution, you should then navigate to Posts › All Posts to verify that your import worked as expected.
Import WordPress Posts – Advanced Topics
Import WordPress Posts Using Filters
To filter your import posts, expand the Add Filtering Options section in the Review Import File screen. For every filter condition, you need to add a target Element, a Rule to apply, and a Value to filter by.
For example, to import posts related to only New York City, you can add a filter containing “New York City” or “NYC” in the category import field:

Note the OR operator joining the two filter conditions in the lower panel. You can use any mix of AND or OR operators you require. You can also drag conditions inward to indent them, which is equivalent to grouping conditions using parentheses. For more information, see Filtering Import Data with XPath.
Import Posts from Different File Types
WP All Import lets you import posts from many different file types, including XML, CSV, ZIP, GZIP, GZ, JSON, SQL, TXT, DAT, and PSV. You can even import the data from a URL or FTP/SFTP site.
Schedule WordPress Posts Import
You can schedule your WordPress post import to run automatically by using either manual cron jobs or WP All Import’s Automatic Scheduling tool.
The cron jobs are a bit of a hassle to set up, but they’re free.
The Automatic Scheduling tool is fully integrated into the import process with a convenient scheduling interface. It also has the added benefit of checking to make sure that your scheduled import is successful. The disadvantage of this tool is that it costs $9 per month.
Additional Import Features
In addition to the features we’ve described so far, WP All Import also:
- Lets you modify data on the fly. You can combine multiple incoming data elements and/or literal text, as well as use inline PHP functions or even create your own custom PHP functions via an embedded function editor. You can read more about this at Using PHP to Extend WP All Import’s Functionality.
- Import WordPress posts to a multilingual site using the WPML (WordPress Multilingual Plugin) plugin. To read more, see Importing Multiple Languages with WP All Import and WPML.
- Import all WordPress and WooCommerce data types.
Import WordPress Posts – Frequently Asked Questions
How Do I Bulk Import Posts into WordPress?
To bulk import posts into WordPress, just follow the steps in this guide. Any import of posts consisting of more than one post is considered a bulk import, so almost every import falls into this category.
How Do I Import WordPress Posts as a Draft?
In the Drag & Drop screen, under Other Post Options, change the Post Status to Draft. That will cause every imported post to be created as a draft.
How Do I Import Only Blog Posts to WordPress?
To import only blog posts, just set a filter that restricts your import to that category of posts. If you want to assign the imported posts to your blog, you can manually define the appropriate category in the Taxonomies, Categories, Tags section of the Drag & Drop screen.
Can I Import WordPress Pages?
To import WordPress pages, just select Pages instead of Posts as the import type. There are no major differences between importing WordPress posts and pages.
How Do I Import Custom Post Types in WordPress?
WP All Import will automatically recognize most custom post types. Typically, all you have to do is select the custom post type in the New Import screen, and the rest of the import process will be similar to importing WordPress posts.
Import WordPress Posts – Related Docs
Import into WordPress From Any CSV, XML, and Excel
How to Import WordPress Posts with Images
Import a Variable Number of Images Per Post
How to Bulk Edit WordPress Posts
Import WordPress Posts – Related Videos