How To Import WooCommerce Products With Custom Fields Data
Are you trying to figure out how to import WooCommerce products with custom fields into your store?
Custom fields are created to share or collect additional information about your WooCommerce products beyond the standard fields that WooCommerce provides.
Several WooCommerce product add-on plugins are available to enable you to add custom fields to your products easily. An example of this is the Advanced Custom Fields or Advanced Product Fields (Product Add-ons) for WooCommerce plugins. But if you need to bulk-import data into these custom fields, you may get stuck because WooCommerce’s native importer does not support importing data into these fields.
This is why, in this article, we will show you how to use the leading import plugin — WP All Import — to import WooCommerce products alongside their custom field data.
What Are Custom Fields in WooCommerce Products
Custom fields are additional WooCommerce product data fields for storing more detailed product information to enhance a product’s listing and drive increased conversions.
You can create custom fields for virtually any additional information about your product that will be useful to customers, e.g. instructions for caring for the product, materials used, product dimensions, or even to collect customer order customization details.
Custom Fields can also be used to collect additional information from customers about a product.
WooCommerce does provide the ability to add product attribute details by default, however, the customization options are limited. This is where custom field plugins become useful. Once you install a WooCommerce custom field plugin, you can use it to add additional custom fields to your WooCommerce products.
In the next section, we will explore how to import custom field data to WooCommerce using the WP All Import plugin.
How To Import WooCommerce Products With Custom Fields Data
WP All Import is the top choice among WooCommerce product import plugins in the WordPress ecosystem. It offers users the smoothest import experience with its modern drag-and-drop user interface, simple 5-step import wizard, and advanced import features.
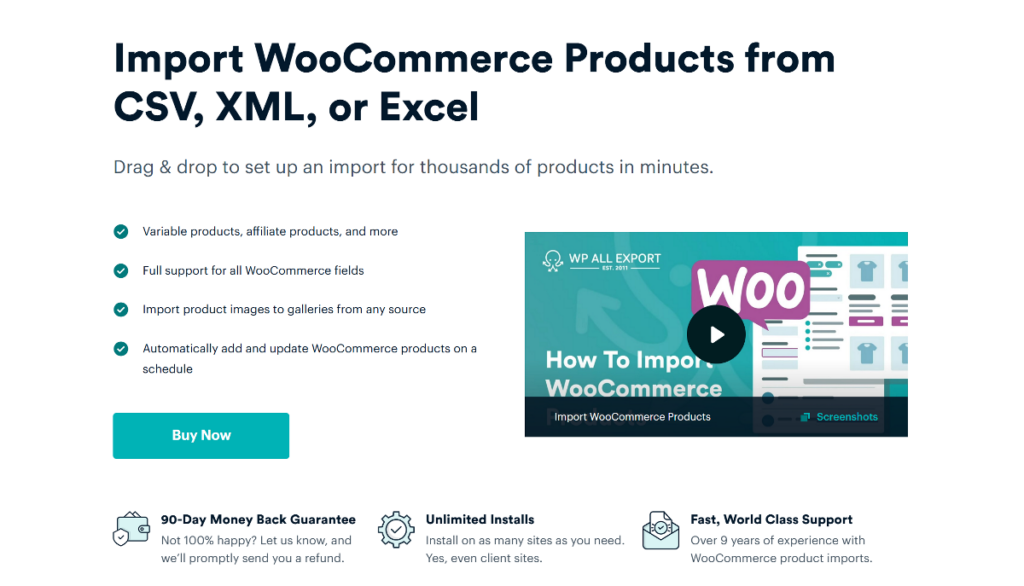
The WP All Import plugin provides add-ons to import standard custom fields, as well as those added using plugins like the Advanced Custom Fields (ACF), Meta Box, JetEngine, and more. The plugin also offers many other great import features, including:
- Support for importing products with custom field data from CSV, XML, Excel, and Google Sheets.
- Advanced filtering capabilities to import only a subset of products.
- Import scheduling to automate the import of products into your WooCommerce store.
- Support for importing all WooCommerce product types, including variable products.
- Support for importing all WooCommerce data types.
- Support for importing all WordPress post types, and more.
To start your WooCommerce import of products with custom fields, purchase and download the WP All Import plugin and its WooCommerce Add-On.
First, install the WP All Import plugin by going to your WordPress admin dashboard and navigating to Plugins › Add New Plugin › Upload Plugin › Choose File › Install Now › Activate Plugin. The plugin will be installed and ready for use.
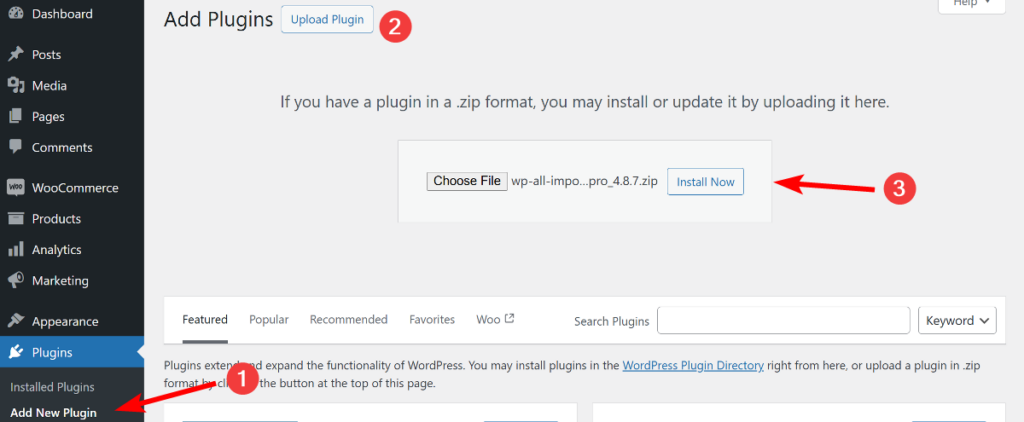
Follow the same steps to install and activate the WooCommerce Import Add-On. Once this is completed, you are ready to create an import for your WooCommerce products with custom fields.
1. Start a New Product Import With Custom Field Data
To start importing your WooCommerce products with custom field data, go to All Import › New Import from your WordPress dashboard menu.
This brings you to the New Import screen, where you can specify your preferred method for importing your product data. WP All Import allows you to load your data in three ways: uploading the import file from your PC, downloading the file from a URL or FTP/SFTP, or using a file that you have previously uploaded.
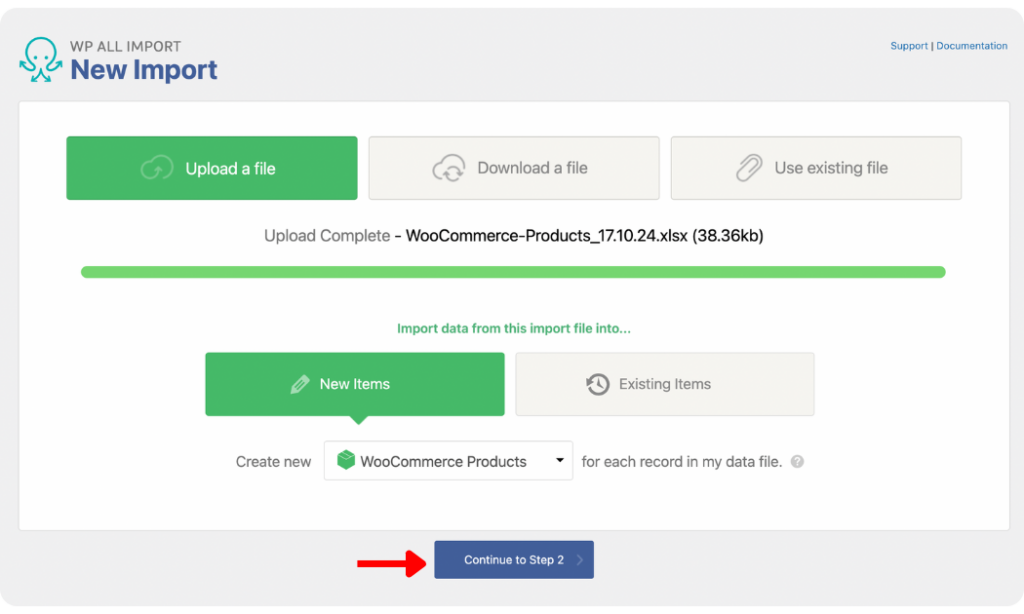
Once you’ve uploaded your import file using any of the provided methods, under New Items, choose WooCommerce Products as the import file type.
Next, click Continue to Step 2 to proceed to the next step.
2. Review Uploaded Product Data
On the Review Import File screen, you can review the data from your import file and ensure that WP All Import correctly detects all the product data fields. Use the gray arrows on the left and right of the screen to navigate between records and review the data.
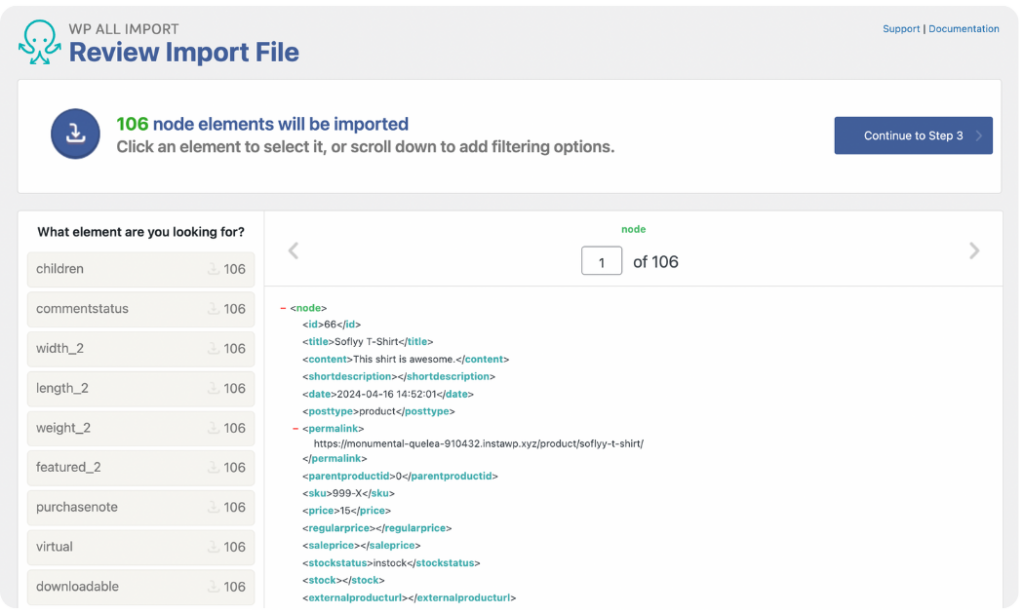
Scroll down the screen to reveal the Manage Filtering Options panel. This panel contains the settings for creating filter rules for your product import. You can filter your import using any Element (column) in your import file, including custom field elements. Simply specify a filter Rule and Value for the selected Element, click Add Rule, and then Apply Filters to XPath to add a filter.
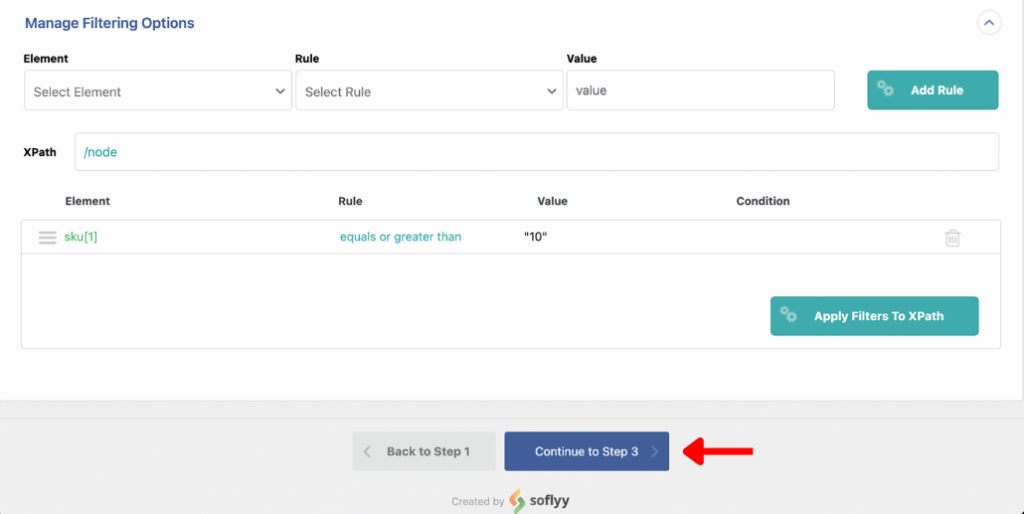
After reviewing your uploaded product data and adding filters as you see fit, click Continue to Step 3.
3. Mapping Your Uploaded Data to WooCommerce Fields
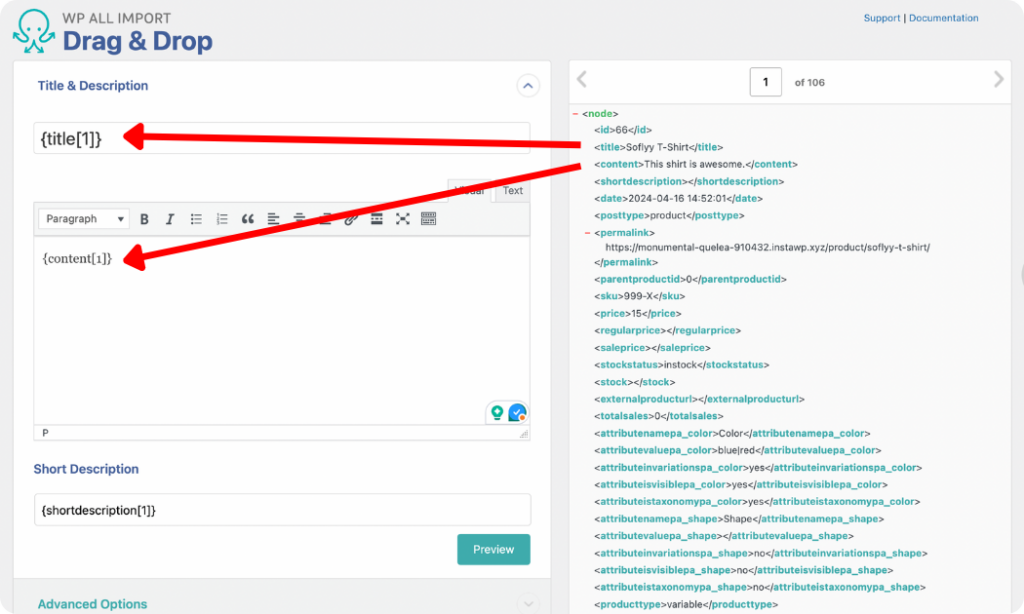
The Drag & Drop screen is where the most important steps in the WooCommerce product import process happen. WP All Import provides a drag-and-drop mapping interface to simplify the import process for beginner and advanced users.
Title & Description
Start by mapping the title and description of your WooCommerce products by dragging the elements from your incoming product file and dropping them into the provided fields.
WooCommerce Add-On
Open the WooCommerce Add-On panel to map the standard fields for your WooCommerce products. Start by selecting the Product Type from the dropdown list to enable the correct fields to be displayed for mapping. WP All Import allows users to import data for simple, variable, grouped, and external/affiliate products.
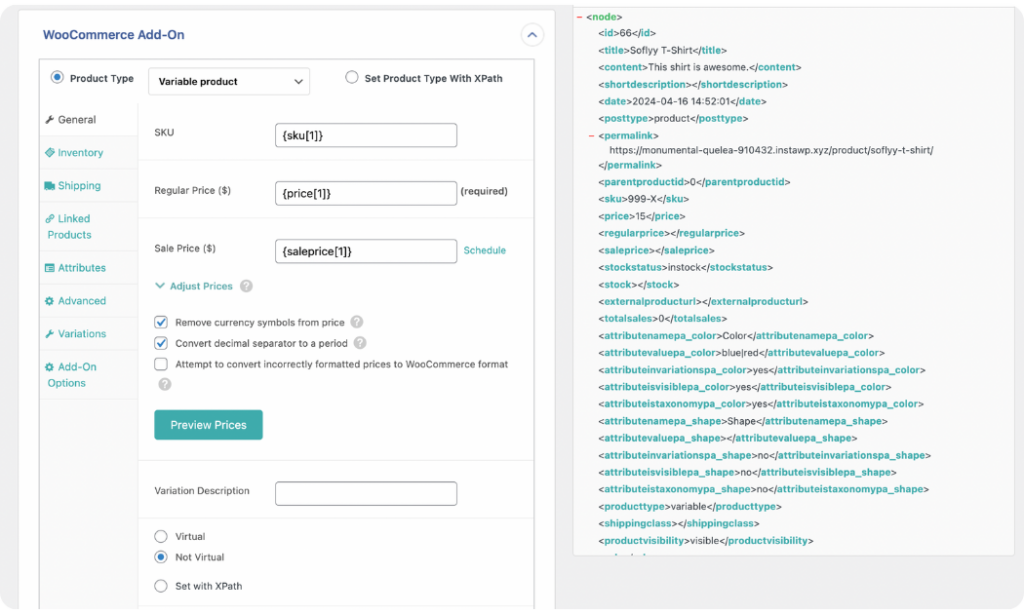
The General tab, opened by default, adjusts the input fields according to the Product Type selected. If you choose simple or variable products, you will see the SKU, Regular Price, and Sale Price fields. Map them with the correct fields from your incoming import data table.
You can leave the other provided settings with their default selection or tweak them as you see fit.
Follow the same mapping process to populate the Inventory, Shipping, Linked Products, Attributes, Advanced, and Add-On Options tabs.
Map Product Custom Fields
Expanding the Custom Fields panel reveals the fields for mapping your products’ custom field data.
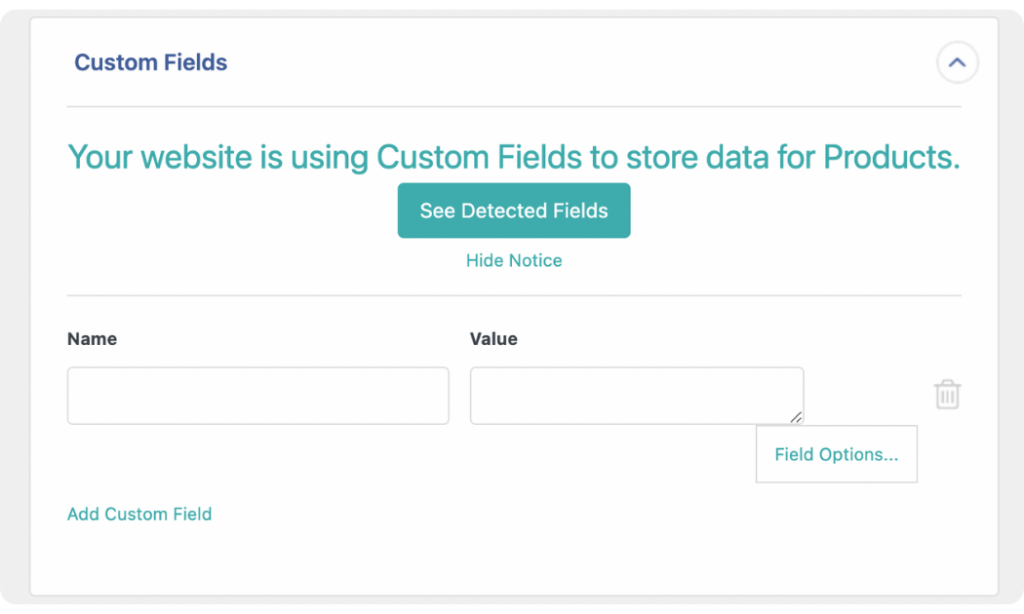
WP All Import is designed to auto-detect and populate existing custom fields. If you have previously published products with custom field data, you will see the See Detected Fields button. Click the button to enable WP All Import to present and populate the existing custom fields.
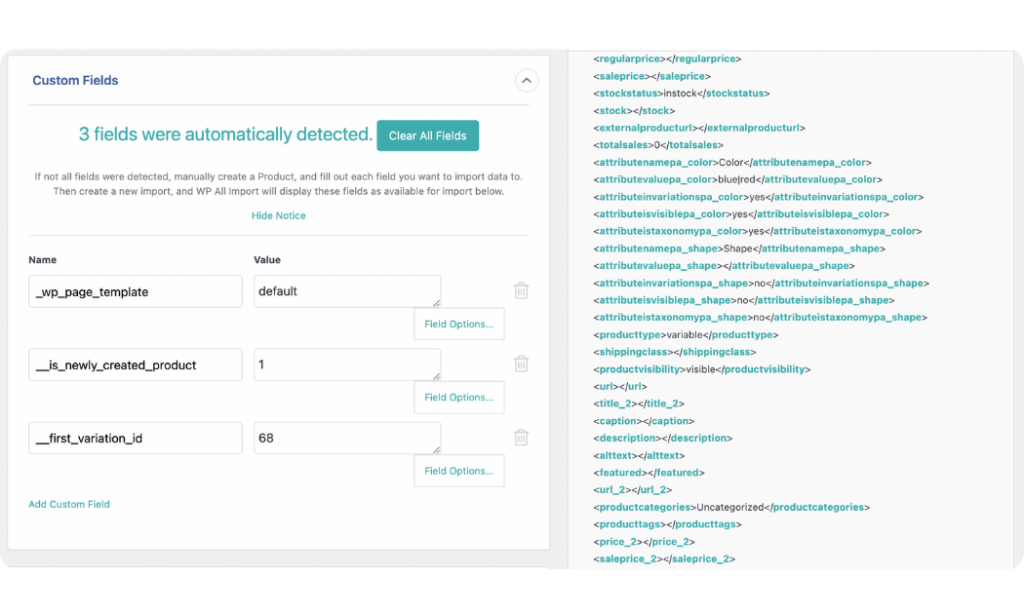
You should see the Name and Value of each detected custom field. Each field’s value can either be literal text or a selection list.
If the custom field value you want to import to your site differs from what’s in your import file, you can select Mapping under Field Options to configure the correct values.
For example, let’s assume you own a sportswear store with a custom field for storing information about their colors. Say the field name is sprtwears_color and the possible values are Red, Blue, White, and Black. If your import file has a {colors} element with hex code values, i.e. #FF0000 (Red), #0000FF (Blue), #FFFFFF (White), and #000000 (Black), you cannot simply drag and drop the element into the custom field Value input box without mapping them. This is because the value will not be recognized.
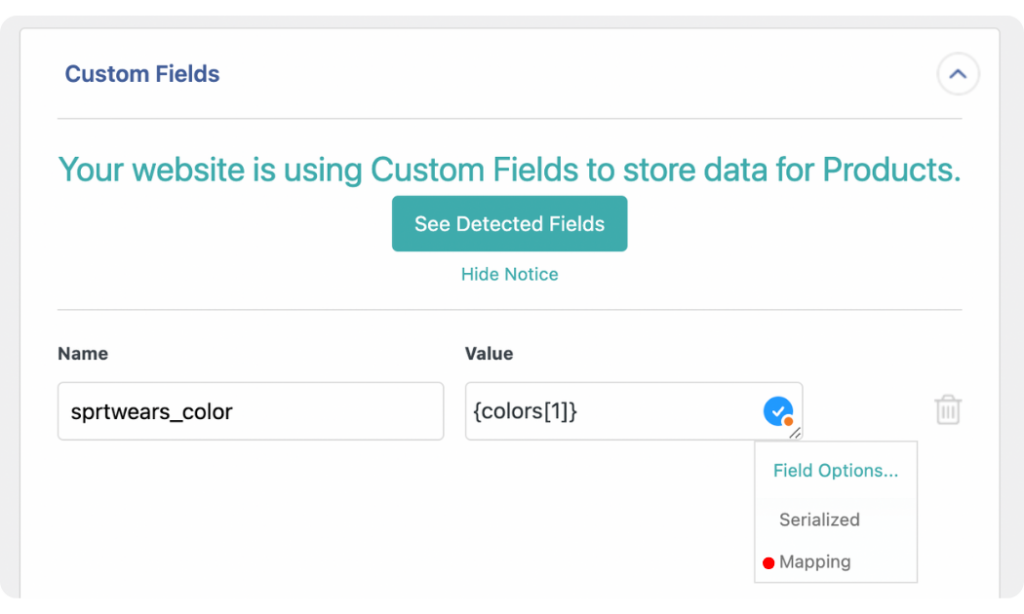
To remedy this, after dragging and dropping the value, you must click Field Options and select Mapping to reveal the dialog box that enables you to specify the mapping rules. For our example, under In Your File, we will enter the hex value for each color from our input file, and under Translated To, we will enter the corresponding existing text values.
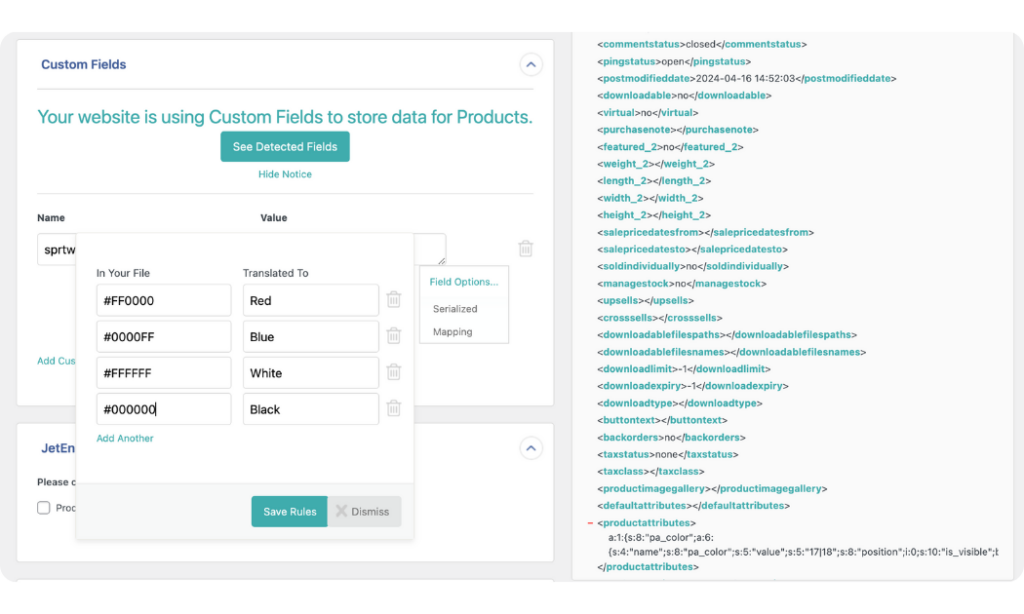
This ensures that when the import is run, #FF0000 in our import file will be translated to Red, #0000FF will be translated to Blue, etc.
If you don’t have existing custom fields, you can create new fields by specifying the Name and dragging and dropping the relevant elements that contain the custom field Value.
Other Panels
WP All Import provides other panels to map additional product data relevant to your import. These panels include Images, Taxonomies, Categories, Tags, Function Editor, etc. However, we will not discuss these other panels in this article.
To proceed to the next step of the import process, scroll to the bottom of the screen and click Continue to Step 4.
4. Configure Advanced Product Import Options
The Import Settings screen lets you configure additional settings for how your product import should run.
Start by creating a Unique Identifier for your import. This is important because if you run the import again in the future, it helps WP All Import correctly link records in the current import to those in the updated file to prevent duplicates.
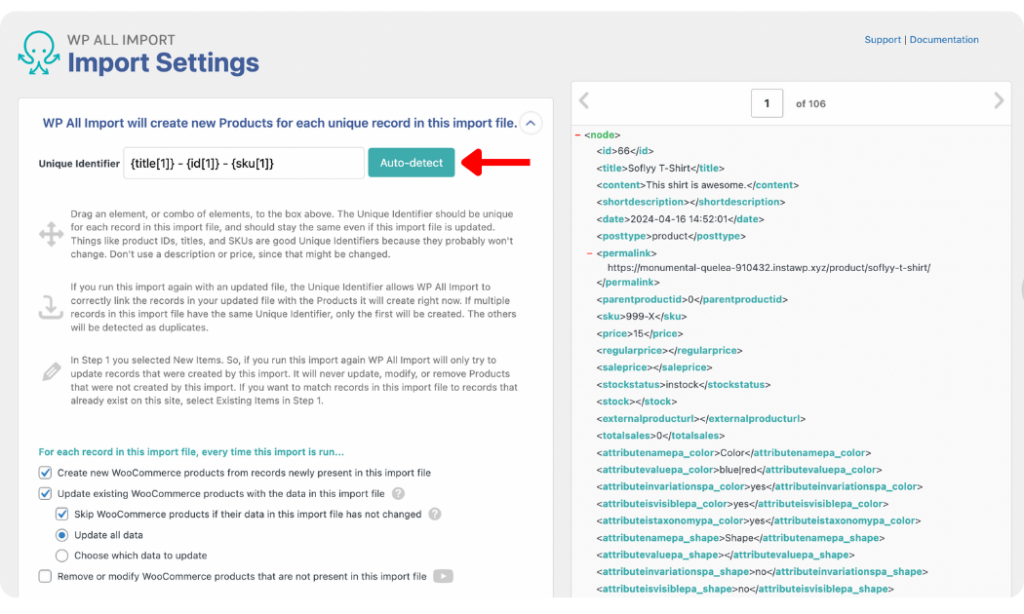
Other settings are provided within the panel to specify how WP All Import should handle each record in the import file every time the import runs. Leave them as is, or change them if necessary.
Scroll down the screen to reveal the Scheduling Options and Configure Advanced Settings panels. The Scheduling Options panel provides settings to schedule your import to run automatically on specific days and times of the week. You can learn more about the panel in the Run WordPress Imports on a Schedule guide.
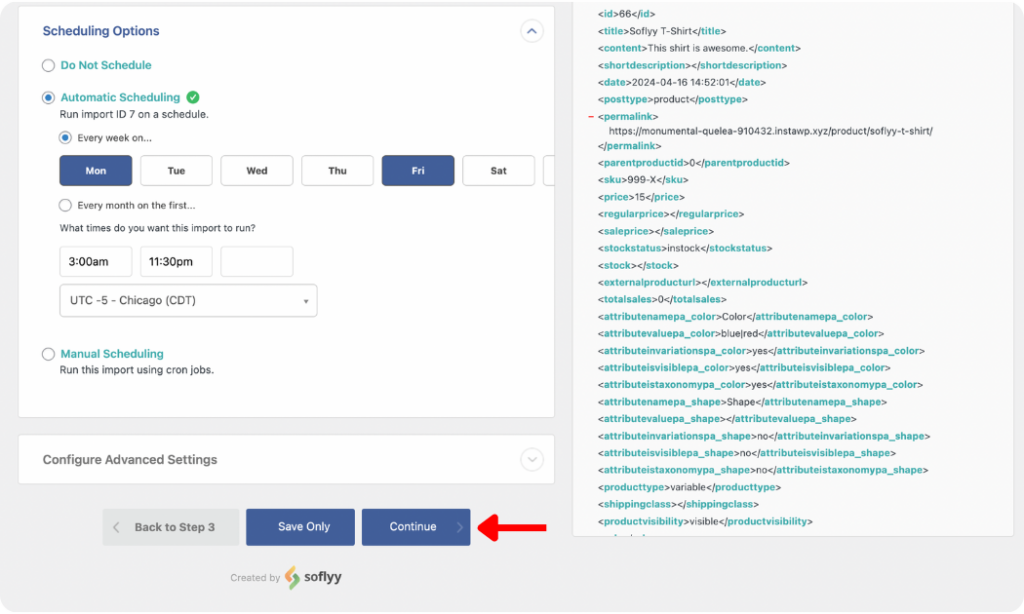
In the Configure Advanced Settings panel, you have options to optimize the speed of your import. Leave the default settings or adjust as you see fit.
Click Continue to proceed.
5. Run Product Import Containing Custom Field Data
The Confirm & Run screen is the final step of the WooCommerce import of products with custom fields process.
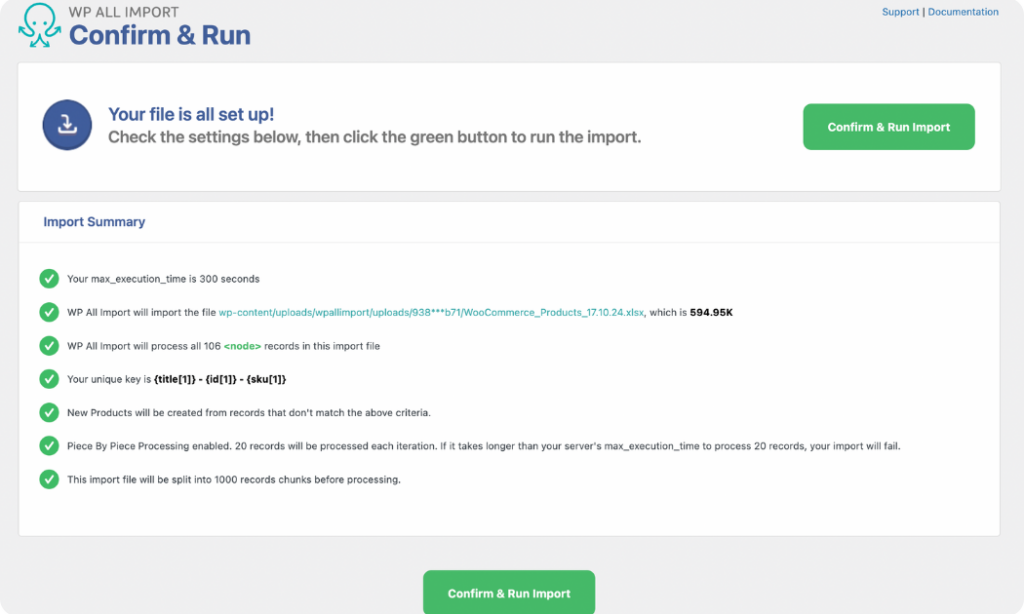
WP All Import provides a summary of all the import settings you have applied so you can check to ascertain that everything is as it should be for your import to run smoothly. If you notice any issues, go back and fix them before running the import.
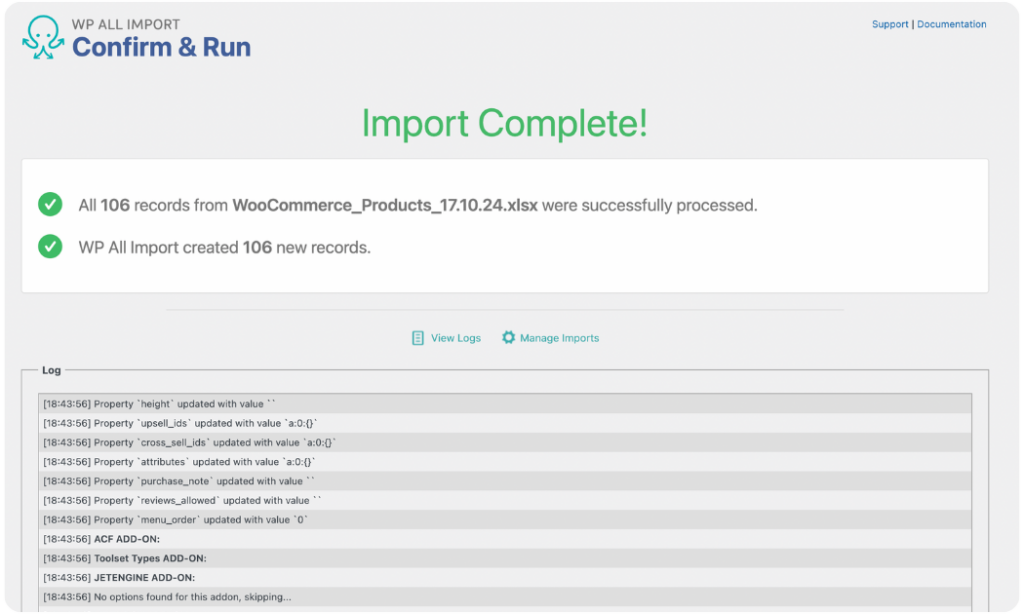
However, if everything is as expected, click the Confirm & Run Import button to start the import process. Your import will be completed within a few minutes, and you will see an Import Complete notification.
Check your imported products by navigating to Products › All Products to see the list of the products. Review a few products randomly to check that all the data, including the custom fields, were imported correctly.
As you can see, importing WooCommerce products with custom fields is easy with the WP All Import plugin. If you want to start seamlessly importing your products with custom field data, download and install the WP All Import plugin today!
Import WooCommerce Products With Custom Fields – FAQs
How Do I Add Custom Fields to WooCommerce Products?
To add custom fields to WooCommerce products at once, download and install the WP All Import plugin and its WooCommerce Import Add-On.
- Go to All Import › New Import.
- Upload the file with your WooCommerce products and select WooCommerce Products as the import type.
- On the Drag & Drop screen, map the import elements and expand the Custom Fields panel to create new custom fields by adding the Name and mapping the Value.
- Run the import and your products with custom fields will be added successfully to your WooCommerce store.
How Do I Import Products Into WooCommerce?
You can import products into WooCommerce with the WP All Import plugin and its WooCommerce Import Add-On. Once you have downloaded and installed them on your site:
- Navigate to All Import › New Import.
- Upload the import file for your products.
- Choose WooCommerce Products as the import type.
- From the Drag & Drop screen, map the incoming elements to the WooCommerce product fields.
- Run the import and your products will immediately be added to your WooCommerce store.
How Do I Import Product Attributes in WooCommerce?
To import product attributes in WooCommerce, get the WP All Import plugin and its WooCommerce Add-On.
- Go to All Import › New Import.
- Upload the product import file that includes product attribute data.
- Select WooCommerce Products as the import type.
- On the Drag & Drop screen, map the incoming elements to the WooCommerce product fields. You can map the attributes’ data in the Attributes tab of the WooCommerce Add-On panel.
- Run the import and your products with their attributes will be imported to your WooCommerce store.
How To Import Variable Products in WooCommerce?
You can import variable products in WooCommerce with the WP All Import plugin and its WooCommerce Import Add-On.
- Navigate to All Import › New Import.
- Upload the import file of your variable products and choose WooCommerce Products as the import type.
- Map the incoming data elements to the WooCommerce product fields.
- Run the import and your variable products will be added to your store.
