How to Import Data into WooCommerce Product Custom Fields
To import data into WooCommerce product custom fields, start by creating a standard product import, which you can read about at How to Export and Import WooCommerce Products.
Step 3 of the import process involves the Drag & Drop screen, where you map import data to the product fields. You can enter, select, or map product custom field data in the Custom Fields section of this screen.
As with almost every aspect of importing or exporting WooCommerce data, there are several nuances to handling custom fields for products. In this article, we’ll walk you through each of these using WP All Import.
Table of Contents
- How to Detect Product Custom Fields
- The Basics of Importing Data into WooCommerce Product Custom Fields
- Mapping Custom Field Values
- Handling Serialized Fields
- Related Docs
- Related Videos
How to Detect Product Custom Fields
When you first expand the Custom Fields section of the Drag & Drop screen, you may see this message:
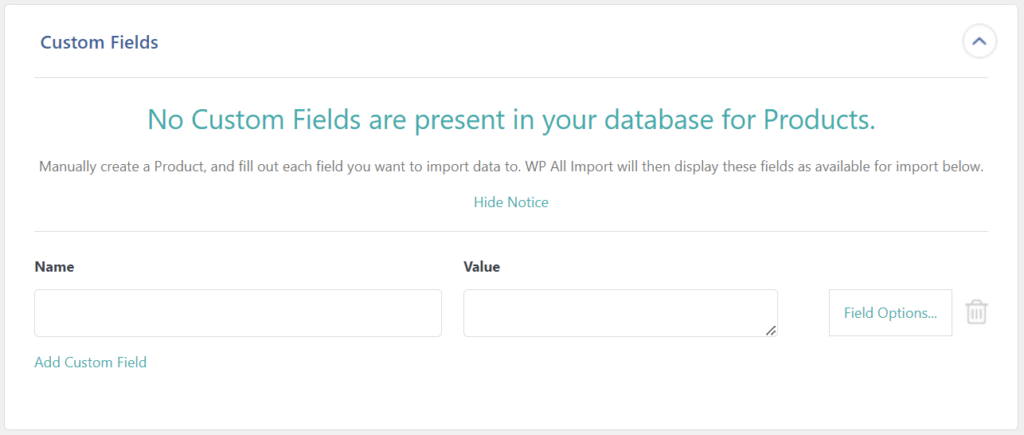
This doesn’t mean there are no custom fields defined for your products. It means that none have been used in a product with a status of Published.
Once you have published products that use at least one product custom field, you will see this message instead:
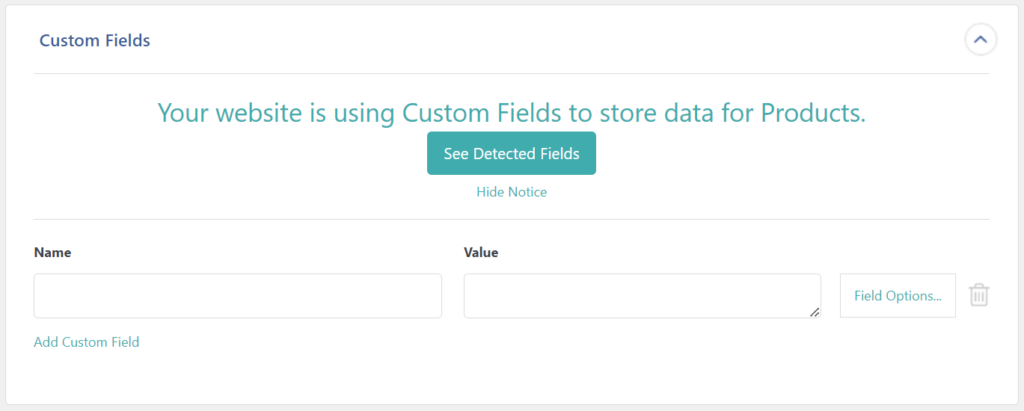
Just click the See Detected Fields button, and your available custom fields will appear:
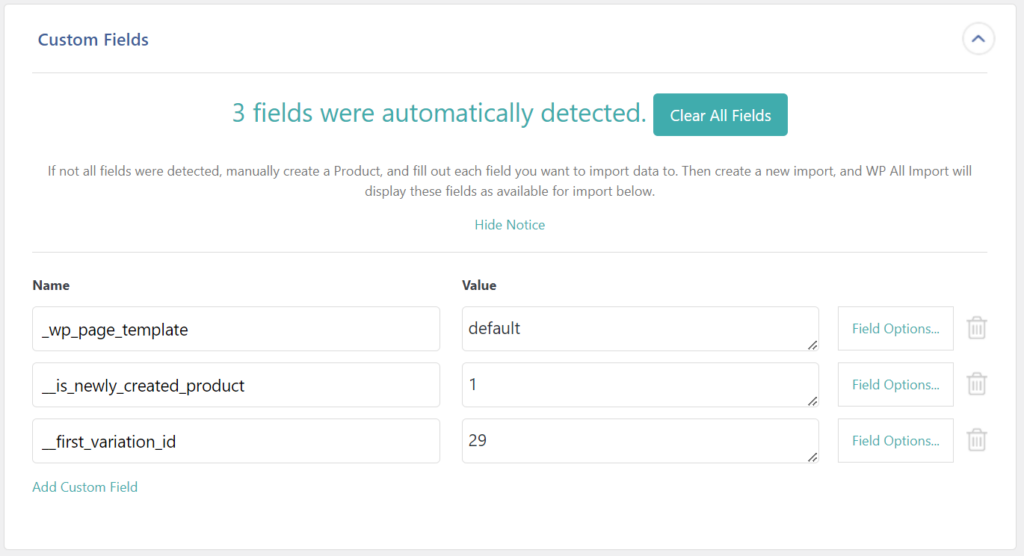
We’ll show you how to import data into these fields in the next section. For this section, the important lesson is that if you want to import data into product custom fields, you must use those fields in at least one product, and the status of that product must be Published.
If you don’t have any products like this, just create a dummy product and populate its custom fields with valid values. You’ll then be able to import values into these fields for all of your import products.
The Basics of Importing Data into WooCommerce Product Custom Fields
You have three choices for how to populate each custom field:
- Type a literal value into the field. The literal value will then be applied to all the imported products.
- If a custom field has multiple values in the database, and you click on the Value edit box for that custom field, you will see a selection list containing all of its available values. Select one of these values and it will be applied to all of the imported products.
- Map an import data element to a custom field, and each imported product will get its custom-field value from that data element.
Here’s a visual depiction of all three methods:

Obviously, it makes no sense to type “MyTypedValue” into the _wp_page_template custom field or to drag and drop the import stock data element into the _is_newly_created_product custom field. We’re just trying to demonstrate the nature of your options.
Mapping Custom Field Values
Sometimes, the custom field values contained in your product import file are not the ones that you want to store in your WooCommerce database. When this happens, just click the Field Options… button to the right of the custom field in question, then click Mapping. This lets you create a translation table to tell WP All Import how to convert the incoming values into the values you want to store in your database:
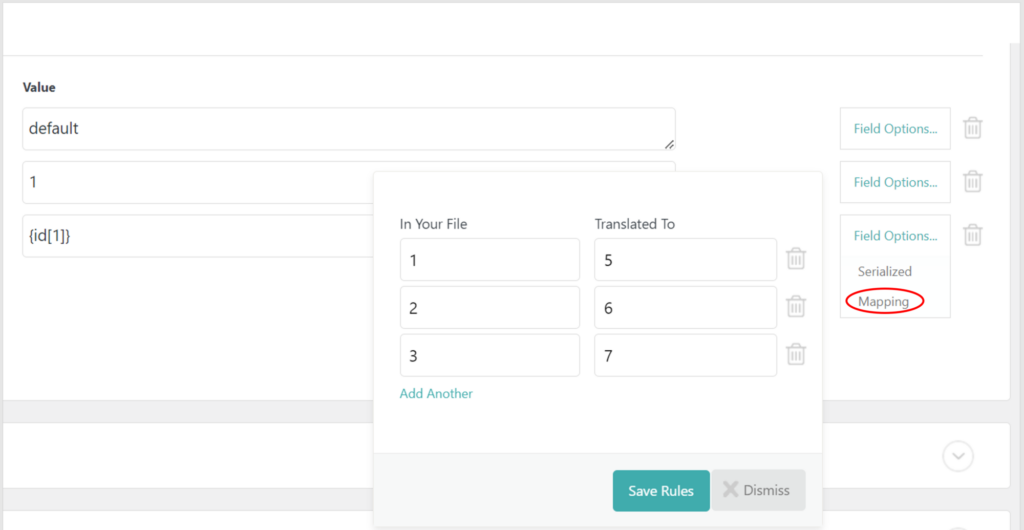
To learn more, see How to Map Custom Field Values.
Handling Serialized Fields
Sometimes, the creators of product custom fields (i.e., the authors of the theme or plugin containing the custom fields) store multiple data points in a single field. This is referred to as a “serialized field” and is considered a bad practice, but if that’s the way a custom field works, you have little choice other than to accommodate it.
You do this first by clicking the Serialized option in the Field Options… list (see preceding image). You can then enter key/value pairs, where each value may be a single import data element:
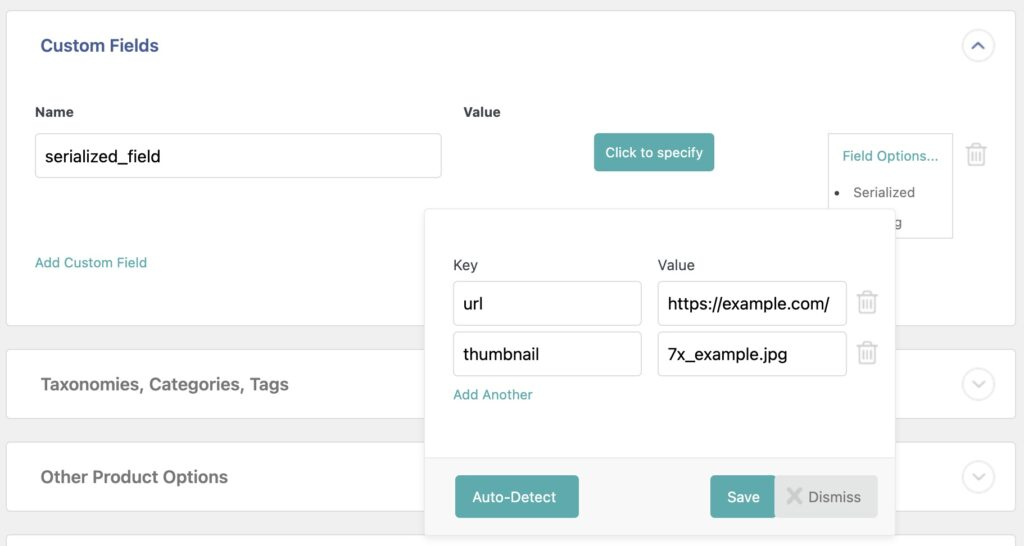
During the import, WP All Import will then create a serialized version of this key/value data for storage in your product custom field.
For more information, see Serialized Fields.
Importing Data into WooCommerce Product Custom Fields — Related Docs
Import WooCommerce Products from CSV, XML, or Excel
Importing Data into WooCommerce Product Custom Fields — Related Videos

