Bulk Importing Users into WordPress: A Complete Guide
Are you a WordPress website owner looking to bulk import multiple users at once?
Importing users one by one can be a tedious task when you’ve hundreds of users to import. Fortunately, WordPress offers efficient solutions to handle the bulk import process.
In this comprehensive guide, we will show you how to bulk import users into WordPress using the WP All Import plugin.
Why Bulk Import Users into WordPress
Bulk importing users into WordPress can save you significant time and effort, especially when managing large user datasets. This method is particularly helpful for website administrators looking to migrate users from another platform, merge multiple sites, or simply looking to add users from a spreadsheet.
Here are some of the reasons that make bulk importing worthwhile:
- Efficiency and Time-Saving
Manually adding users one by one can be a tedious and time-consuming task. Bulk importing allows you to add hundreds or even thousands of users in just a few clicks. - Easy Data Management
Bulk import plugins often come with features that make it easier to manage user data. You can easily map relevant fields, filter data, and even schedule imports to keep your user database up to date without manual intervention. - Seamless Migration
If you are moving from another platform to WordPress, bulk importing users can make the migration process seamless. You can transfer all user data, including custom fields, without losing any information. - Better Experience for Users
When moving from another site, bulk importing allows you to securely migrate users with passwords. This ensures that users can log in with their existing passwords on the new site without affecting their experience.
Now that you understand the benefits of bulk-importing users, the next step is to choose the right plugin for this process. Let’s now look at the best WordPress importer plugin available.
Choosing the Best Bulk User Import Plugin For WordPress
There are many WordPress importer plugins available in the market, but only a few can efficiently handle importing large user data sets.
Here are some of the key features to look for in a WordPress user import plugin:
- Support for various file formats like CSV, Excel XLS, Excel XLSX, and XML.
- Support for importing all user data fields, including custom fields.
- Simple interface to easily map WordPress fields.
- Powerful filtering to select which users to import.
- Regular, automated imports to keep your user database up-to-date.
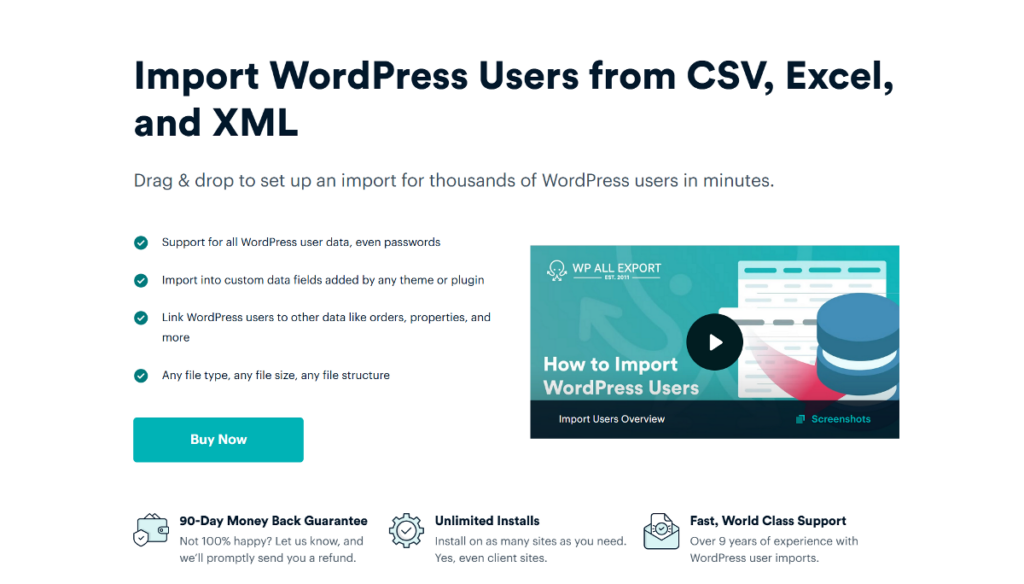
WP All Import stands out as the best option and includes all the above features. It allows you to import data in multiple file formats including CSV, Excel XLS, Excel XLSX, and XML. It comes with a user-friendly import wizard that breaks down the process into five simple steps. You also get a drag-and-drop interface that allows you to map fields from your import file to the relevant user data fields.
Not convinced yet? WP All Import also includes advanced features like automatic scheduling and powerful filtering rules. The scheduling option allows you to automatically import user data to your website on a fixed schedule. The filtering option lets you specifically select which users to import to your website.
That’s not all. WP All Import is not just limited to users; it supports all other types of custom post types, including WooCommerce products, orders, customers, listings, and more.
Prepare User Data for Bulk User Import
Before you begin the bulk import process, it’s important to prepare your user data properly.
If you’re migrating from another site or merging multiple sites, you can easily get a ready-to-import CSV file using plugins like the WP All Export plugin. For detailed instructions on this process, refer to this guide that explains how to export users effectively.
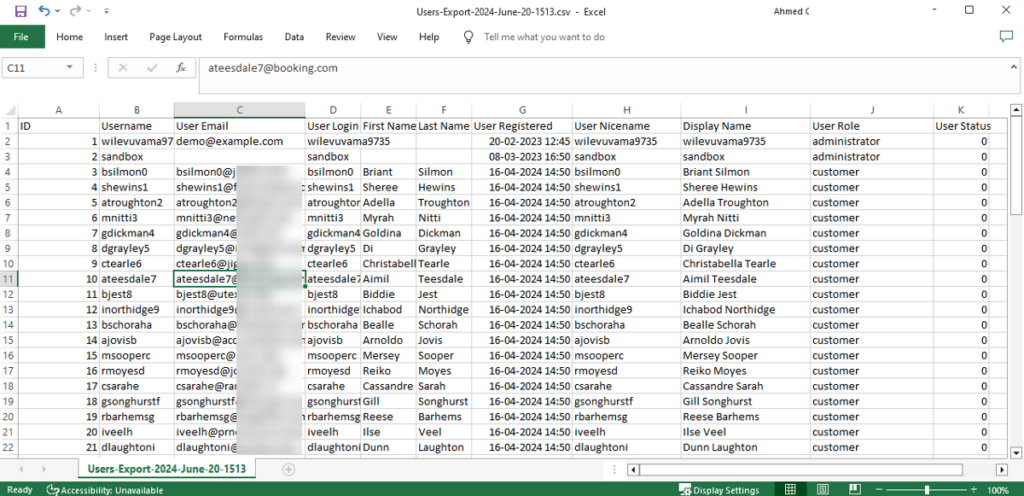
If you are preparing your CSV file from scratch, you’ll need to make sure it includes all the necessary information. The two mandatory fields for the user import process are the username and email fields. In addition to these, you can also include optional fields such as:
- First Name
- Last Name
- Display Name
- User Role
- Website
- Registration Date
Beyond these basic fields, you might want to include additional fields specific to your website. For example, if you’re running a membership site, you might want to add membership level and membership start date.
Once you have the CSV file containing all the required information, let’s look at the import process in detail.
How to Bulk Import Users into WordPress: A Complete Guide
To begin the import process, make sure you have your user data ready and have installed the premium version of both the WP All Import plugin and the User Add-On on your website.
Once everything is in place, let’s look at the bulk import process in detail.
1. Start the Import Process in WP All Import
To start the import process, navigate to All Import › New Import in your WordPress dashboard.
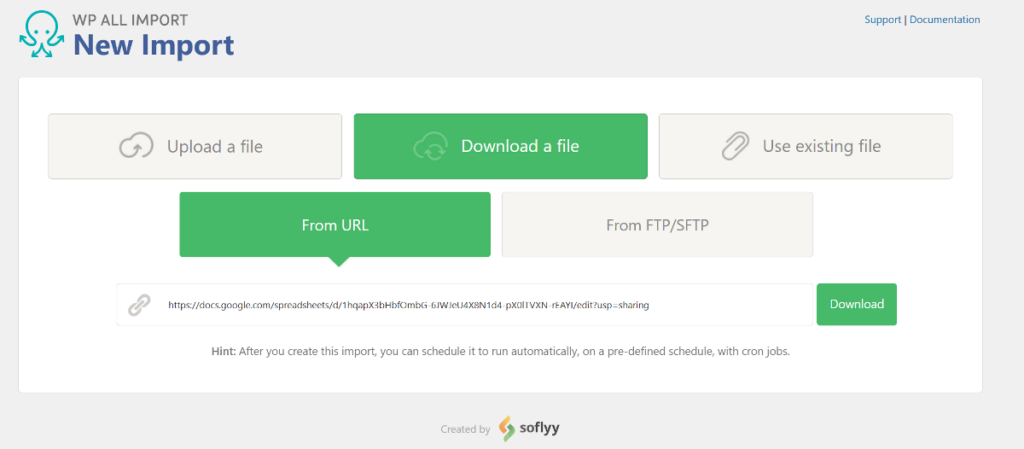
WP All Import allows you to select an import file from multiple sources. You can:
- Upload the file directly from your computer.
- Paste the file URL from services like Google Sheets, Google Drive, and Dropbox.
- Select the file from your server.
If you want to enable the scheduling option, which lets you automatically import users from a file, you’ll want to use the last two options.
Upload the file to Google Drive or Dropbox and click the Download a file option. Select From URL and then paste the file URL in the box. Finally, click the Download button.
This will reveal additional options where you need to select the import type as Users under New Items.
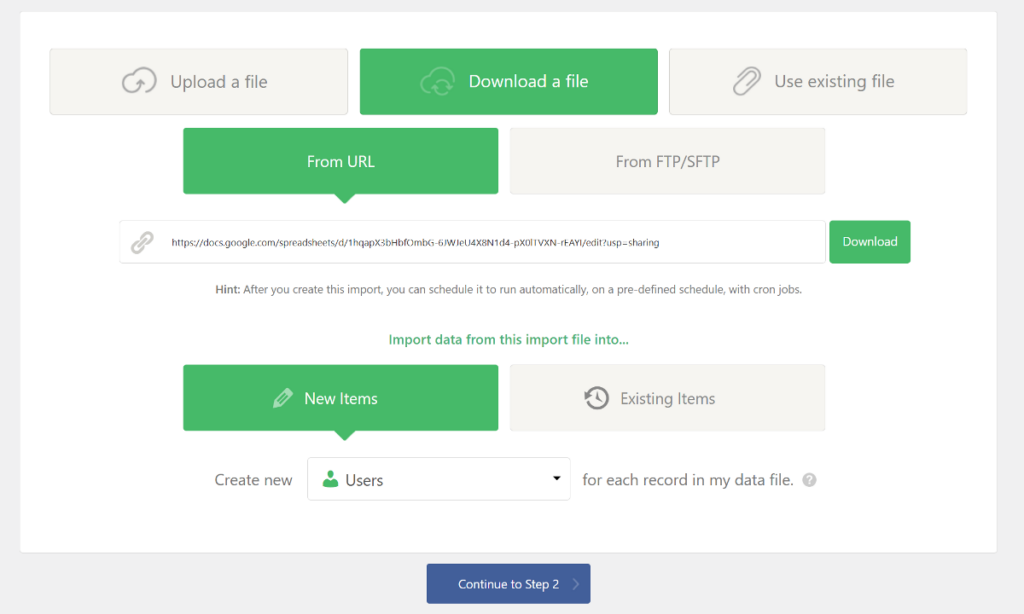
Next, click Continue to Step 2 to move to the next step.
2. Review the User Data to be Imported
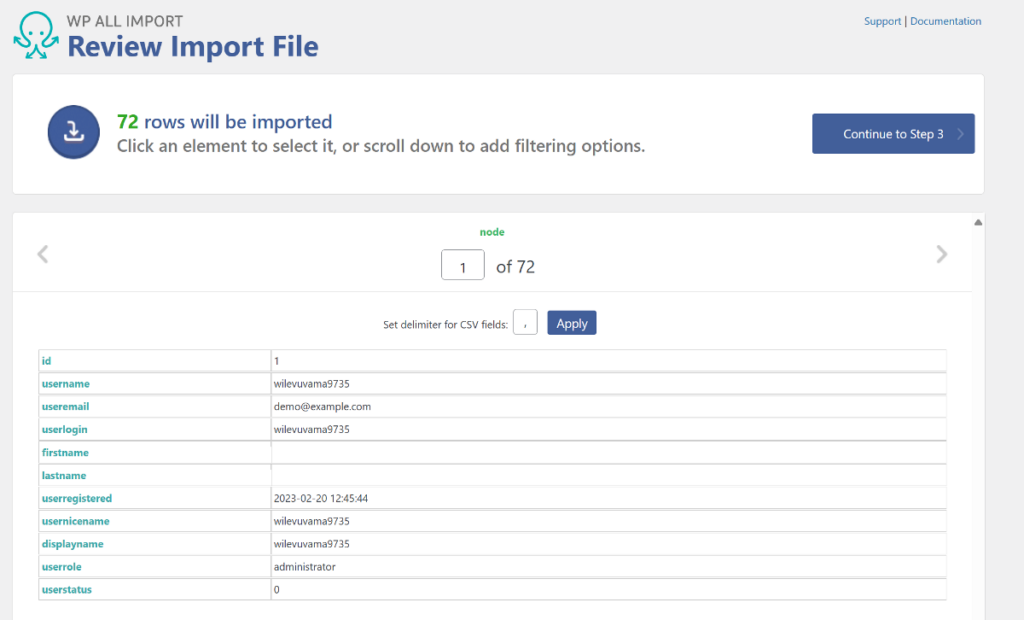
The Review Import File step gives you a preview of the records in your import file, which you can verify before proceeding with the import process.
You can use the gray arrows on both sides to review individual records. It will also display the total user count at the top.
On the same page, you can also select specific records to import. WP All Import has powerful filtering rules that allow you to apply filters based on various criteria.
For example, if you’re importing users from another website, you can use filters to exclude previous website administrators.
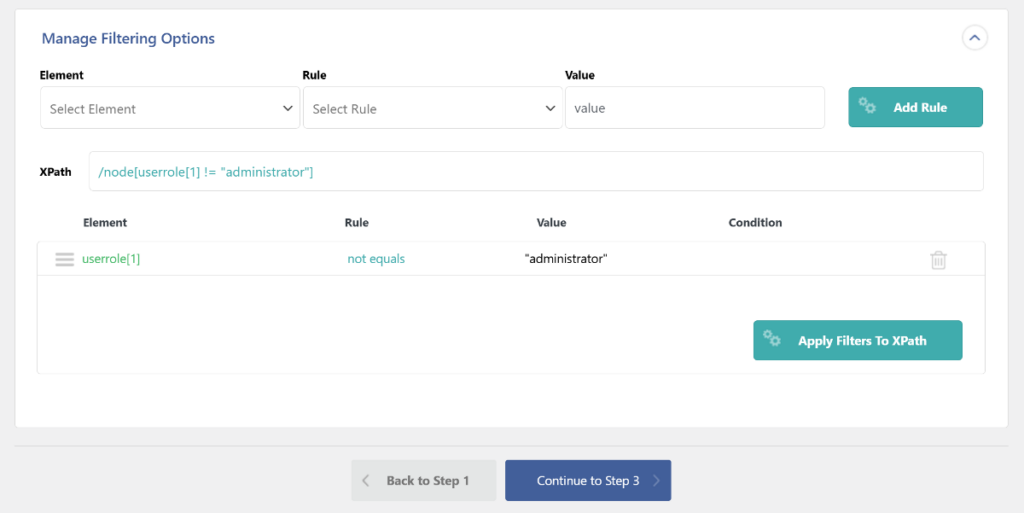
After adding all the criteria, click the Add Rule button. However, since the imported file is stored outside the WordPress database, the filters won’t apply directly. WP All Import filters data using XPath, and to apply these filters, click the Apply Filters To XPath button.
You are not restricted to applying just one rule; you can add multiple rules and combine them using the AND and OR conditions.
After reviewing the data and applying the filters, click the Continue to Step 3 button to move to the next step.
3. Map Fields from Your Import File to The Relevant Fields in WordPress
This is the most important step in the entire process. It allows you to map fields from your import file to relevant user fields in WordPress.
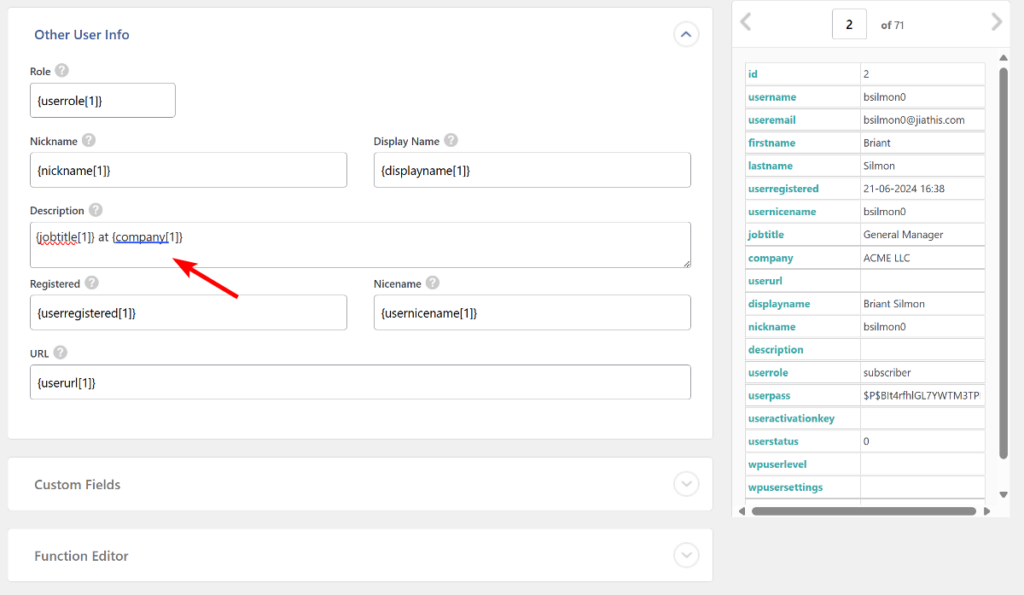
The user fields in your import file will be listed in a table on the right. To map a field, drag the field from the user table on the right to the relevant field box on the left.
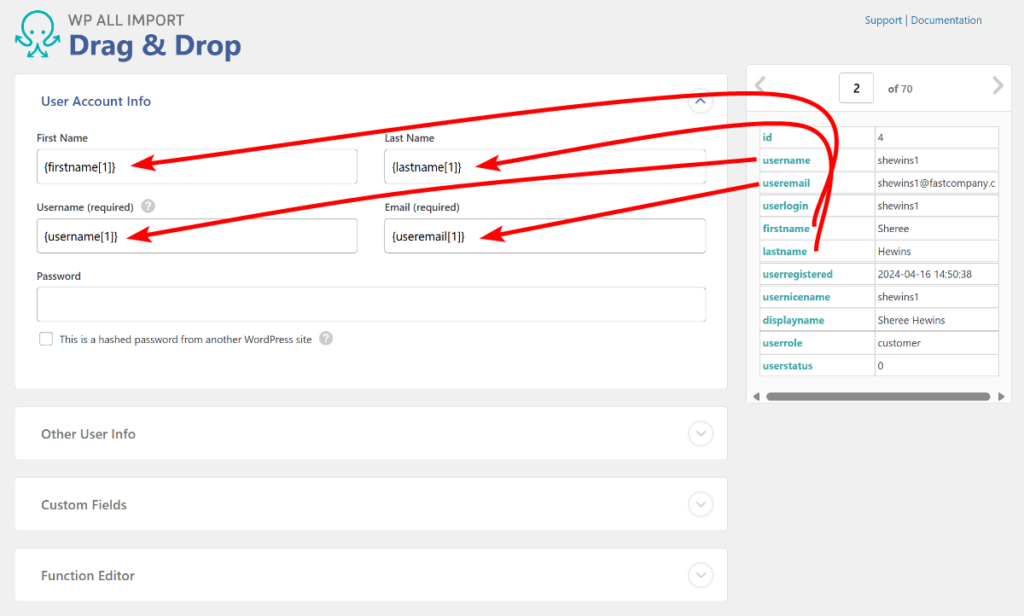
The WordPress fields are divided into different sections such as User Account Info, Other User Info, and Custom Fields. If your website has any other plugins installed, the page will show relevant sections for those plugins.
If you’re migrating from another WordPress website, WP All Import also lets you securely transfer passwords. If you’re just adding new users, you can leave the password fields empty to let users set their passwords through the welcome email.
Need to modify the data from the import file? No worries, the WP All Import plugin lets you apply built-in PHP functions to manipulate data on the fly. It also allows you to combine multiple user fields from the file and add static text to them.
For example, you can combine the User Title and Company Name fields in the Description box to add information about the user’s position and company.
After mapping all the fields, click the Continue to Step 4 button to move to the next step.
4. Apply Additional Import Settings to User Data
The Import Settings page includes multiple options to efficiently run the import. These settings include assigning a unique identifier, allowing WordPress to send a welcome email with a password reset link, automatic scheduling, and some speed optimization options.
The unique identifier allows WP All Import to differentiate between records so that no duplicates are created. It is also helpful when you run the same import file again with updated data.
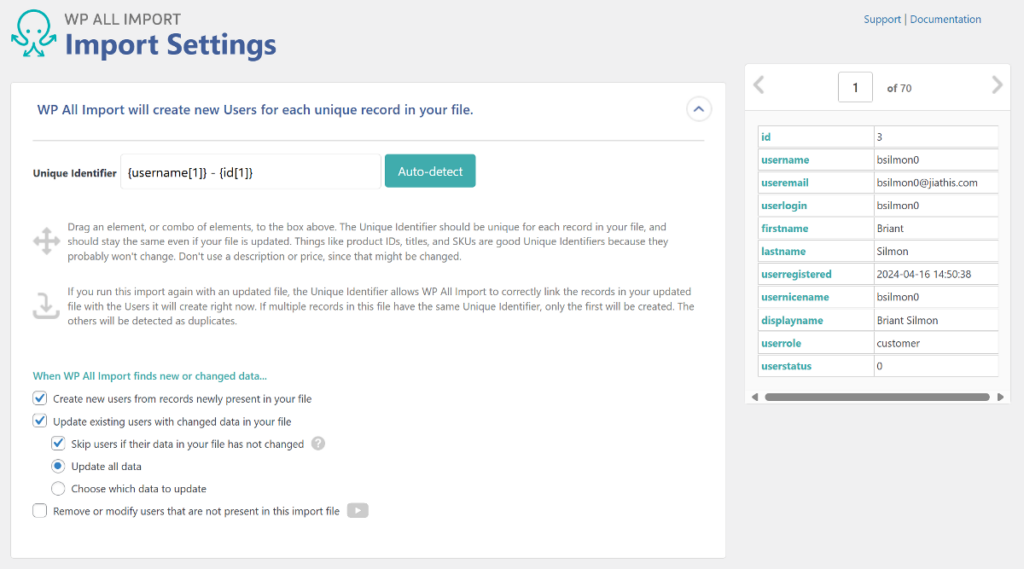
To set the identifier, click the Auto-detect button to let WP All Import automatically set the best identifier from your file.
The next option allows you to block sending welcome emails containing a password reset link to newly added users. If your file does not contain a password field, leave it unchecked to enable sending the email.

Since you’re importing users from a file stored on a cloud service, WP All Import allows you to schedule automatic imports of new data on a fixed schedule.
This means that you can add new user data to the file, which can then be imported to the website when the import runs again automatically.
To enable scheduling, expand the Scheduling Options panel and select between automatic and manual options. The Automatic option is a plug-and-play paid service that allows you to select the days of the week or month you want the import to run. You can also set the exact time and select the timezone for the import.
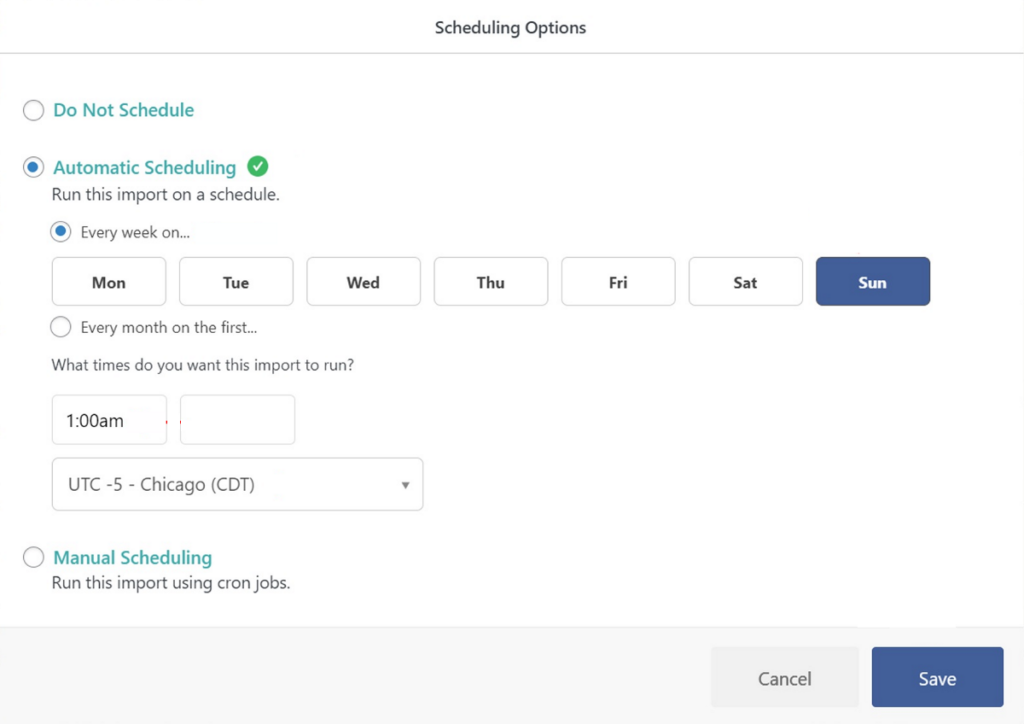
There’s also a manual option that works by setting up cron jobs on your server.
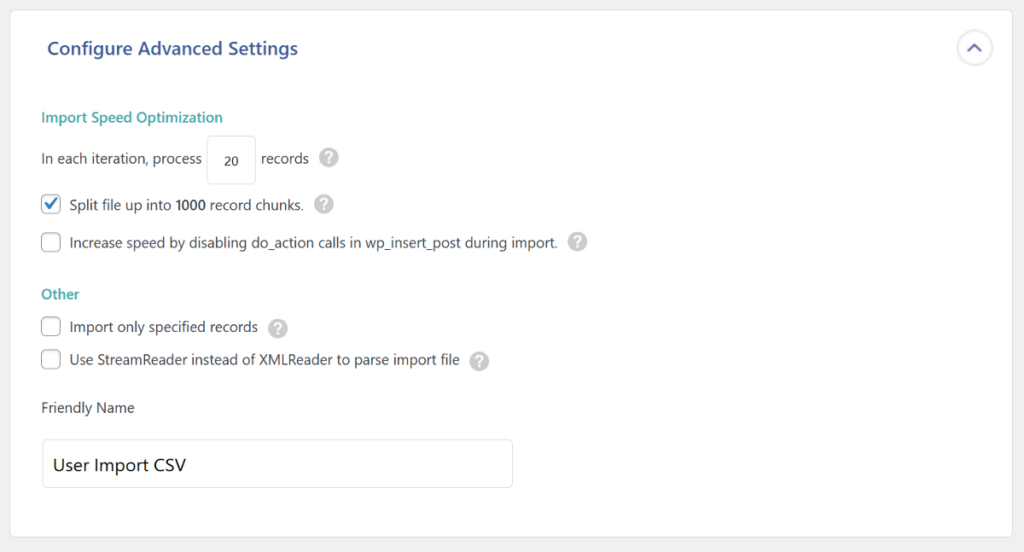
The last settings panel on the page is the Advanced Settings panel. This panel includes a few speed optimization settings and some additional settings. All of these are self-explanatory and can be enabled using simple checkboxes.
Once you’ve configured all the settings, click Continue to move to the next step.
5. Confirm and Run The User Data Import
This is the final step in the user bulk import process. Before running the import, WP All Import gives you a summary of all the steps you’ve performed so far.
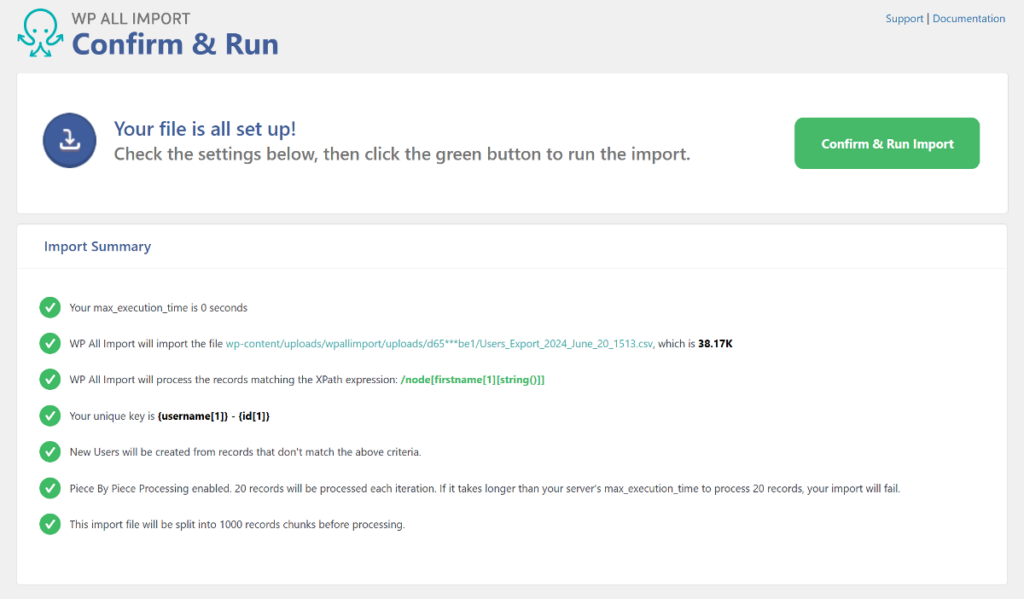
Go through the checklist and review all the steps. If anything needs correction, you can go back to the previous steps and make the necessary changes. If everything looks correct, click the Confirm & Run Import button to start the WordPress user bulk import process.
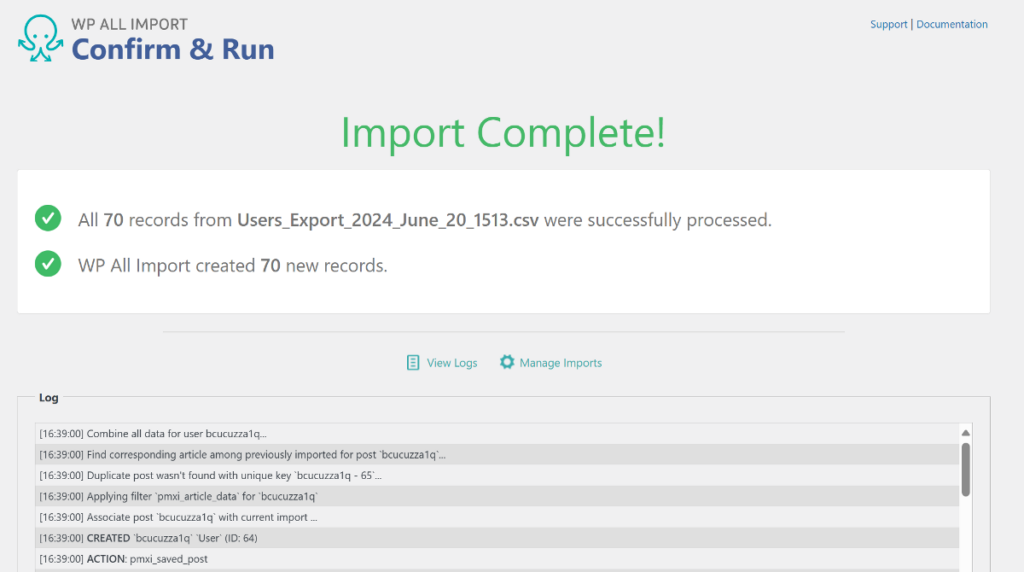
WP All Import will run the importer and add new users to your WordPress website. After the process is completed, it will show a confirmation along with a summary of how many users were added and if any users were updated.
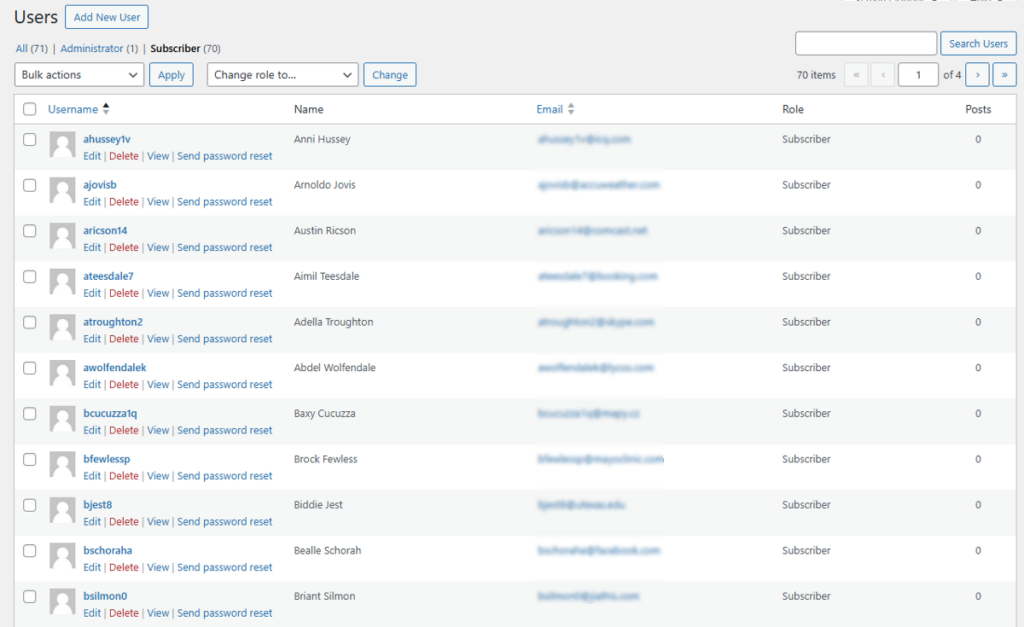
To verify, navigate to Users > All Users and search for the newly added users. You can also open individual user profiles to check the additional field values.
That’s it! This is how easy it is to bulk import WordPress users using the WP All Import plugin.
Bulk Import Users into WordPress – Wrap-Up
Bulk importing users into WordPress is an efficient and time-saving process when migrating from another platform or merging multiple sites.
WP All Import is the best WordPress importer plugin and makes the whole import process easier. thanks to its user-friendly drag and drop interface and import wizard. It also includes additional features such as:
- Multiple import file types, including CSV, Excel, and XML.
- Support for all user fields, including custom fields added by third-party plugin.
- Powerful filtering to select which users import.
- Regular, automated imports to keep your user database up-to-date.
Ready to simplify your data management and bulk import users? Download and install the WP All Import plugin today!
Bulk Import Users into WordPress – Frequently Asked Questions
How To Mass Upload Users to WordPress?
WP All Import makes it easy to mass upload users from CSV, Excel, or XML files. Here’s how:
- Navigate to All Import > New Import.
- Load your file and select Users as the import type.
- Use the Drag & Drop interface to map data from your file to WordPress user fields.
- Run the import.
How To Bulk Data Import in WordPress?
WP All Import supports bulk importing all WordPress data types. These include posts, pages, users, custom post types, listings as well as WooCommerce products, orders, customers, reviews, coupons, and more.
How Do I Import Users From One WordPress to Another?
To efficiently migrate users from one WordPress site to another, use a combination of the WP All Export and WP All Import plugins.
- Use the WP All Export plugin to export users from your source site.
- Import the exported file to your destination site using the WP All Import plugin.
How Do I Import Customers Into WordPress?
Importing customers into WordPress follows the same process as importing users. In the first step, simply choose WooCommerce Customers as the import post type instead of Users.
How Do I Download WordPress Users As CSV?
WP All Export allows you to export users in various formats, with CSV being the default. Follow the steps in this guide and click the CSV button in the final step to download your file.